
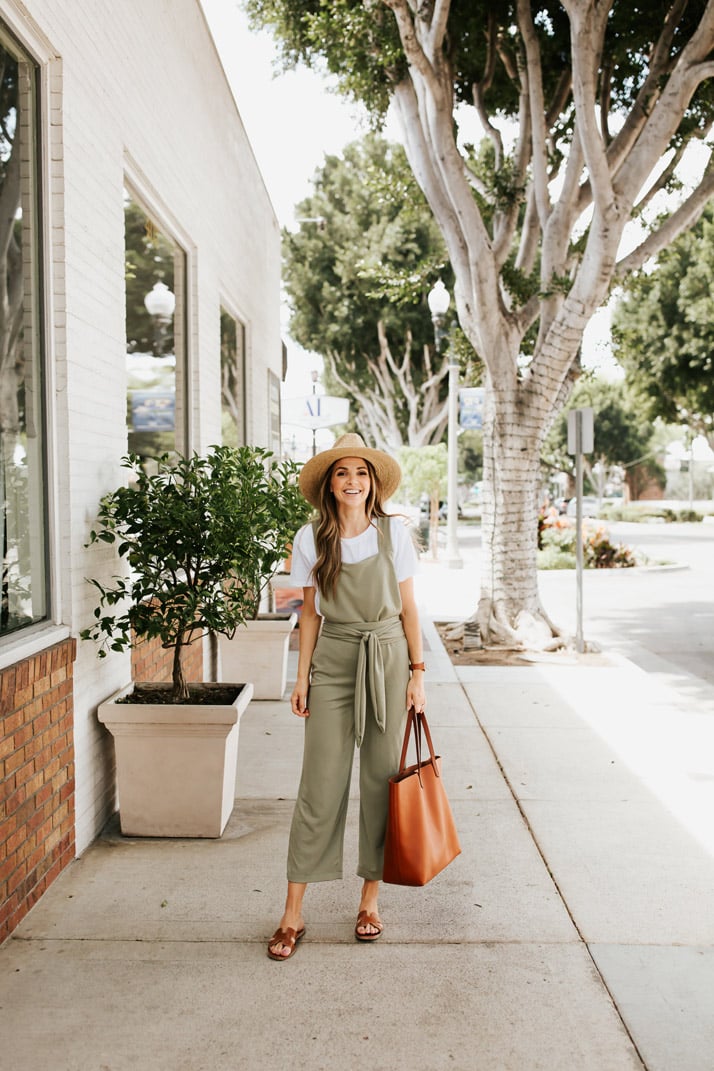
When you want to wear your pajamas all day but can’t? This jumpsuit is the perfect solution. Learn how to make it with this sewing tutorial.
Outfit Details:
Jumpsuit, made by me (Similar HERE + HERE)
White Boxy Tee (wearing size small — is a little sheer)
Similar Straw Hat
H Strap Sandals
Madewell Tote
Apple Watch Band
I’ve been wanting to make a jumpsuit and share a sewing tutorial for one for a LONG time. But I couldn’t ever find the right fabric, so I never did it.
Then I stopped in at Jo-Ann’s a couple weeks ago and they had a ton of new knits on the shelf for summer and I ended up bringing home three different gorgeous knits.
This light sage green knit is not a bit see-through, has a gorgeous drape, and is a soft and smooth as butter. My boys wanted to hug me all day in this outfit!


This is a quick and easy project, but I marked is as intermediate because it does take a little more time. It’s not just a couple of straight lines and you’re done.
Here’s what you’ll need:
2 yards of soft knit fabric (a linen blend would look really cute too!)
The fabric I used was from the Tropic Time line at Jo-Anns, and it’s a Micro Pique Knit. It also comes in Yellow!
Matching Thread

First you need to make your pattern pieces. Use a pair of pajama pants, or loose fitting pants to create your pattern for the bottom of the jumpsuit. If you don’t know how to make a pattern, use this tutorial HERE.
Here are the pieces you’ll need:
- LEGS (make sure the waist comes up high enough to hit right around your belly button. You’ll need to cut two of these pieces).
- BODICE (this is just a trapezoid, with the width of the bottom just an inch or two wider than the top. You’ll need two of these pieces).
- SHOULDER STRAPS (they should be 3″ wide. For the length, measure from 2″ below your collar bone, over your shoulder, and down your back to your waist)
- WAIST STRAPS (They should be about 4″ wide. For the length, make them as long or short as you want so they tie around your waist once or twice).
- WAISTBAND LINING (this should be 2-3″ wide, and the length should be 2″ shorter in circumference than the circumference of the waist opening on the jumpsuit pants). Make sure this is cut in the direction of the fabric so it stretches widthwise.
Step 1. Take your SHOULDER STRAP pieces and with right sides together, sew up three of the sides. Do this for both shoulder straps. Turn them right side out and press flat with an iron.
Step 2. Take your BODICE pieces and stack them with right sides of the fabric together. Place your two shoulder straps inside, with the one raw edge of the straps sticking out the top. Make sure the sides of the straps are only 1/2″ away from the edge on either side. Sew up the sides and across the top with a straight stitch and a 1/2″ seam allowance.
Step 3. Turn your bodice right side out and press flat. If you placed your straps correctly, your straps should come right to the edge of your bodice, as illustrated.
Step 4. Time for the pants. Take your first two pant leg pieces and, with right sides together, sew them up with a straight stitch on either side. Repeat for the second two pant leg pieces. Now you’ll have two separate pant legs.
Step 5. With right sides together, tuck one pant leg inside the other, matching up the seams at the crotch, and then pinning up each side of the center pant line. Sew with a straight stitch across this “U” shape.
Turn your pant legs right side out and press your seams flat.
Step 6. Now take your WAISTBAND LINING pieces and sew them together (with right sides of the fabric together) on the short sides. This should now be a big “O” shape, and be slightly smaller (a few inches) than the waistband opening of your jumpsuit. If you’re using a knit material that doesn’t fray, you don’t need to hem this. If you use a different material that will fray, hem it now.
Step 7. Repeat Step 1 for your WAISTBAND TIE pieces.
Step 8. Use a seam ripper and open up 5″ along the seam on the back of the pants of the jumpsuit. Slide in the end of your waistband ties (leaving 1″ of space above the ties), and then sew the seam back up with the waist ties now hanging out the back.
Step 9. This step is a little tricky, so go slowly. We’re now going to attach everything together. Take your PANTS and line up the BODICE and attached SHOULDER STRAPS along the waistband. Make sure the raw edges are all lined up. Cross the straps in the back and pin them to the PANTS waistband in your desired location. Now take your WAISTBAND LINING and stretch it carefully over the whole thing, pinning it in place.
Sew around the entire waistband with a straight stitch. Then turn everything right side out and press flat.
Step 10. Hem your pants to your desired length, and you’re done!

Shop this Post


I love this! Well done! What are your thoughts on doing this as a skirt (so it would be a dress with a flowy-ish bottom rather than pants?) i love the idea of a cross back Dress! would love to hear if you would think that would work and how you would go about it.
love that idea! JayLynn in the comment below gave some great tips – check those out!
I would think it would be really cute. Instead of cutting pant legs ur going to need a front & back of a skirt now. Depending on the fullness you want will determine how wide the fabric would need to be.if you are wanting something extra full I would consider 4 pieces instead of just 2, it’ll be easier to work with in gathering. You. Would see all skirt pieces together, press your seams open & then run a basting stich along the top of each skirt panel stopping & starting new for each panel. I use a double basting stich, it helps give a nice gather. Your now going to gather the top of the skirt to your desired waist width, still inserting the waist ties in the center back (remember throughout that you need that back center seam. You now have a skirt piece instead of the above described pants. Put everything together as stated & voila!
Hope this helps, good luck!
Thanks for sharing your expertise!!
I really liked the result of your work thanks to properly selected fabric, it looks very light and flowing.
So cute!! what a great little jumpsuit! I have fabric for a dress version of this and now I have to go out and get more fabric to make a pant fabric! LOL thanks for the inspiration! :o)
his summer dress is very beautiful, she is very confident when it comes to clothes. thank you for sharing
Thanks alot
Love this! WOULD BE FUN to add pockets to the pants/skirt!
CANnot get this to print..keeps trying to double Print the document with the main set of photos..I really like this pattern..How can I get it to print properly..
I like your article very much, thanks for sharing the good information we have read.
[…] overalls, Olive overalls, Olive Linen Fabric, Gingham […]
[…] Pictures – Atlantic Pacific Ocean, delicious pepa, Song of Style, SC, Merric’s Art […]