

*photos by Rad and Happy
model is Rad and Happy’s darling daughter
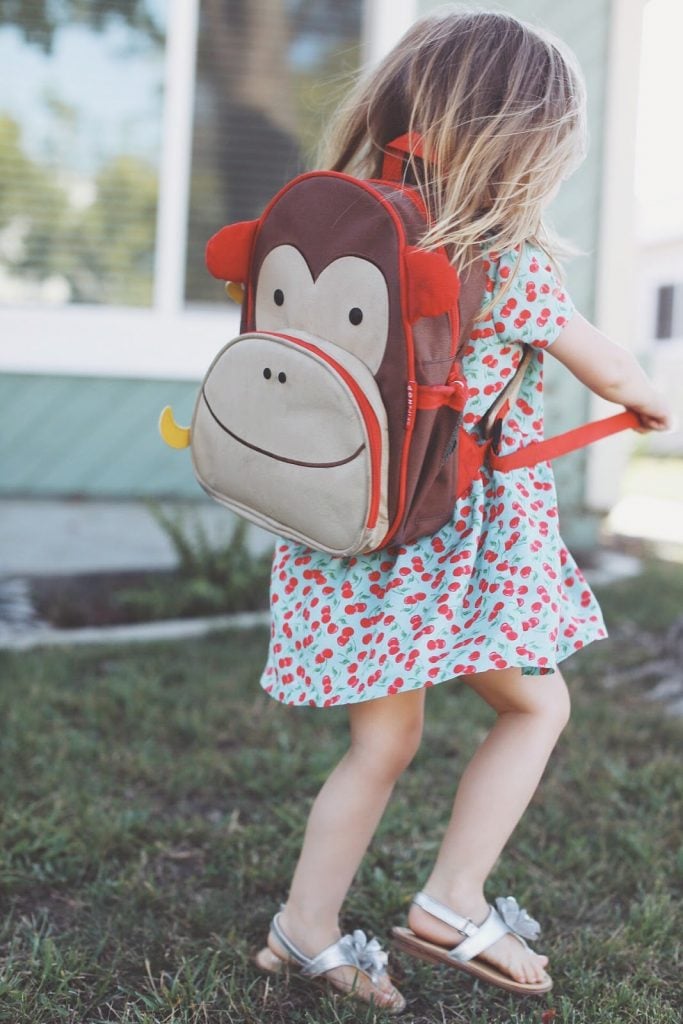
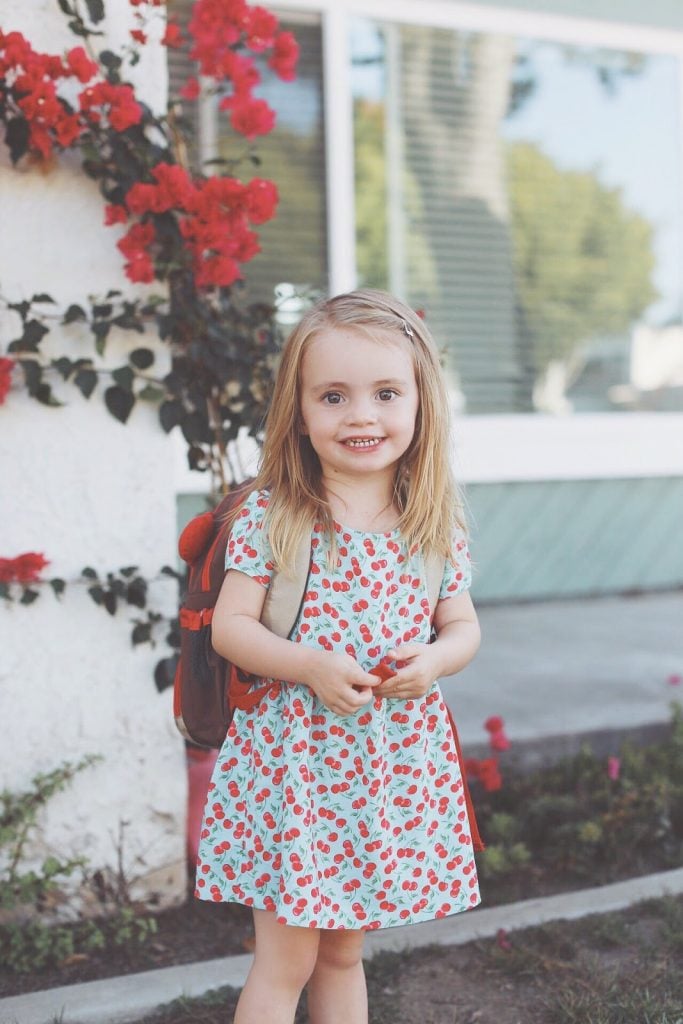
I almost never sew for kids, but every once in a while there’s a print too cute to pass up, like this cherry print I found at Jo-Ann’s a few weeks ago. Although now that I think about it, I probably should have made one in my size too, because what grown woman wouldn’t want to wear a cherry dress?
Back to school is right around the corner and this would make the perfect school dress for your daughters. And if you don’t know how to sew, don’t forget about The Modern Girl’s Guide to Sewing! It’s a complete guide to teach you how to sew. And with your kids going back to school, use that school time to learn to sew!
Click READ MORE to find the full tutorial below the jump!

Materials:
1/2 yard fabric (mine is a cotton poly blend, but you can use pretty much anything)
matching thread
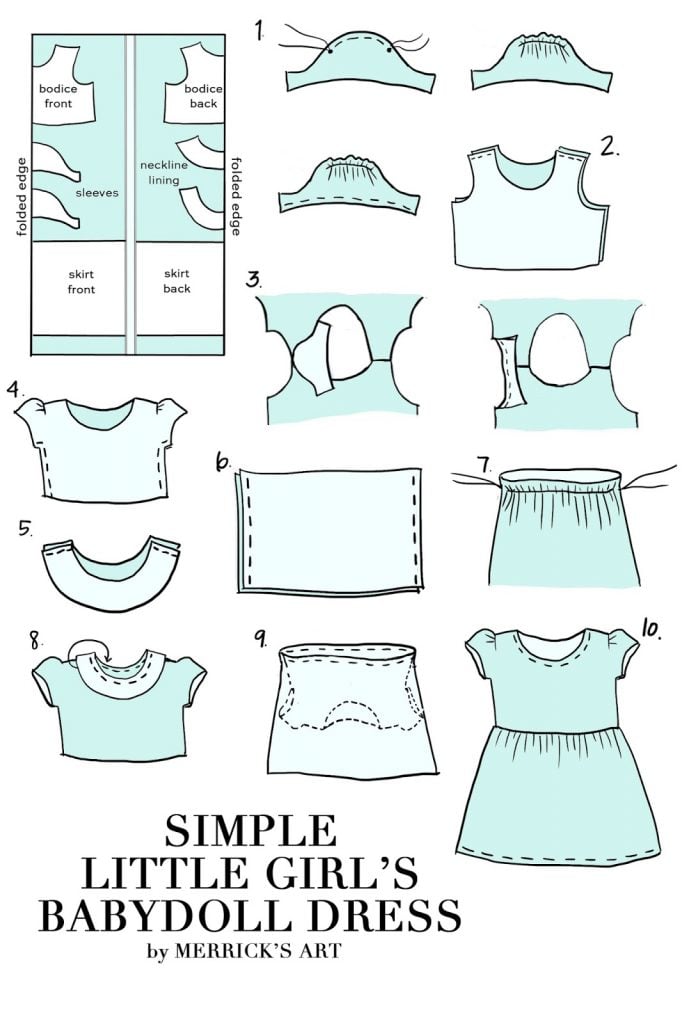
First, cut out your pattern pieces. Use an existing dress or shirt as a pattern. You’ll need a BODICE FRONT and BACK, NECKLINE LINING to match the necklines of the bodice front and back, 2 SLEEVES, and a SKIRT FRONT and BACK (the total circumference of these two skirt pieces when they’re attached should be about 2 times the size of your child’s waist)
Step 1. Take your sleeve piece and sew basting stitches around the curve. Gather your fabric. Repeat for the second sleeve. Now hem the sleeves to your desired length. Set aside.
Step 2. Now take your bodice pieces and sew them at the shoulder seams with right sides together.
Step 3. Now it’s time to attach the sleeves. Line up the top of the sleeve with the bodice shoulder seam (as shown) with right sides together. Pin in place.
Continue pinning the sleeve to the bodice, and then sew along the arm hole with a straight stitch. Repeat for the second sleeve.
Step 4. With right sides together, sew up the sides of the bodice, matching up the armpit seams.
Step 5. With right sides together, sew the two neckline lining pieces together. Set aside.
Step 6. With right sides together, sew your skirt pieces together on the sides.
Step 7. Do a basting stitch all the way around the waistline, and gather the fabric until the circumference matches the bodice circumference.
Step 8. With right sides together, pin the neckline lining to the bodice neckline, matching up the side seams. Sew all the way around the neckline, then tuck the lining inside and press in place.
Step 9. With right sides together, tuck the bodice inside the skirt, matching up the side seams. Sew all the way around the waistband, attaching the bodice and skirt together.
Step 10. Turn the dress right side out and press the waistband. Then topstitch the neckline to keep the lining in place, and hem the bottom of the skirt to your desired length.
And you’re done! Now go make 10 of them for your little girl for back to school (or make it in your size ;)!
See all of my kid sewing tutorials right here!


Is this the Gertie Line fabric?
Love it!
Sarah
http://www.thepolkfolk.blogspot.com
love it!
This is such a cute dress for a little girl!
http://www.teacupsandtulips.com/