
 |
| dress: made by me (tees from forever 21) // sunglasses: c/o aupie // bag: c/o oasap // shoes: target (similar & similar) // bracelet: c/o hello fab // watch: michael kors |
- 3 t-shirts (mine are forever 21 and I used one medium for the top, and two larges for the bottom, although I ended up taking it in so much to make the dress fitted that I should have probably gone with a small and 2 mediums)
- matching thread
- 1/8″ wide elastic
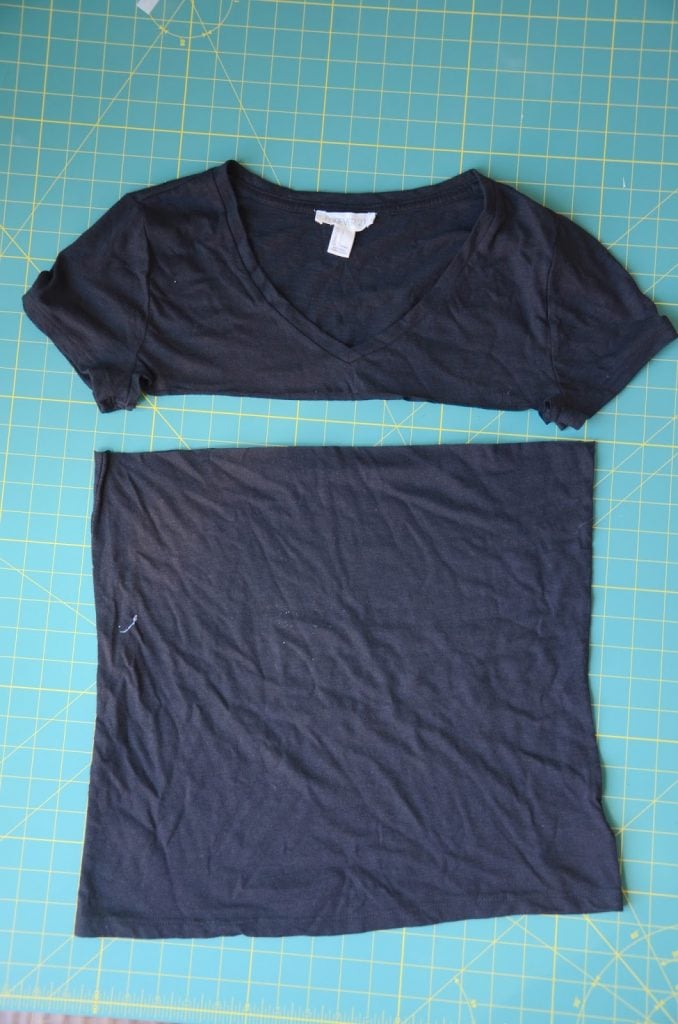
Step 2. Take the top tee (the one that isn’t cut up), and just slice off the bottom hem. Then with right sides together, sew the middle and top tee together, as seen below.
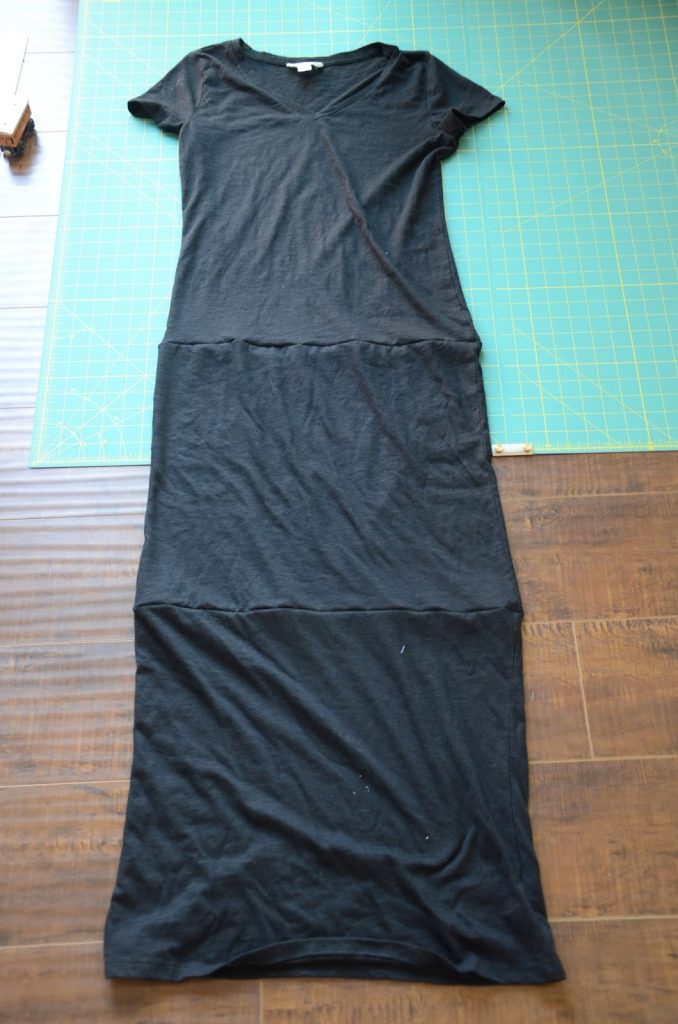
Step 3. Cut off the bottom hem of the middle shirt and then attach it to the bottom shirt, with right sides together. Your dress should now look like this:
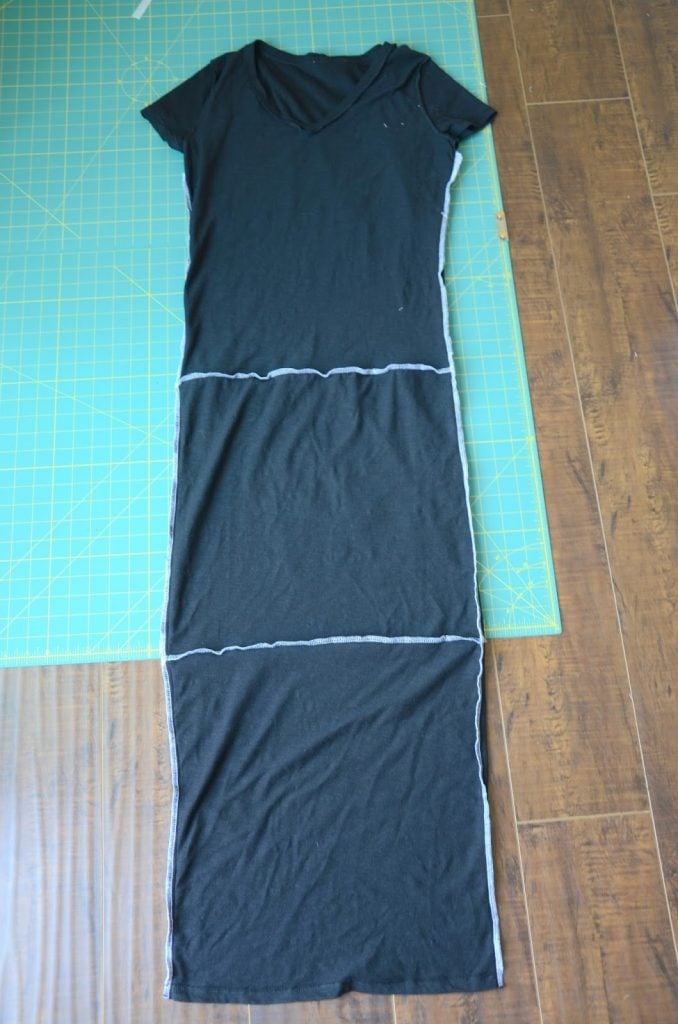
Step 4 (optional). Take in the sides of your dress so it is very fitted. The ruching is very forgiving, so don’t worry too much about it being super tight, and if it’s too loose the ruching will sag. Finish your raw edges with a serged or zigzagged seam if desired. The inside of your dress should now look like this (my dress here came to about 2 inches above my ankle):
Step 5. Measure from your natural waist down to your knee and cut a piece of 1/8″ wide elastic in that length. Pin one end of the elastic to the natural waist area on the side seam allowance of your dress, as seen below, and then pin the other end of the elastic to the hem of your dress. Sew a straight stitch down the elastic, attaching it to the seam allowance, pulling evenly as you sew. Repeat on the other side of the dress.

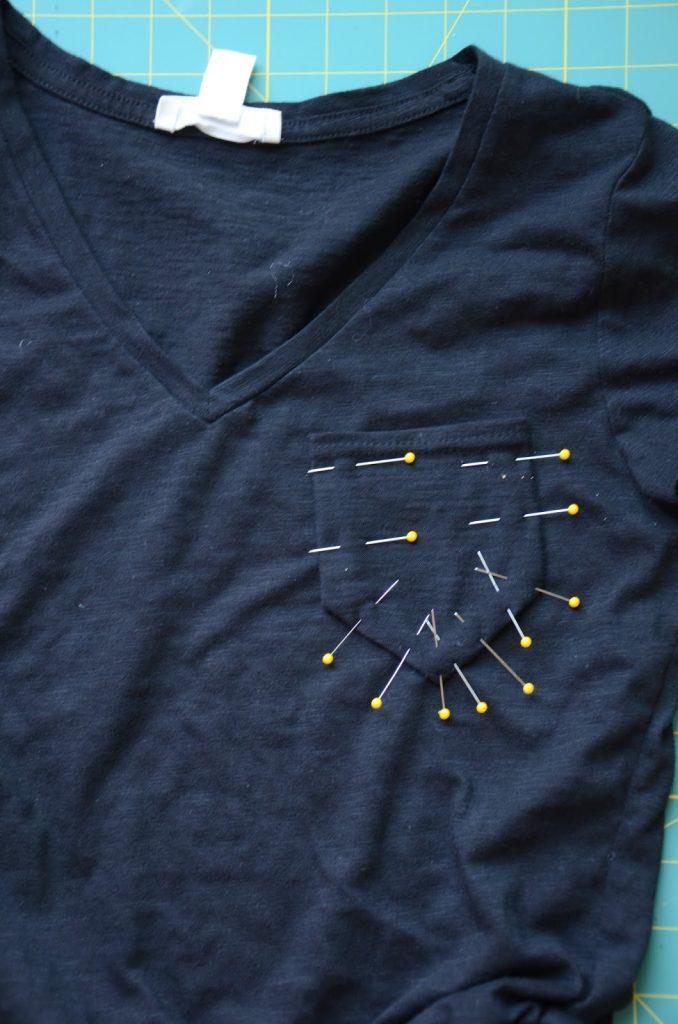
Step 6 (optional). If you want a pocket, cut a piece of fabric in this shape below. Fold the top edge down and sew a straight seam across.
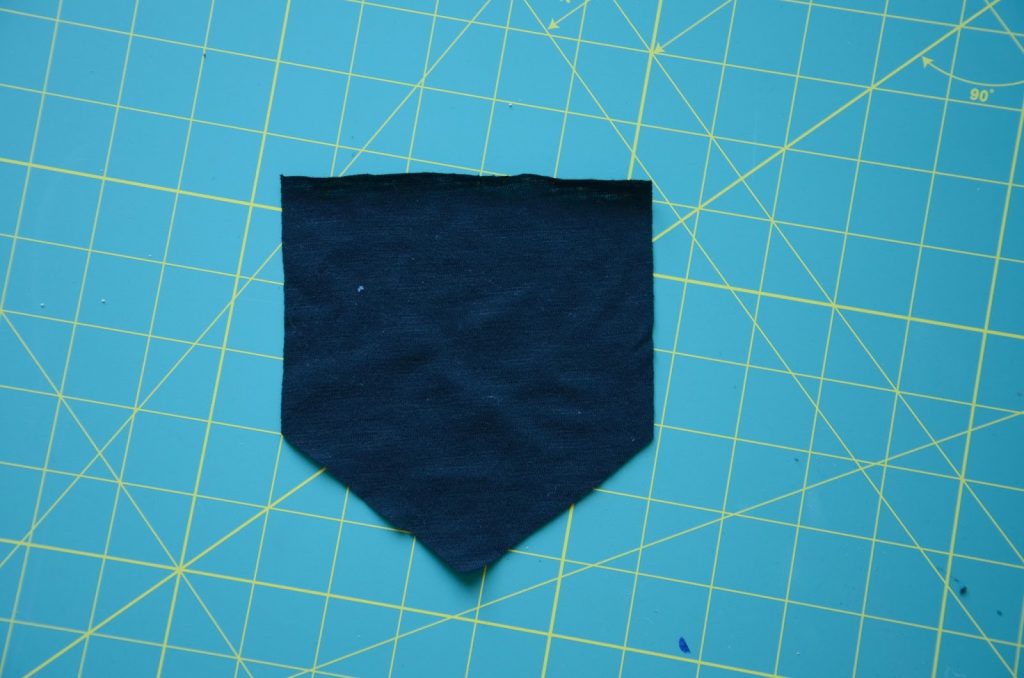
Fold the remaining sides in and press into place, then pin to your shirt and sew around the three sides.


So, so cute! I think even I may be able to do this! I am a little confused still about how the elastic creates the ruching. You said pin it at the natural waist, and then do you pull it tight and pin it at the bottom or just let it fall naturally? Sorry, I am not a seamstress at all!! =)
You pin it at the waist, and then stretch as you sew. Then, when you get to the bottom, the elastic will snap back to its original length, which creates the ruching. Hope that helps!
Thanks for responding to Jenni's comment, Kylie! Hope that clarified a bit, Jenni!
Thanks ladies! =)
This is a five minute video that shows how to do the ruching by pulling on the elastic as you sew it. The video shows three different things. You want to watch the third one at about the 3:55 mark of the video. Hope it helps you understand the ruching part now. 🙂 http://www.youtube.com/watch?v=3lk36V9uVdA&sns=em
Sorry the link won't let you click on it. Trying again. http://youtu.be/3lk36V9uVdA
Wow! Amazing! I think i can actually do this lol. Just worried if i can manage the ruching part and make it as even as you did.
Question, did you buy 3 shirts in all same sizes or did you size up on the bottom 2?
Good question! I sized up for the bottom two, although I ended up taking in so much of it so it was fitted enough that I probably didn't need to.
I love this Mer! It turned out fantastic!
I love this Mer! It turned out fantastic!
you are so darn crafty! so awesome
Omg, I hate you (and by hate I mean adore) for making a dress out of cheap-o Forever 21 shirts. Ones I OWN! I need to learn to sew.
YES YOU DO!
Love this tutorial!
Wow- this turned out amazing! I really want one…
This has jumped to the top of my to do list. You are so creative and it turned out great!
This is such a fantastic idea ! It looks awesome ~!
Madeline | Its a Mads Mads World
Definitely want to try this! Great idea!
It looks fantastic! Victoria Beckham style!
Such a compliment! Thanks!
I also thought Victoria Beckham when I saw your picture. B-E-A-U-TIFUL! I am new to your blog and found you via a pin. I'm truly novice when it comes to sewing but you show how to do it with simple easy steps. I <3 you forever!
I llllooove this! making it this weekend for sure!
so creative and classic!
xoxo
Erin at Hart of Style
Ridiculously cute. I have a t-shirt dress pattern that I like, but I'm going to add extra length next time and try adding the ruching.
Thanks, Jill! I should try making my own t-shirt next time too — great idea!
You are awesome! And inspiring me to want to sew… I might just try this – thanks 🙂
Thanks for posting this! I found your maternity dress post a couple of days ago and loved the dress but wasn't sure how you made it… Perfect timing for this post – and a super cute dress!
So in step 4 when you fitted your dress how far down your dress did you go? Or did you just make the bodice fitted?
I went all the way down to the bottom hem…I just pulled it up as if it was ruched to check the fit and that worked pretty well!
Oh my gosh! That is so cute!!!
So creative, I love this dress! 🙂
xoxo Renee
This is genius!! I can't wait to pop out my baby in 6 weeks and make/wear this. It'll be perfect for the 4th trimester.
This is a great tutorial…i'm going 't-shirt hunting' this weekend! 🙂
That is amazing and I totally wish I could sew.
Love this with the ruching! Plus it looks so easy. Putting this in the to do list for post baby 🙂
My mind is blow. Well done! I need to try this!
Cute cute cute!!!
Such a great post!!! I am a novice sewer and I made this in 1 hour. I got soooo many compliments on it.
this is amazing! ive been saving some old f21 tees, now I know what to do with them!!
carisa
Bunnies and Pearls
Go Our Site and buy product
ladies dresses
Roxcii has been on the verge of the latest fashion.It is new generation latest fashion for girls and woman’s. Go our site and see what kind of dress you need. Enjoy…………..
Great love your blog and tutorial
Alicia
http://trendandcut.com/
Hello to everyone, I did this with a minor defect ! I need your help! I found $1 tshirt at walmart, so I got 3, one medium and 2 large. The large ones were too big so I had to take them in, so I fixed that. My problem is at the bottom where the ruching ends, I don't like how it pulls the sides higher . What did I do wrong, how to fix it ! I am new and for my first time ever sawing I think I did an incredible job! lol
I fixed it ! I realized that the elastic was too short! Hey I give myself a 9 now lol! I just want to thank you Merrick for for such a great tutorial and easy for me as a beginner. May God continue to Bless your hands to create more beautiful things! Good job on your blog!
Hi Merrick, I love your blog and the inspiration it provides a novice blogger like me!
I had some trouble with the ruching last night – I cut the elastic waist to knee and then sewed it waist to hem of the last t-shirt – but it only ruched up to mid-calf length rather than to knee length. Any ideas? I realised I used a fairly small stich lengh so I am wondering whether than stretched the elastic too much – would I be better with a longer stich?
Thanks again for the great tutorials!
Kimberley
The size of the stitching shouldn't matter…try cutting your elastic a bit shorter, and then pulling it tighter as you sew. That will make it bounce back more when you're done with that seam.
Good luck!
Cute cute! I used to have trouble with elastics; I pulled as I stitched and the elastic just stayed stretched out…! I think the problem was too thin elastic at first, but now I just zigzag every time I have to do elastic and I don't have any more problems. Necessity is the mother of invention, am I right??!
Made this for my daughter to wear for Christmas. She paired it up with some leggings and boots. She loved it. Thank you for such an easy tutorial.
Thank you for inspiring me to continue sewing! Love your blog! Wonderful designs!!
Just made this dress in about 30mins, I'm almost 34 wks preggers and I am loving this dress, I am going to make myself a bunch more, and make my 3 yr old daughter a couple (how adorable), mine will wait till after baby is here so they will fit without the belly…hehe. thank you for such an awesome easy tutorial
I had to come back to this tutorial to thank you… I went around our local flea markets and found pretty t-shirts I liked, and followed your tutorial making 3 contrasting bands. I did have trouble getting a stitch in the circumference of the dress that would stretch with my movements and am still looking for a solution for that… (hint hint – straight stitch and zig-zag both tend to crack, what's that about?) but it's a dress that has got me SO many positive comments every time I wear it. Mostly my husband and he doesn't like me leaving the house in it, haha. I don't have a perfect body but somehow this dress is so flattering it makes me feel a million dollars (thank you ruched-up belly area). Bottom line? I'm now working on a second version of the same thing. You may be my new favourite person. How shallow is that?
I’ve been following your blog for a while now, but I am a beginner at sewing (got my first machine this month!). I followed this tutorial and couldn’t be happier! Took me MUCH longer than the 30 min some commenters are saying, but still looks perfect! Thank you so much, Merrick! Can’t wait to try some of your other tutorials!
Do you flatten out the side seam, with it in the middle and fabric on either side, to sew on the elastic, or do you sew the elastic to the side seam with the dress to the side and the seam on the outside edge? I hope that question makes sense. It would be so much easier if I could show you! 🙂 THANK YOU!
It makes sense! Option #2 is what you want to do — the dress on one side, and the seam allowance on the outside edge. Good luck!
Hi – Love this idea – I wonder if you would tell me what you think of alternating sections of the elastic. for example have the elastic sewn in 3-4 inch pieces on the sides alternating with un-ruched, so that the corresponding side is without elastic so that there are layers of left ruching & right plain and vice versa for the next 3-4 inches with some overlap???? Just a thought!!
[…] Click Here For Shirt To Dress Refashion Tutorial […]
[…] We all have a lot of tees around the house and some that simply never get worn. Why not try her three shirts to a dress refashion tutorial here. […]
[…] my own pattern and refashions. Some more successful than others. Today I thought I would try one of Merricks refashion tutorials three t shirts to a dress off her […]