
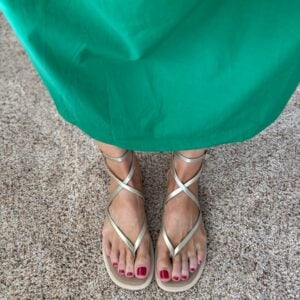
Outfit Details:
White Tee, Similar Plaid Skirt, Pearl Sandals, Straw Tote
The button front midi skirt is everywhere this spring and summer, and naturally I’ve jumped right on that wagon. Midi skirts are an amazing momiform option because they’re lightweight and comfy, while keeping you covered when you’re running after toddlers or getting down on the floor to play.
But whether you’re a mom or not, this type of skirt is great for so many summer activities, or can even be dressed up with wedges and a blouse for church!


I bought this plaid fabric in the LA Fabric District a few years ago but didn’t have any specific plans for it. So it got buried in my storage bins until I recently unearthed it and instantly knew I had to make a button front skirt. I found a few similar plaid fabrics here, here, here, and here.
They’re so easy to make — just two pattern pieces and a few seams. The hardest part is just the time it takes to do the buttons!
Today I’m sharing the easy instructions to make one of these skirts. I don’t provide printable patterns for any of my tutorials, but you can use this video to make your own patterns and then follow the instructions for the skirt below.
Here’s what you’ll need:
2 yards lightweight fabric (mine is rayon, but you can use a lightweight denim, a medium weight knit, a nice cotton…lots of options! I shared a few similar plaids above)
Matching thread
1 1/2″ wide elastic
7-8 Buttons
Buttonhole foot for your sewing machine

First cut your pieces. You’ll need one big piece for your SKIRT, and then 3 pieces for your WAISTBAND. Your skirt piece dimensions should be:
Width: waist measurement x 1.5 (if you want the skirt to be more full, multiply it by 2 instead)
Length: As long as you’d like it. Mine was roughly 28″ before I hemmed it.
Step 1. First you’ll need your three WAISTBAND pieces and your elastic. Cut the elastic about 3 inches shorter than the length of your WAISTBAND BACK piece. Stretch the elastic and pin it on either side of the WAISTBAND BACK piece.
Step 2. Then sew the WAISTBAND FRONT pieces and sew them together on the side seams on each side, simultaneously attaching the elastic.
Step 3. Fold the entire waistband in half, with the elastic inside.
Step 4. Sew a basting stitch seam along the top of your SKIRT piece and then gather the skirt evenly until the width matches up to the width of your waistband.
Step 5. With right sides together, sew the SKIRT to the WAISTBAND. Then iron your waistband up so it lays flat.
Step 6. Take the front panels of the skirt and fold them each twice over. You’ll need to measure these folds to make sure they’ll line up in front once the skirt is around you and the buttons are sewn in place. Make your folds larger or smaller if needed until they line up perfectly.
Then sew in place with a straight stitch. My fabric (rayon) is very lightweight, so I added a strip of interfacing inside the folded edge to give it some structure and stability.
Step 7. Mark the placement of your buttons and button holes, and then use your button hole foot to insert button holes on one side of the skirt.
Step 8. Using a needle and thread, sew your buttons in place on the other side of the skirt, and you’re done!

Shop this Post


Amazing. I wish I knew how to sew beyond just fixing a button.
That skirt is gorgeous! Although I was secretly hoping that you were going to make a shirt dress out of that fabric 😉
Paige
http://thehappyflammily.com
You’re queen of DIYs!! Loved all of your tutorials and this button down midi skirt is just so impressive!
http://lartoffashion.com
Gorgeous skirt! Just a quick question: what dimensions should the waistband pieces be? I don’t think it’s mentioned anywhere in the tutorial…
Poppy
http://poppyallanorma.com
I’ve been waitung for this tutotrial since I saw you working on it on IG. I have the same question about the waisband. Length?
I’m excited to try this out. The fabric I’m going to use is a little see through. If you were going to add a lining would you gather the lining also like the main piece of fabric?
You don’t give specifics on how long to cut the back waistband. I can see from the image that the two front pieces are each half of the total skirt width,
Great post, Merrick! I’d love to have some more information on the length for the waistband pieces. Can’t wait to hear from you!
THanks for the tutorial, Merrick! At what point should you hem the skirt – before or after adding the buttons?
Do you have a favorite qhite shirt that isn’t see-through? I notice all your white shirts looks but have a hard time finding shirts that are light for good drape but not paper thin…Or do you have tricks for when you wear them?
COuld probably be it’s own whole blog post!
Hello! Like others im wondering the measurements for the waistband? Pls kindly tell. Thank yOu
Okay…. so i’m pretty new to sewing still, so correct me if im wRong, but i think i figured Out the WaisT bands. The back waist band is half your waIst mEasuremEnt. And the front two bands are a fourth of your waist measuRment + 6inches. (4 inches are for the “twice fold over”Leaving a two inch fold and the other 2 inches are for the two inch overlap for the buttoNs.) For example, if you had a 32 inch waist measurement. You back band would be 16 inches and your front Bands woUld be 14 inches (8 inches + 4 inches for the fold + 2 inches for the button over lap). Does this sEem correct or not? Let me know if im wrong because, like i said, im a still a beginnEr.
Hi Jessy, isn’t sewing fun. Basically you have it right but don’t FORGET TO ADD 7/8 ON THE ENDS OF THE BACK PIECE AND ONE END OF THE 2 FRONT PIECES. THAT IS YOUR SEAM ALLOWANCE. THENTIN THE FRONT YOU HAVE TO ADD ENOUGH TO FOLD WITH THE REST OF YOUR FOLD. PERSONALLY I WOULD NOT MAKE A WAIST BAND USING 3 PIECES. I WOULD ONLY HAVE ONE PIECE. THAT IS JUST MY PERSONAL OPINION. I ABSOLUTELY LOVE THIS SKIRT AND CAN’T WAIT TO MAKE IT. I DON’T KNOW THE LADIES NAME WITH ALL FREE SEWING BUT, I LOVE THE THINGS SHE CAN DO WITH AN OLD BUNCH OF SCRAPS AND IT LOOKS LIKE A MILLION DOLLARS.
[…] Full tutorial here. […]
I kinda think it’s common sense, you have 3 pieces for your wrist. When I make a shirt I only have 1 piece for the waist band but, this one has 3 pieces so measure yourself from side to across your back. Not to tight cause you want to be able to move and breathe, then add 7/8 of an inch on each side for your 7/8 seam allowances. I can’t remember now if she Told us how wide to cut it for the back but, for me I don’t like a lot of gatgeringcross my behind. I’m really small but to me I feel like I have a huge behind.
There is no waistband measurement, so I had to eyeball it, but it’s clear now that the waist x 1.5 does not account for the button placket. I’m not sure all the instructions were properly accounted for in this. I will have to pivot and make something else out of these cuttings.