


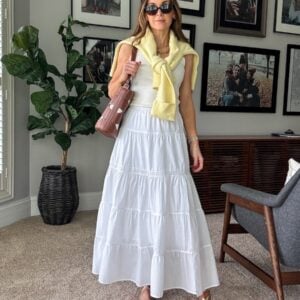
OUTFITS DETAILS: swing dress made by me (tutorial below, fabric designed by me and c/o spoonflower, available for sale here!) | blush heels | handbag | watch | bracelet one and two
*photos by jana laurene
I shared these photos on Monday for my birthday and today I’m excited to share the tutorial! And don’t forget — the fabric is available for purchase over on Spoonflower if you want to pick some up.
Click READ MORE to find the full tutorial!


Materials needed:
2 1/2 yards fabric (I bought mine in silky faille)
matching thread

Step 1. Using similar pieces of clothing as a pattern, cut two DRESS pieces, two 3/4 SLEEVES, two CUFFS (measure loosely around your arm an use this for your width measurement, and make it 3 inches wide), and two strips for the NECKLINE LINING (one matching the front of the neckline, and one matching the back of the neckline. They should be about 2″ long).
Step 2. With right sides together, sew the DRESS up at the shoulders.
Step 3. With right sides together, pin the top of the SLEEVE and the top of the shoulder together, as shown. Continue down the rest of the arm hole, pinning the sleeve in place.
Step 2. With right sides together, sew the DRESS up at the shoulders.
Step 3. With right sides together, pin the top of the SLEEVE and the top of the shoulder together, as shown. Continue down the rest of the arm hole, pinning the sleeve in place.
Step 4. Sew the sleeve to the arm hole with a 1/2″ seam allowance. Repeat steps 3 and 4 for the other sleeve.
Step 5. With right sides together, sew from the elbow to the knee with a 1/2″ seam allowance. Make sure your seams match up at the armpit!
Step 6. Sew the two neckline pieces together at the shoulder seams to form an “O,” and then attach the NECKLINE LINING to the BODICE neckline with a straight stitch (there’s a more detailed illustration and instruction for this step over here). Then tuck the lining inside the neckline, press flat, and stitch around the neckline with a wide stitch to hold the lining underneath.
Step 7. Now let’s move to the CUFF. Fold it in half (right sides together) so the short ends are lined up and then sew across the short side with a straight stitch. Once the CUFF has been sewn into a loop, fold it in half, as shown. Repeat for the second CUFF.
Step 8. Now it’s time to attach the cuff to the sleeve. Stretch the cuff wide, as shown. Now slide the stretched CUFF over the end of the sleeve, with the folded side facing up, and the raw edge facing down. Pin in place.
Step 8. Now it’s time to attach the cuff to the sleeve. Stretch the cuff wide, as shown. Now slide the stretched CUFF over the end of the sleeve, with the folded side facing up, and the raw edge facing down. Pin in place.
Step 9. Sew around the end of the sleeve with a straight stitch, stretching in between pins so the fabrics all lay flat together. Repeat for the second sleeve.
Now lay the cuff down flat and it should bounce back to be smaller, making your sleeve gather and become perfectly puffed.
Step 10. Using a wide stitch, top stitch around the neckline to tack the lining in place. Then hem the dress to your desired length.
And that’s it. Now we can be ice cream dress twinsies! Happy Friday!


This dress is so pretty! I really, really need to get a new sewing machine so I can start attempting your creations!
Paige
http://thehappyflammily.com
This is def. one of the best DIYs ever!! Super cute and feminine dress!
http://lartoffashion.com
That dress is so cute and I love the fabric that you designed! I’ll definitely be giving this project a try this summer. Thanks for sharing!
-Helen
http://www.sweethelengrace.com
This is gorgeous! The color is so rich and deep–I love it.
I wish I knew how to sew!! This is so pretty!
I love your dress!
xx
Mademoiselle Coconath
http://mllecoconath.com
great and very sweet this dress
This is SEW cute (see what I did there?)! I love it, but I’m suuuuucch a terrible seamstress. This makes me want to bust out my sewing machine, though. Love!
Chandra
More Modern Modesty
http://www.momomod.com
Your dress is very beautiful. I like it
How fun- I hope you had a great birthday
Hi! I just have found your blog and I love it!
I want to sew this dress but I can’t find the measurements to do the pattern. Are they at any part?
So, how can I design my own dress?
Thank you!
I only provide tutorials — not patterns. But I created this video to show how to make patterns from your own clothing: https://www.youtube.com/watch?v=vgh7EHTnQPk Hope that helps! xx