For the last few weeks, I’ve been wracking my brain to come up with a fun and not-terrribly-complicated Halloween costume for the boys. Two years ago I made a BYU football uniform costume for Peanut, and then last year we recycled that costume and added a little football costume for newborn Buck.
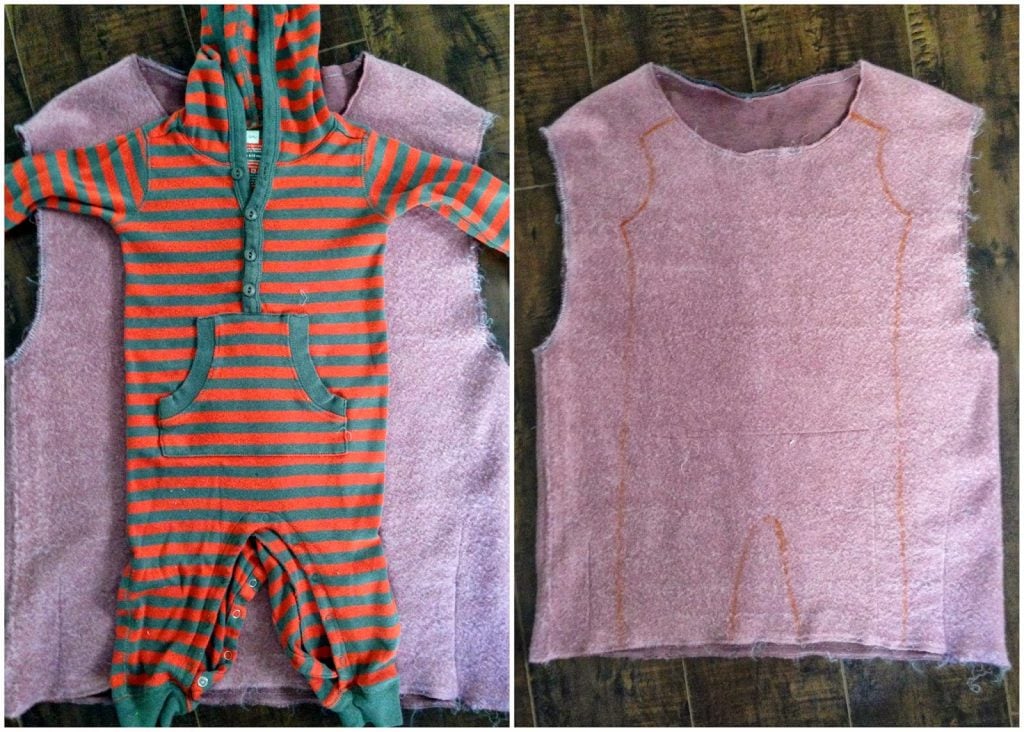
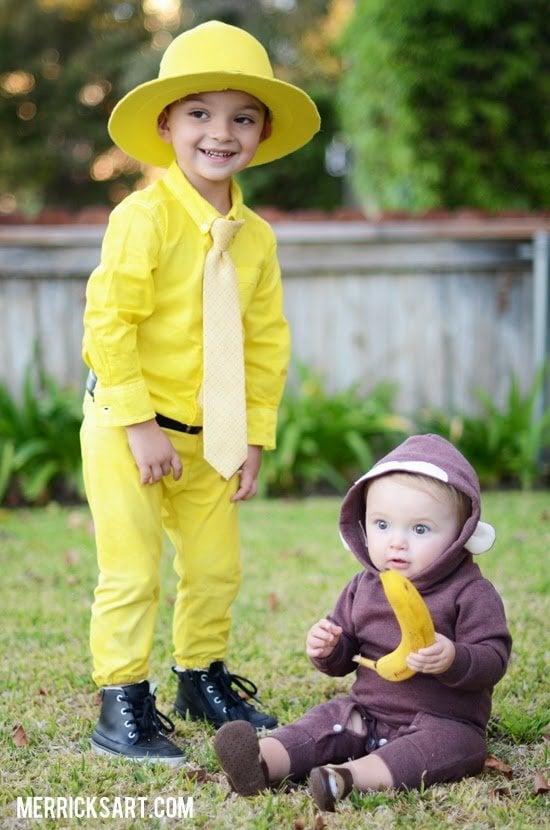
I figured I couldn’t squeeze another year out of that football costume, so it was time to come up with something new. Peanut has recently become a huge Curious George fan, so one day as we were reading one of the books, the idea sparked — Buck as Curious George, and Peanut as The Man in the Yellow Hat!
I shared my super easy Man in the Yellow Hat costume tutorial on Babble, so now I want share my tutorial for the Curios George costume.
I’m pretty sure I could have gone to any costume store and purchased a monkey costume, but I wanted to try a new refashion and I wanted something homemade. Since I wanted the costume to have a hood (so it could have monkey ears), I decided to try refashioning it from an adult sized hoodie.
Now that I’ve done this, and I absolutely LOVE how it turned out, I plan to take other cheap adult hoodies and make them into little jumpsuits for my baby. They’re so comfy and warm for winter!
This tutorial has a lot of steps, but none of them are difficult. I just try to explain each step as clearly as possible. Forge through!

- men’s hoodie (mine is from walmart, size small)
- RIT dye (I used cocoa brown)
- light peach felt
- snaps (I used these no-sew ones from Jo-Ann‘s)
- seam ripper


Step 2. Using a seam ripper, remove the arms, hood, and ribbing.

Step 3. Using a hoodie that fits your child, trim down the men’s hood, leaving a 1/2″ seam allowance. If you don’t have an existing baby hoodie, just trim down the men’s hood several inches, using the original shape as a guide.


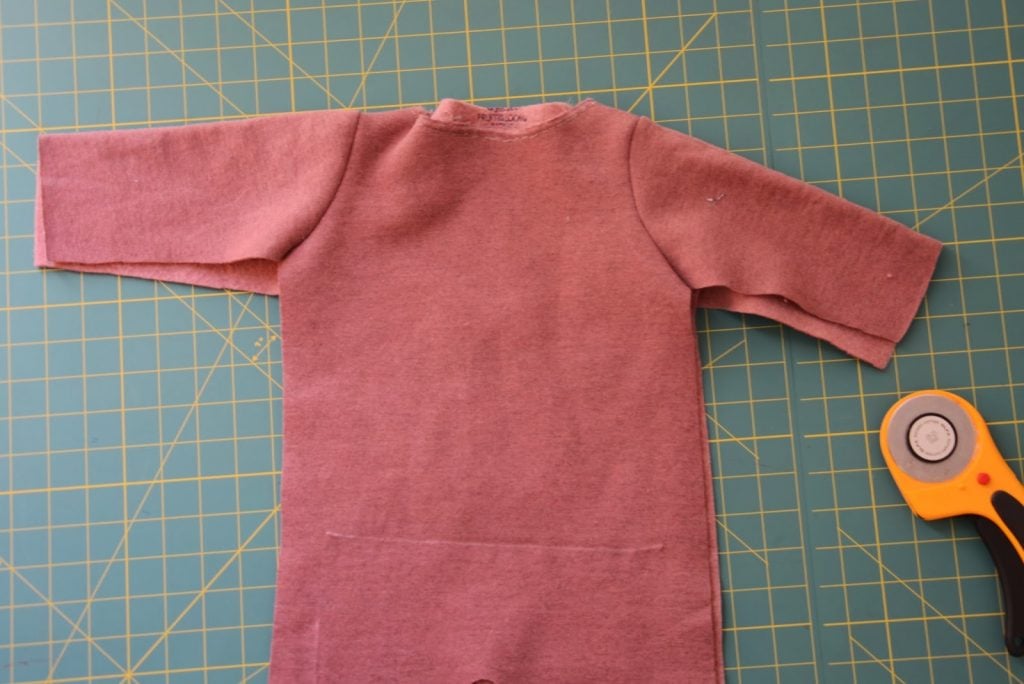
Step 5. With right sides together, pin the shoulder seams of the jumpsuit and sew with a straight seam and a 1/2″ seam allowance. Trim your seam allowances and zigzag or serge the raw edge.

Step 6. Take your sleeve and, with right sides together, attach it to the arm hole (which is just a half circle opening right now). Sew with a straight stitch and 1/2 inch seam allowance, then trim your seam allowance and zigzag or serge the raw edge.
Repeat for the second sleeve.

Now your jumpsuit should look like this:
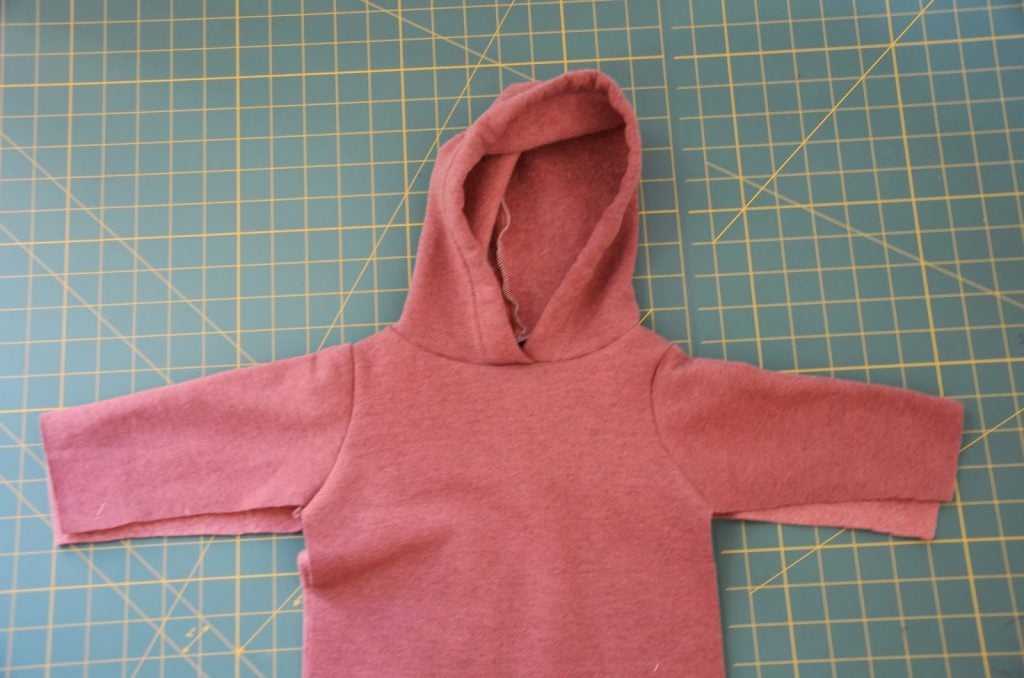
Step 7. With right sides together, sew your hood up from the top to the back of the neck, trim your seam allowance, and zigzag or serge the raw edge.

Step 8. With right sides together, pin the hood to neck of the jumpsuit. Overlap the pointed ends of the hood at the front, as seen below.
You will have some fabric ease, so distribute it between pins evenly. Sew around the neckline with a straight stitch, stretching the fabric in between pins to avoid fabric tucks. Trim your seam allowance and then zigzag or serge your raw edge.

Now your jumpsuit should look like this:
Step 9. Now let’s do the ribbing at the wrist. Measure your baby’s wrist and then trim down the ribbing length to your desired size.
Lining up the raw edges of the ribbing with the raw edge of the sleeve, pin the ribbing to the sleeve. Since the sleeve will be wider than the ribbing, pin on both ends and then pull the ribbing as you sew. The sleeve should now look like the photo on the right.
Repeat for the second sleeve.

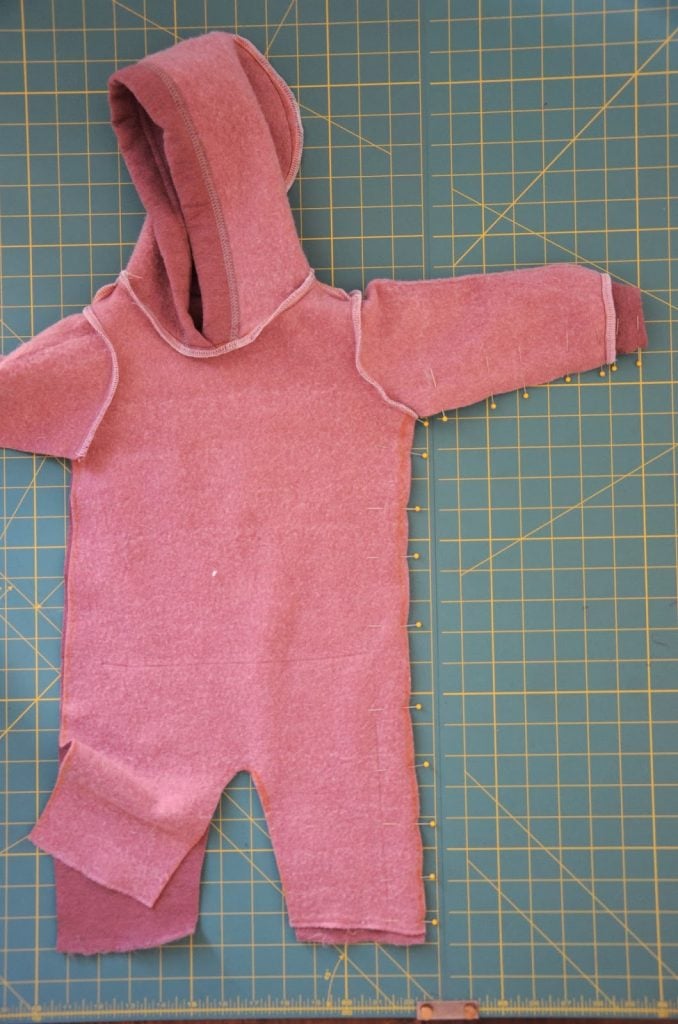


Next, serge the other side of the U-shape and hem, as seen below. This U-shape is the section that will go in between your baby’s legs and allow maximum movement.

Step 13. Now it’s time for the ankle ribbing. The original ribbing should be doubled up, so unfold it so it’s a single layer (like the piece I’m holding in the photo below). Trim and sew it down to your desired width so it fits snuggly on your baby’s ankles, and then fold it in back in half so one side is a folded edge and one side is two raw edges (as seen two photos below).


Step 14. With right sides together, pin the ribbing to the ankle opening of the jumpsuit. Cross the front and back pieces of the jumpsuit, makings sure the front piece is on top of the back piece (as seen below on the right). The leg opening should be bigger than the ribbing, so stretch the ribbing in between pins as you sew.
Repeat on the second leg. They should now look like the photo on the right:


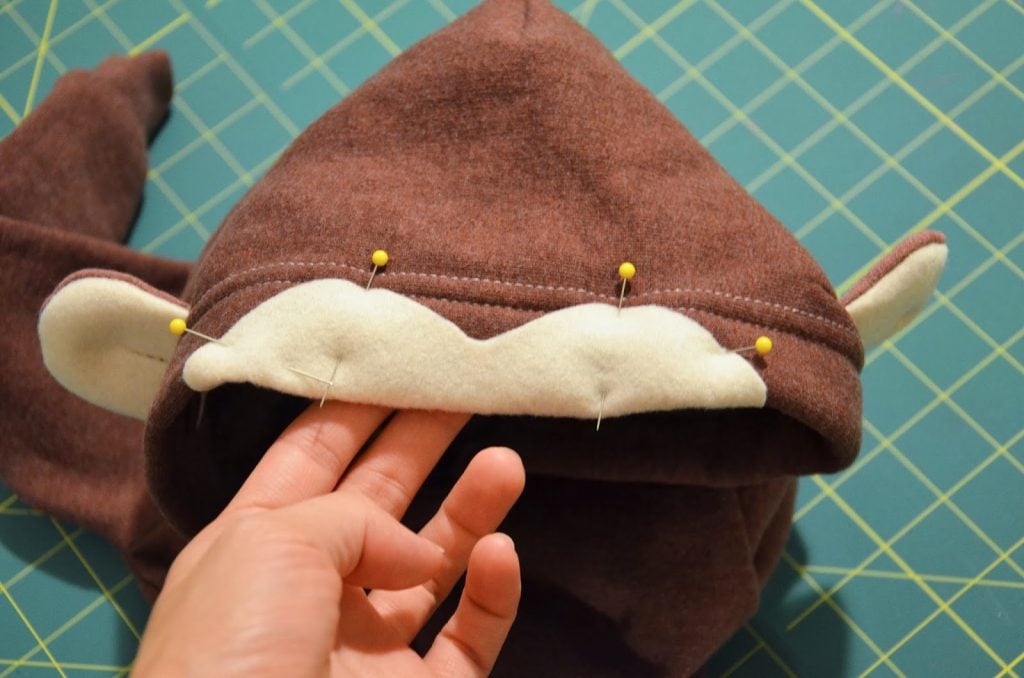
Step 5. Cut a widow’s peak shape out of the peach felt. Set aside.
Cut a 2 1/2″ wide slit on either side of the jumpsuit hood.

Insert the ear into the slit, pin in place, and sew the slit closed as seen below with the dotted line.

Step 6. Pin your widows peak felt in place and then sew around the entire felt piece with a wide straight stitch. Try to get your stitching as close to the edge of the felt as possible.
*I originally folded the felt underneath and sewed it in place, but the double thick felt on top of the thick hood made the hood really stiff. Instead, trim off the felt at the edge of the hood (so it doesn’t fold under) and sew in place.


This is adorable.
You have got to be joking – SO freaking cute!!!
Now that is one cute monkey! Good job Merrick!
O my! Your boys are adorbs! You did a great job on the refashion.
What a sweet monkey! Great outfit.
I'm dying from your kids cuteness! omg
SO CUTE! That monkey and that man in the yellow hat better be trick or treating my house so I can see this in person! They are adorable.
Do you have any tips for hemming on a curve? every time I try it ends up crooked …. thanks!
Just use the little markings on the sewing machine so you stay the same distance from the edge of your fabric. Hope that helps!
Darling! And such a great, comprehensive, easy to understand, tutorial!
Oh my word! Too cute!
what a great idea!! LOVE it!
You are so creative and talented! 🙂
This is so great!
I’m so glad I found this! Awesome tutorial!
i’m so excited about this! i am about to make a george costume for my 4 year old and i need some ear help! ha!
p.s. i was thinking i would do the same, big kid mwtyh and little kid george and my 4 year old decided HE wants to be george so we are doing the opposite! ah! 🙂
Wow, I never would have thought that this could be done. It looks very interesting. The costume for the child came out really very funny. Will there be a continuation with other things?