Yesterday I showed you how embellish a jersey pencil skirt, and today I’ll show you how to make said pencil skirt.
Materials:
- pencil skirt that fits you
- 3/4 yard knit/jersey material (I got mine at JoAnn’s) — more or less depending on your size
- 3/4 yard knit/jersey lining (optional)
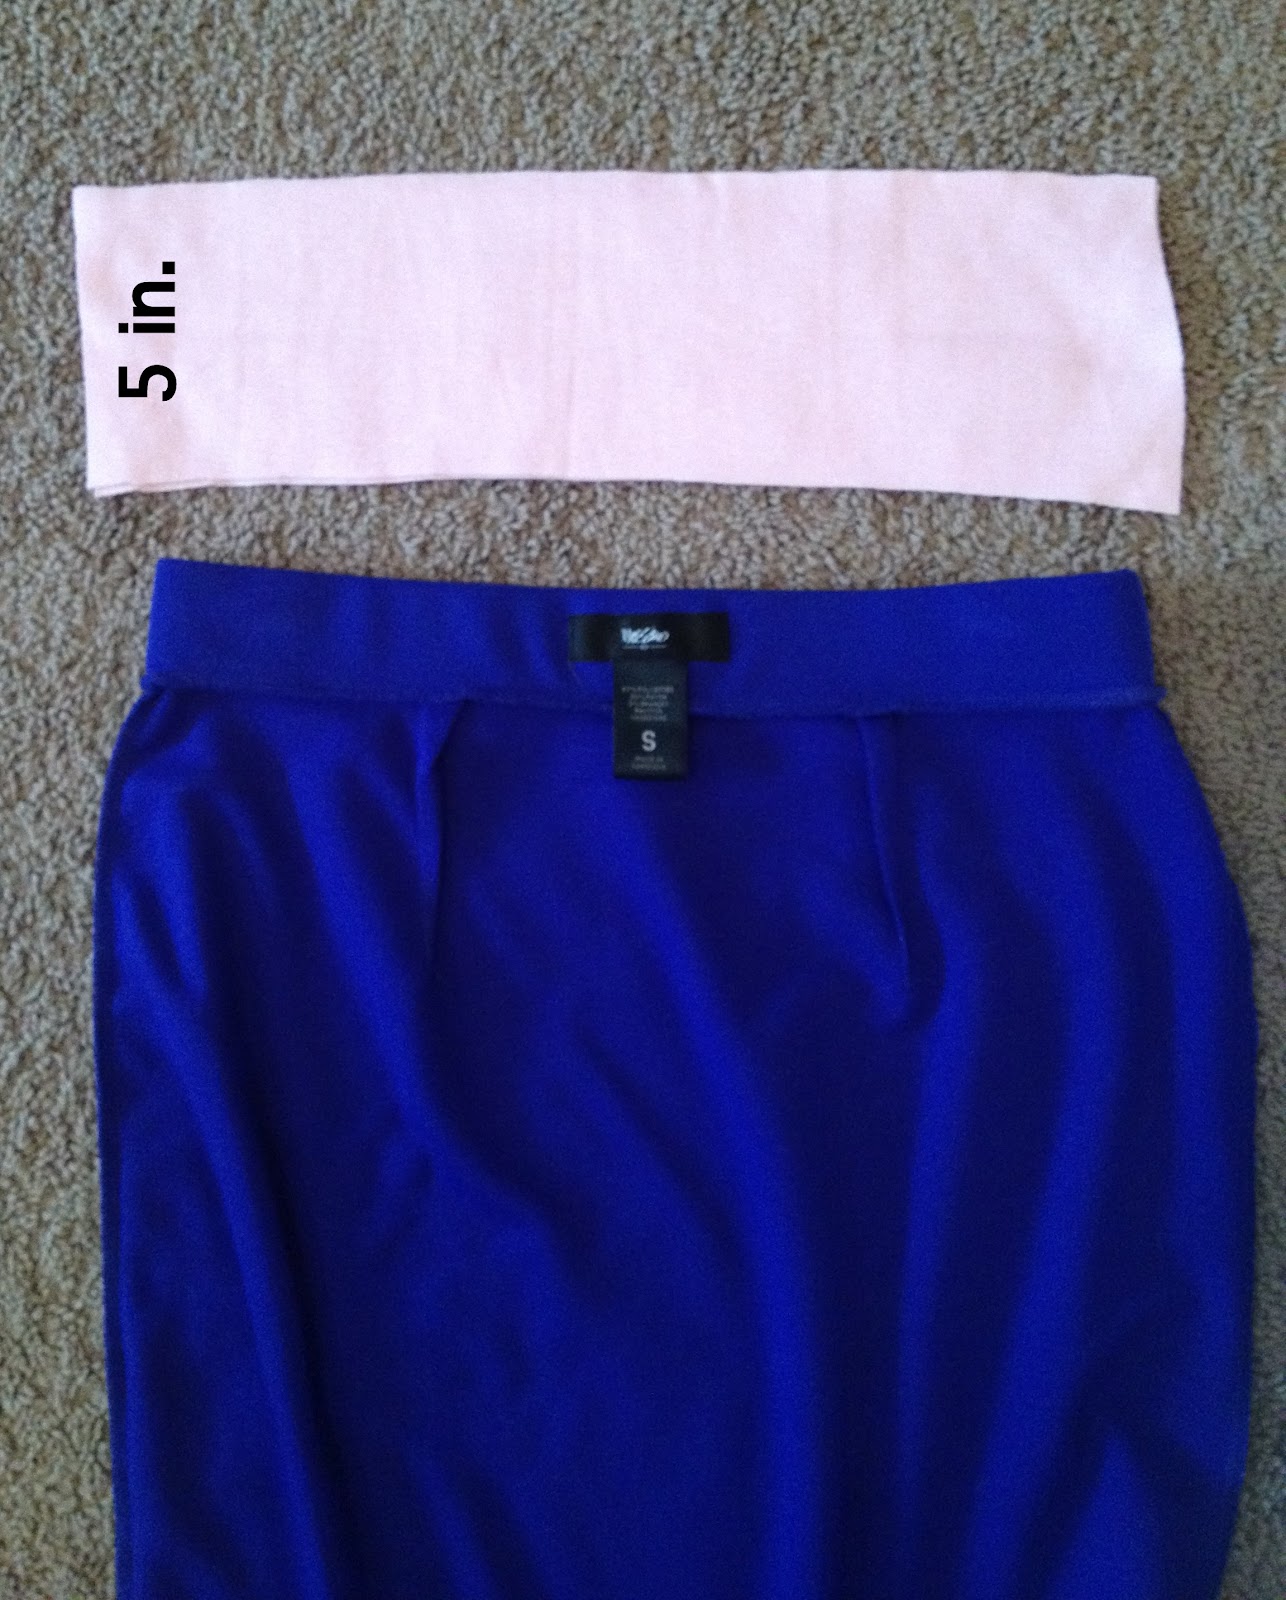
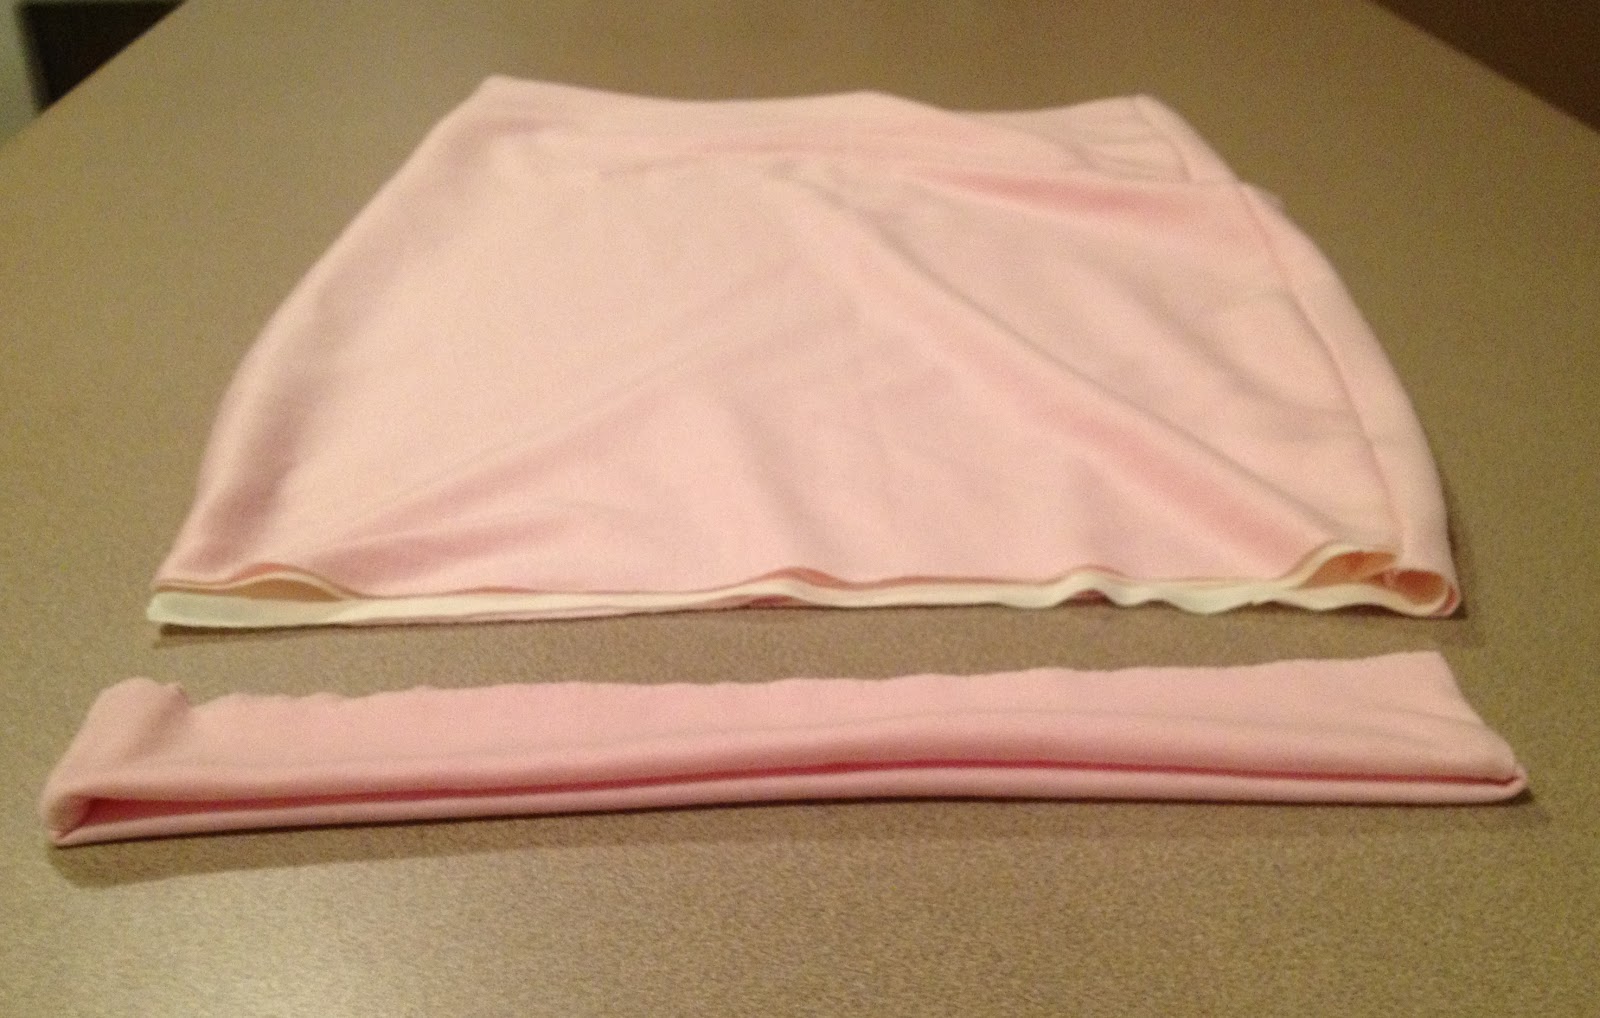
Step 1. Lay your pencil skirt on your folded-in-half knit material with the stretch of the fabric going horizontally (as seen below). Cut around the skirt, adding a 1/2″ seam allowance. As you cut around the hips, add an extra 1/2″ to your seam allowance to account for your darts. Since your fabric is folded in half, it will cut two of the same exact shape. If you want to line your skirt, cut 4, or cut two more out of your lining material.

Fold your waistband down to finish your cut.

Step 2. Now cut your waistband (making sure the stretch of the fabric runs horizontally again). Make it roughly 5 inches tall, and as wide as your pencil skirt waistband with an extra 1/2″ seam allowance on either side (as seen below). Make sure you cut two (2) of these.
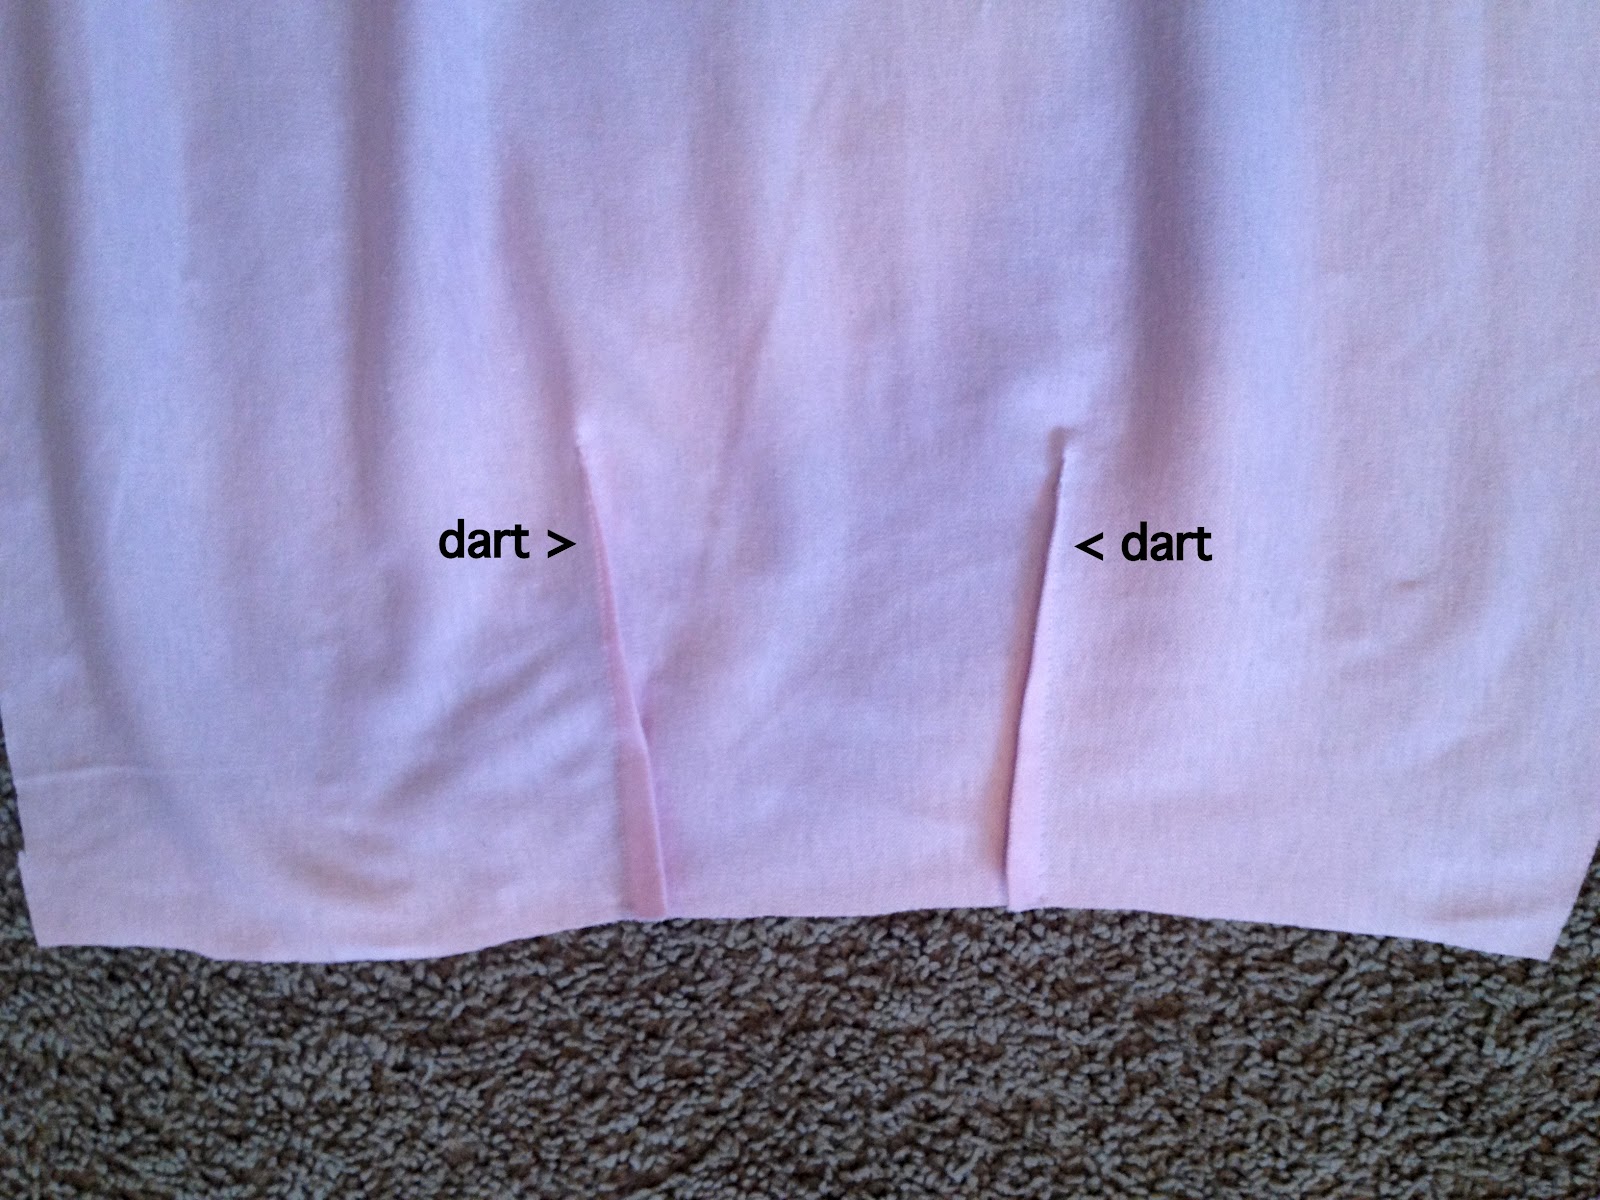
Step 3. On the back piece of your skirt, along the top, sew two darts about 4 inches long each . If you don’t know how to sew darts, refer to this easy video tutorial.
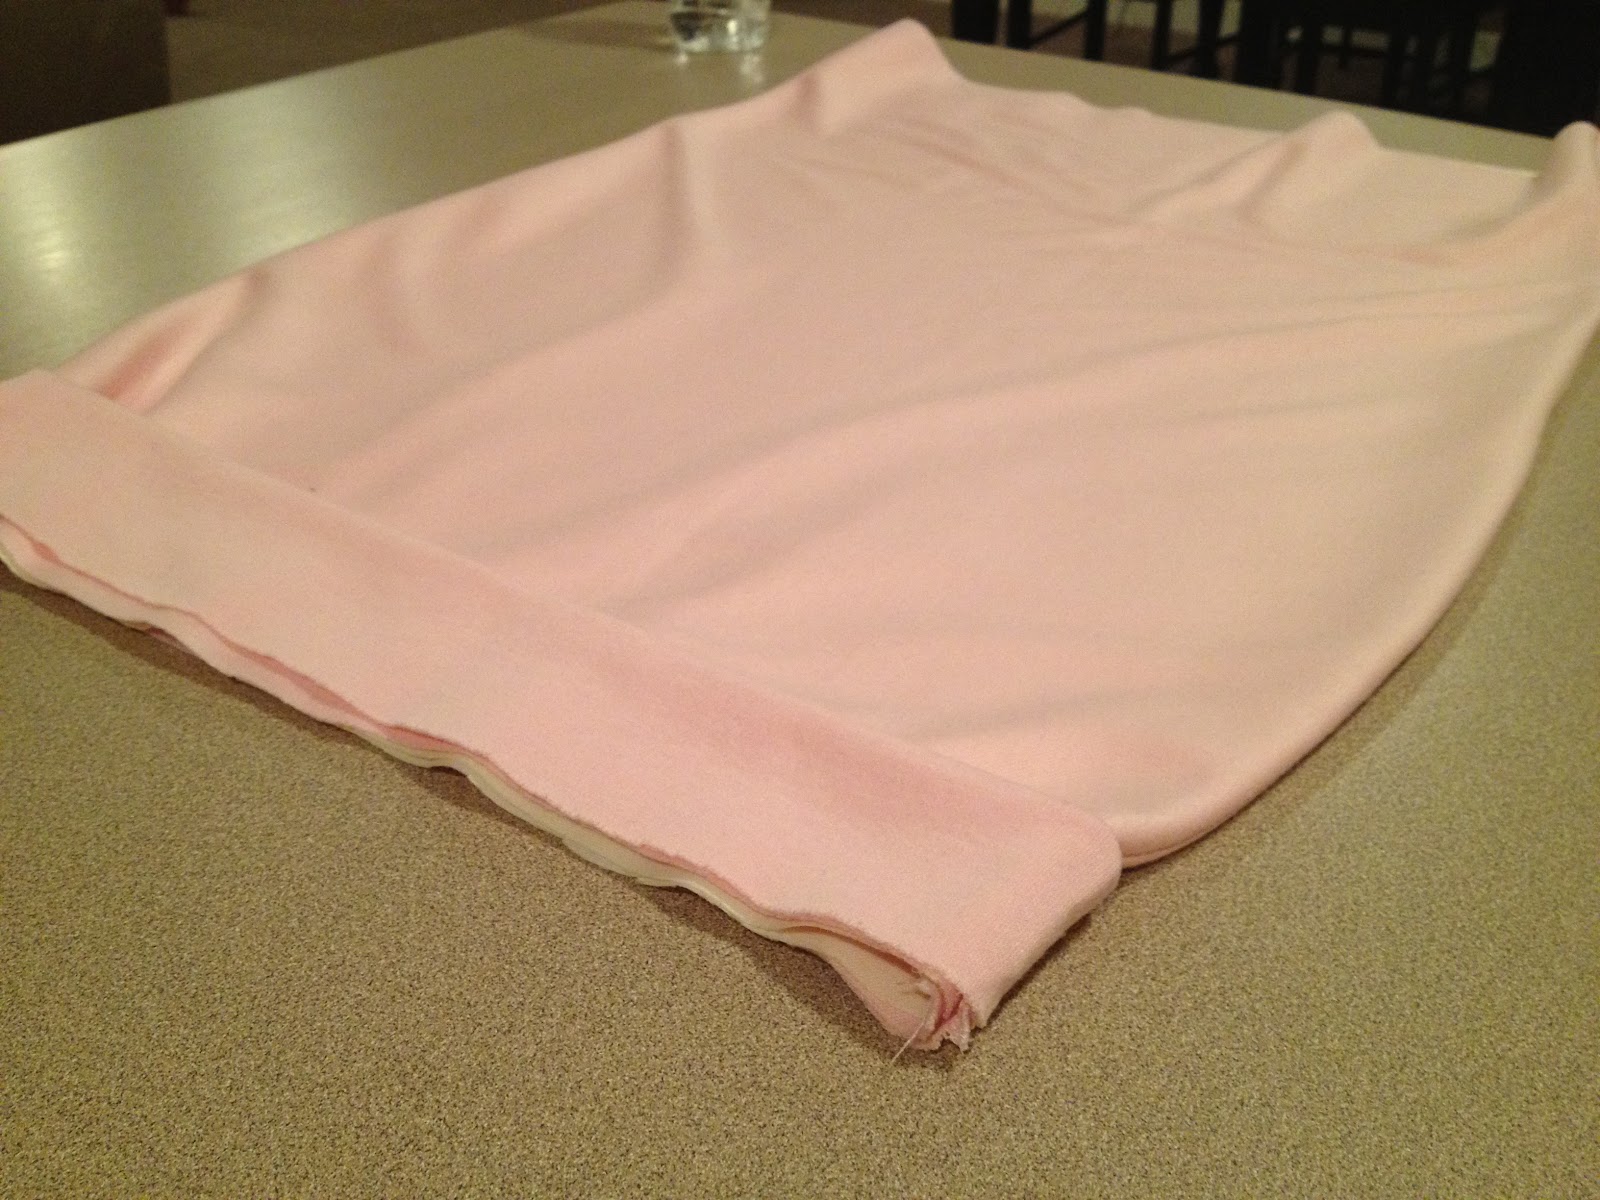
Step 4. Now that your darts are done, put your back lining and back skirt piece together (as seen below. . . .
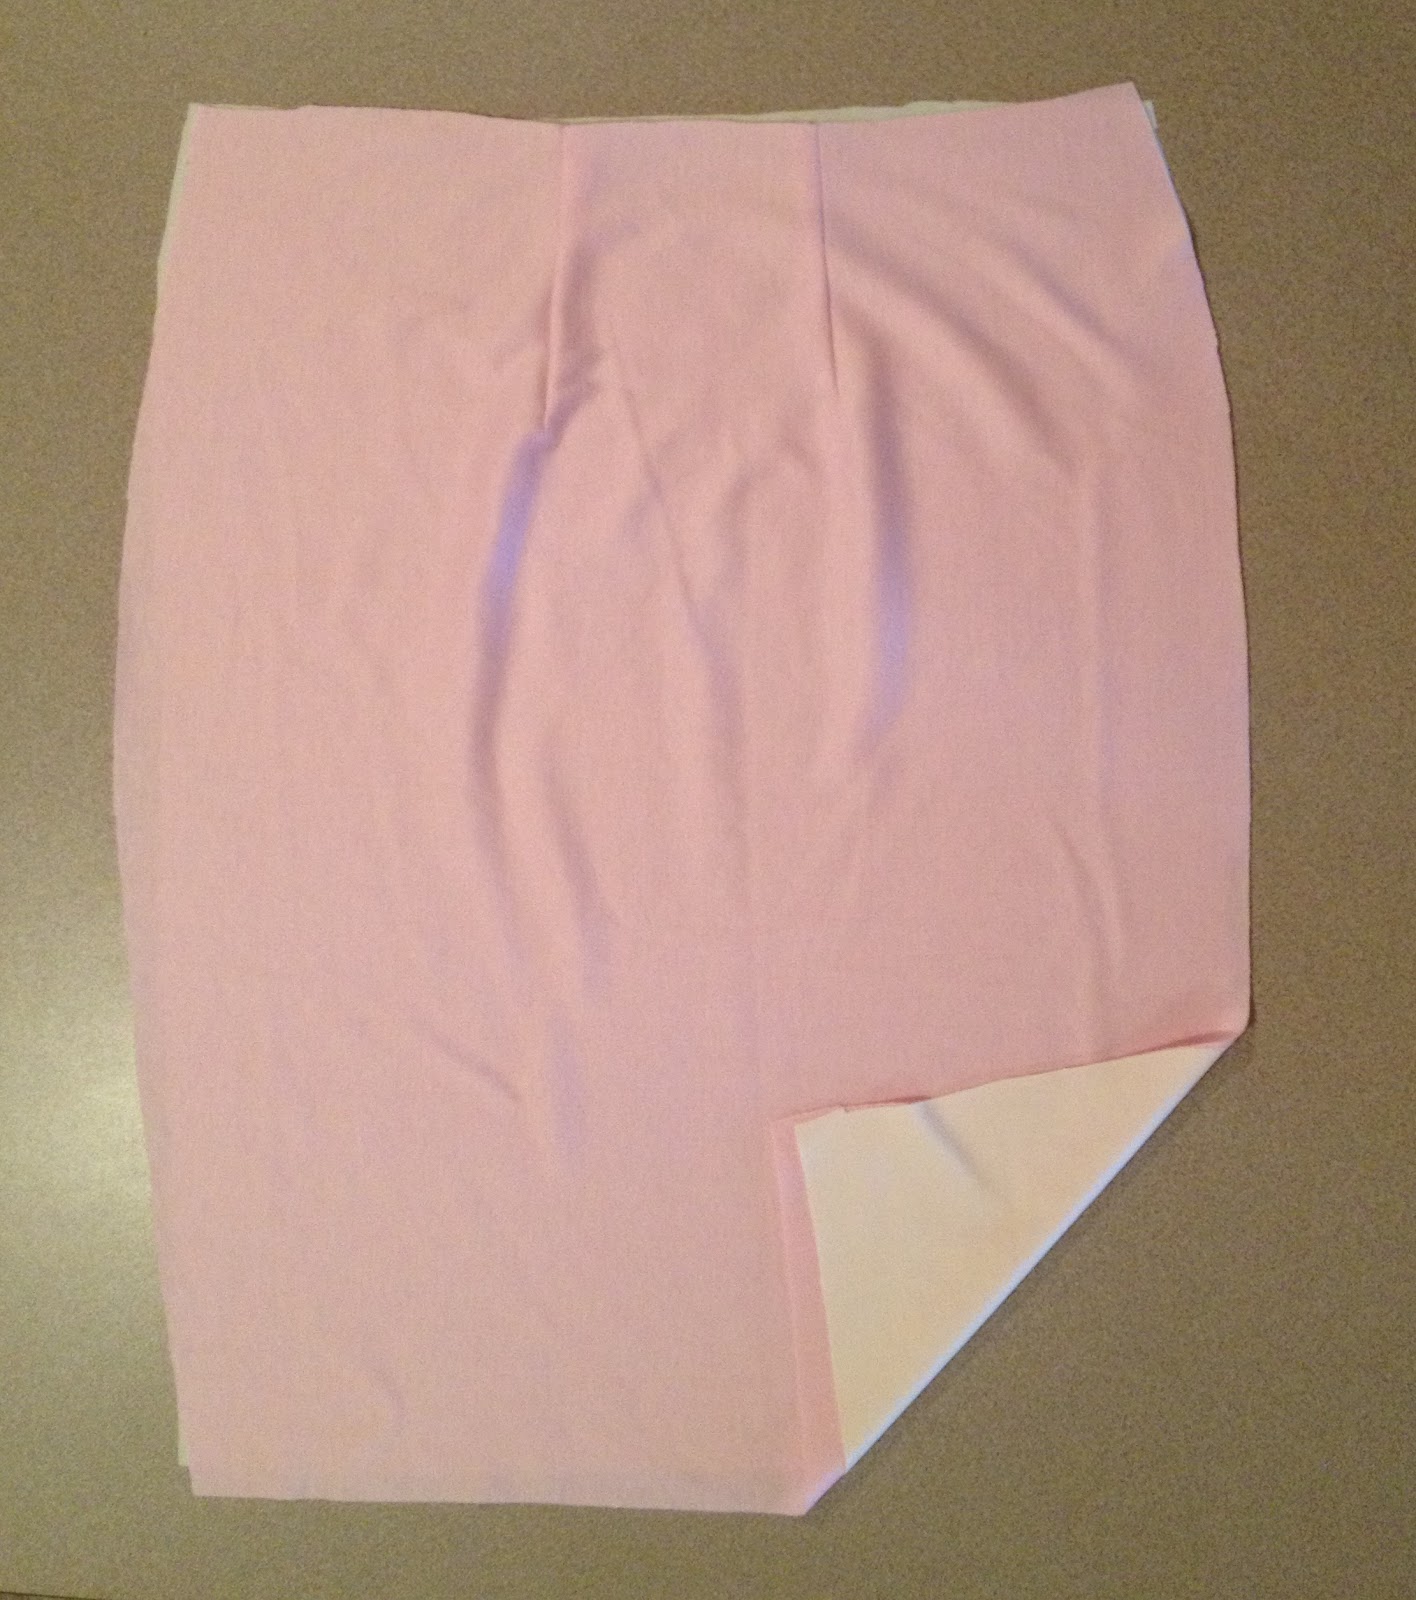
. . . .and then (with right sides together) place your front skirt piece on top, and your front lining on top of that. The order should be back lining, back of skirt, front of skirt, and front lining (as seen below). Make sure your two pink fabric pieces have the right side of the fabric facing each other.

Now sew along to the two sides with a 1/2″ seam allowance to attach all four pieces. Cut off extra fabric and zigzag or serge the edges.
Step 5. Now for the waistband. With right sides together, sew up the short sides of your waistband with a 1/2″ seam allowance. Cut off the extra seam allowance and serge or zigzag the raw edges.
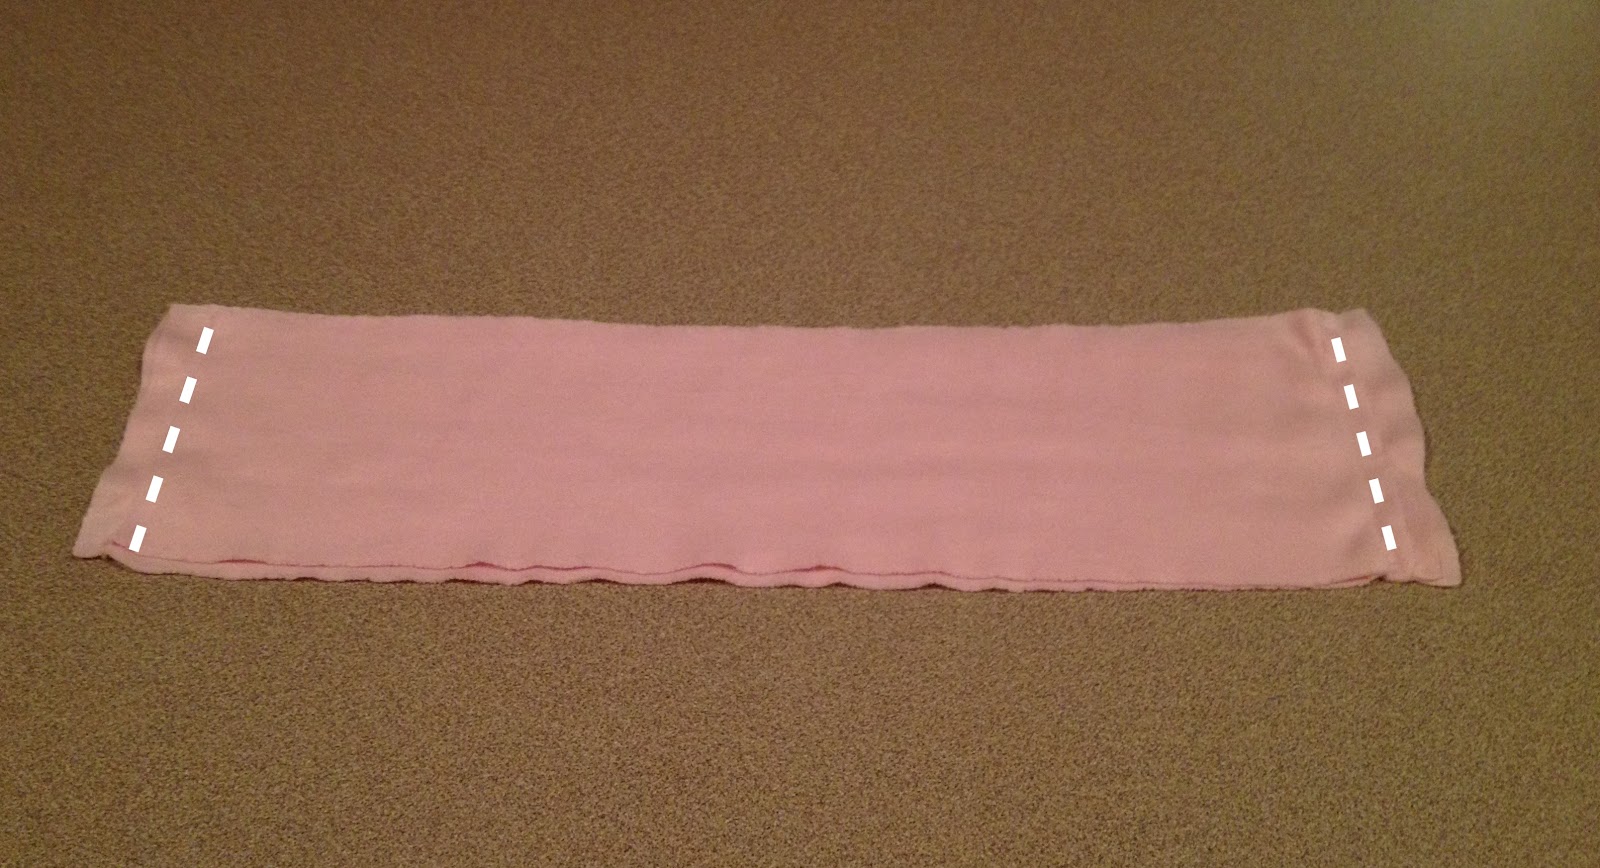
Then fold the waistband in half (as seen below). . .
. . . . and then, with all the raw edges facing out, pin it to the top of the skirt (as seen below). Make sure you match up the side seams. Sew along the entire waistband with a 1/4″ seam allowance, then cut off the extra fabric and zigzag or serge the raw edges.
Press your waistband flat, and now it should look like this. . .

Step 6. Try on your skirt and pin the hemline to your desired length. Stitch around the bottom with a wide stitch (as to avoid bunching). Press flat and you’re done!

And of course, then add some fun painted embellishments if you’d like 🙂
As always, comment or email with any questions. Happy sewing!


I always love these posts and seeing the end product – SO SO cute 🙂
Annie
The Other Side of Gray
Merrick, you make it look so easy!! I love how the skirt turned out… As for me, actually making one and having it turn out like your end product is a different story. I get so nervous cutting fabric.. I just have to try it!!
Oh this is DARLING. I now have a strong desire to make a jersey pencil skirt. And my arrows would not turn out that good!
just made pencil skirt from this tutorial! mine is a print, and not painted, but it actually DOESN'T look homemade! 🙂
this is so cute!! i love it! i don't think my skirt would ever turn out that cute though cause i suck at sewing. can you make me one? 🙂
this is Megan and i met you at the blogger meet-up but couldn't remember your url. i finally found it!! sorry it took me so long. i love your blog! it is so beautiful and you are so talented!
I just found your blog! I'm in love with this DIY (def pinned it!). xoxo A-
I spy that swell Target skirt as a pattern. Great idea! Let me ask a little mor about the fabric- is it like a thick ponte fabric? Or thick like a sweatshirt?
Merrick- just wanted to let you know that I finally made my first thrift refashion!! So excited to tell you. I wore it and everyone kept asking where I got it hah!
DelaChic
Wow this is amazing! I love your tutorials Merrick!
That is so cool! You make it look so easy!
Lindsey
http://thriftandshout.blogspot.com
Wow really easy. I can't wait to go fabric shopping.
http://www.bridge91.blogspot.com
I love your tutorials! You make it all make sense! Thank you so much.
New follower.
Melissa
redflycreations.blogspot.com
This skirt is adorable. I went to JoAnn's yesterday to buy some fabric and have a question. Do you know the blend of jersey knit you purchased? I could only find 60% cotton 40% polyester and it felt more like T-shirt material. Is that the right kind? PS…I tried to ask two workers where their jersey knit was and one didn't know and the other lead me to the sparkly spandex 🙂
Richard + Analese:
I don't know what blend of fabric this particular fabric is, but I would look for a rayon/polyester/spandex blend, or rayon/spandex, or polyester/spandex. Lycra is also a good substitute for spandex, so you might see those blends with lycra instead.
Hope that helps, and that you avoid the sparkly spandex at all costs 🙂
Thank you! Found what I was looking for and finally finished the skirt yesterday. Love!! Thanks again fro responding.
i've been sewing with jersey like crazy all year. can't wait to make this.
Loving this blog right now! I'm a new sewer and you make things easy to follow. Keep the inspiration coming!
Loving this blog right now! I'm a new sewer and you make things easy to follow. Keep the inspiration coming!
Thanks for sharing this post….
https://www.jigno.com/women/accessories/handbags.html
I wanted to know if you put darts in the lining? I’m looking Forward to trying this!