


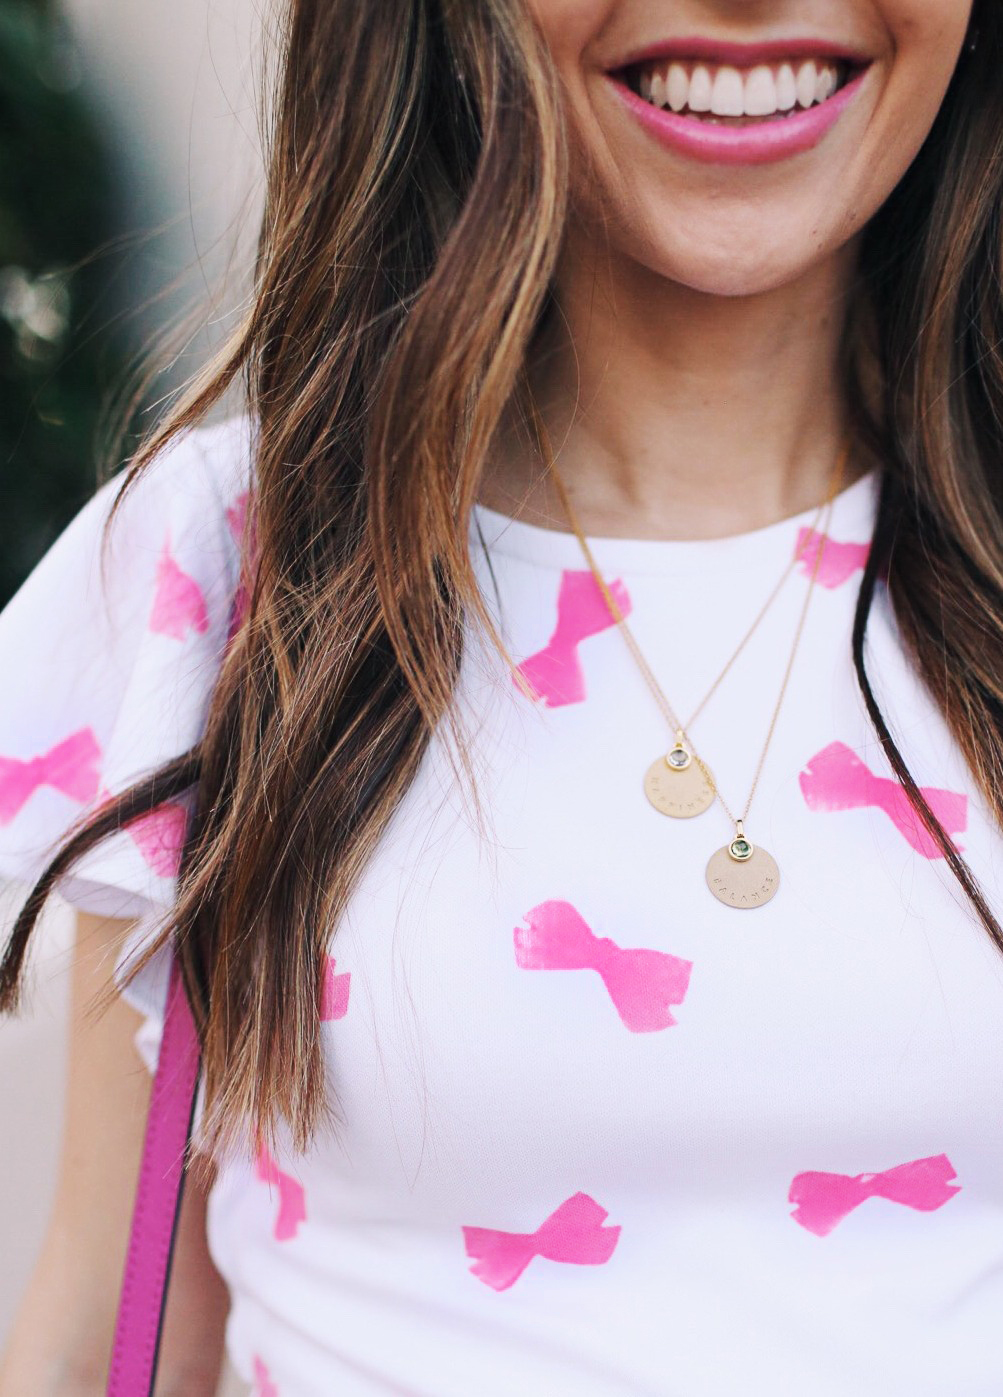
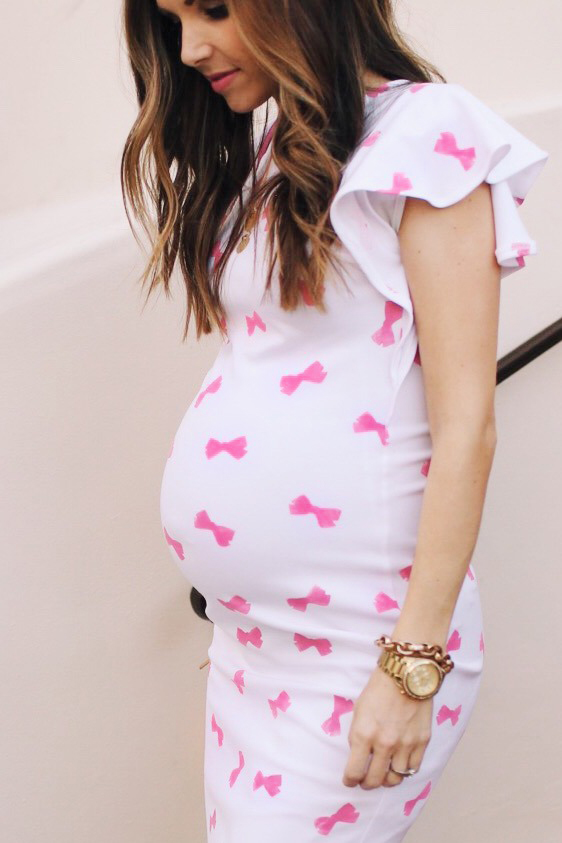
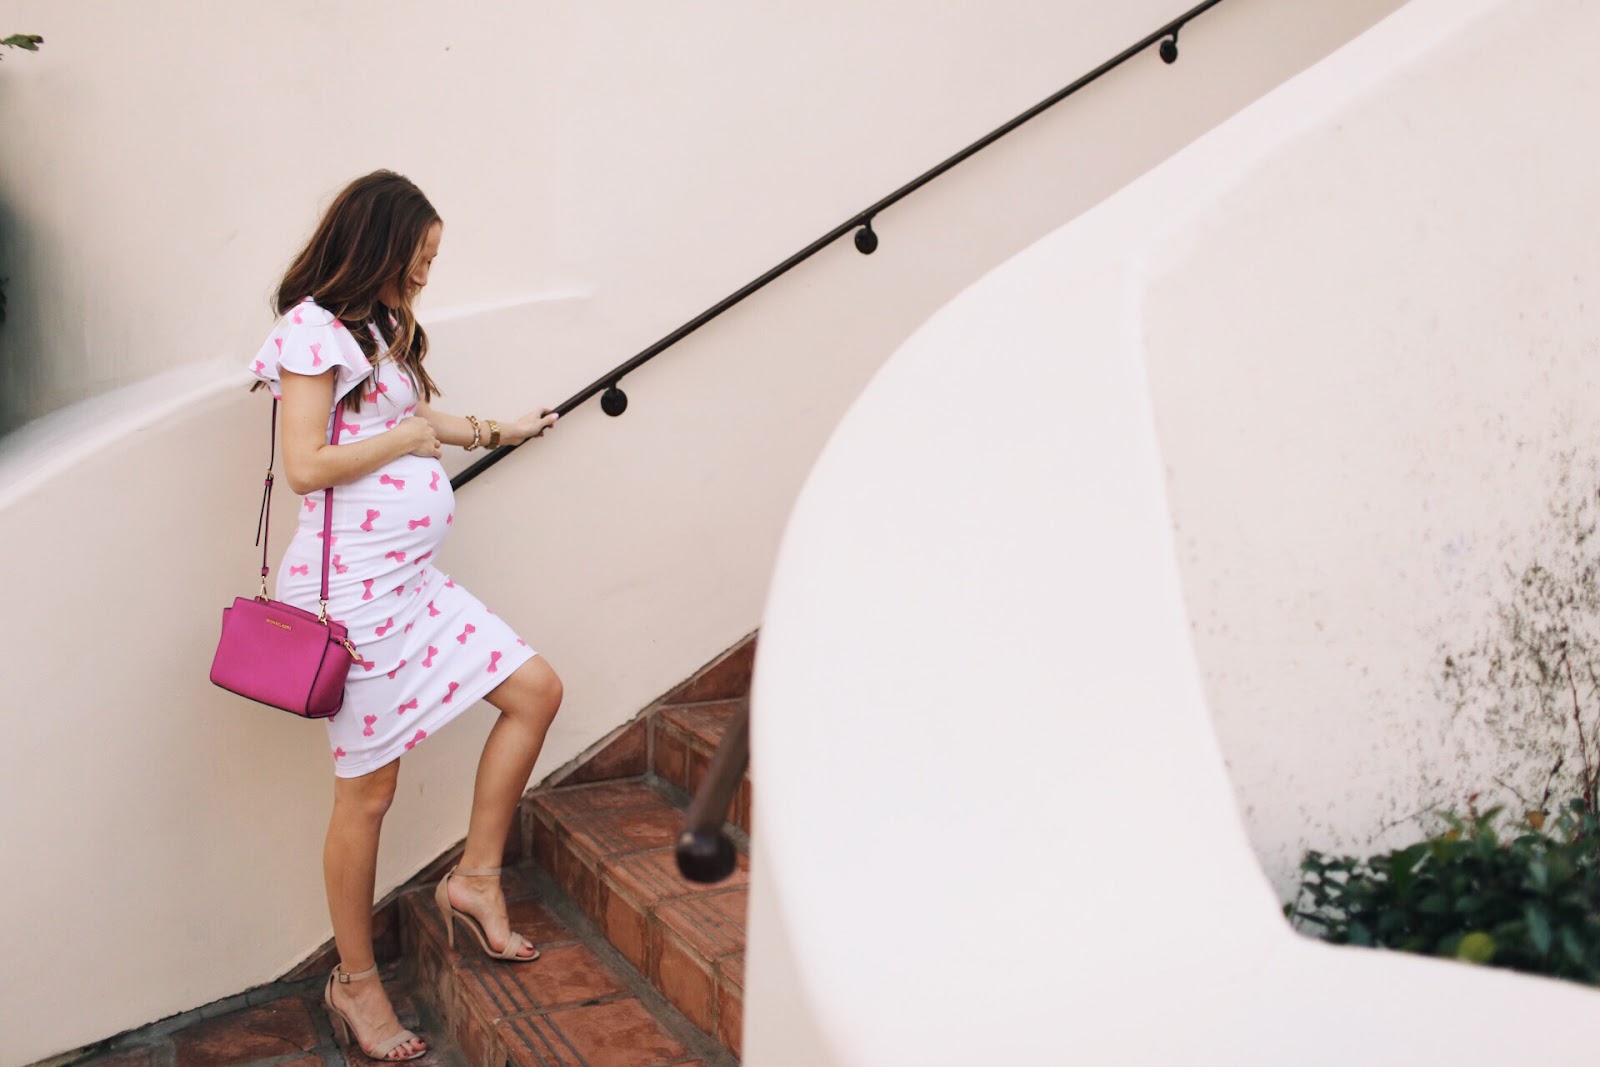


OUTFIT DETAILS: DRESS MADE BY ME (TUTORIAL BELOW) || MICHAEL KORS BAG || NUDE HEELS || WATCH || “BALANCE” + “HAPPINESS” NECKLACES c/o MEJURI
photos by rad and happy
Last year I ran across a bow print dress like this one and instantly fell in love with it. It was sleeveless and more of a swing shape, but I just couldn’t stop thinking about the print and have kept it in the back of my mind for almost a year so I could make it for Valentine’s Day. So I did my own take on it and made it bodycon (which is obviously more flattering on my huge baby bump) and added some flutter sleeves.One of the things I’ve been itching to do more of this year is make my own textiles, so this was a perfect opportunity to try it out. I used a pink rubber eraser and an x-acto knife to carve the bow stamp, and then silkscreen ink to stamp it. So easy, and I love how it turned out.

If you’re not a seamstress, you could still make this by purchasing a white dress (like this one or this one) and stamping it. A quick and easy refashion alternative!
Click READ MORE below to find the full tutorial!

Materials Needed:
1 1/2 – 2 yards white knit fabric (depending on your size and how long you want the dress) — mine is a thick ponte knit, and I recommend going with something thick and durable if you’re making your dress bodycon style. Thin knits work better for a drapey style dresses.
matching thread
rubber eraser (like these ones)
speedball screen printing ink (I bought fluorescent hot pink and mixed it with a tiny bit of black to tone it down since it was pretty neon)
sponge brush
Step 1. First create your stamp. Use a rubber eraser or stamp carving block and draw your bow shape on it with a pencil. Then carefully carve it with your x-acto knife or stamp carver.
Step 2. Pour your paint on to a plastic plate and use a sponge brush to apply a nice even layer to the stamp. Press down on the fabric, then repeat until all your bows are stamped on. Let it dry completely. Once it’s dry, the ink needs to be heat set. These instructions here are super helpful.


Step 3. Create a pattern using an existing bodycon dress you own, or a fitted t-shirt and adding length. If you don’t know how to make your own pattern, use this tutorial here. Use pattern paper and cut out all your pieces. You’ll need a DRESS FRONT and BACK, (can be the same pattern piece — just make sure to cut the neckline on the front piece lower), 2 NECKLINE LINING pieces (front and back), and a SLEEVE.
For your sleeve, the pattern is a little funky. I played around with different shapes until I came up with a sleeve I liked, and I’ve drawn the shape and provided dimensions.
Step 4. Once all your patterns are cut out, lay them flat on your fabric and cut out your fabric.
Step 5. Add bust darts to the FRONT DRESS piece. If you don’t know how to do these, use this tutorial here.
Step 6. Take the DRESS FRONT and BACK pieces, and with right sides together, sew the shoulders together with a straight stitch.
Step 7. Take your NECKLINE LINING pieces and cut them 1/2″ shorter on each end. Then sew the NECKLINE LINING pieces together into a circle. Then with right sides together, match up the side seams of the LINING with the shoulder seams of your DRESS and sew around the neckline with a straight stitch. Since your NECKLINE LINING will be slightly smaller than your dress neckline, pin it so it fits evenly around the dress neckline. Stretch as you sew so the two pieces lay flat together. This will prevent a wavy, droopy neckline.
Step 8. Once the NECKLINE LINING is sewn on, tuck it inside the dress and press in place with an iron. Use a double needle to allow for stretch when pulling over your head, and do a nice wide stitch (3.5-4.0).
Step 9. Now it’s time for the SLEEVES. To make things easier, hem your sleeves before inserting them. Then with right sides together, pin the sleeve to the dress, starting at the shoulder seam and pinning evenly down the dress on either side.
Step 10. Now sew all the way around the sleeve opening and down the dress to attach it. Repeat for the second sleeve.
Step 11. Once both sleeves are attached, lay the dress with right sides together and pin from the armpit to the hem. Then sew with a straight stitch.
Step 12. Hem your dress to your desired length. Make sure you use a double needle here as well so you have some stretch as you walk!
Just over two weeks til Valentine’s Day, so hurry up and make yourself one!


Wow!! One of the prettiest DIY dresses ever!!! You look gorgeous!
http://lartoffashion.com/finish-the-sentence/
I love this (and pretty much everything you do!). From the photo it doesn’t look like your dress has darts. Is that because you made your dress maternity style?
http://www.styleandsewing.wordpress.com
Mine does have darts, I think the sleeves are just hiding them in these pictures. I made mine using this tutorial exactly — I just made sure the fabric was stretchy enough to stretch across my bump without having to add ruching on the side (which it is). Hope that helps!
Thanks! I thought maybe stretchy fabric didn’t need darts – thanks for clarifying!
I get completely giddy to see your DIY Fridays! They are always so good! I love this dress, and you look gorgeous! You are an inspiration.
I love all your great ideas!! Quick question, can I use any fabric paint? Or do I have to go with the screen printing ink (maybe for the stretch and washability)? I am an avid sewer and have followed many of your tutorials, this is my first into printing on fabric. ^_^ y Thanks!
You CAN use any fabric paint, but I’d really recommend using this silkscreen ink. Just like you mentioned, it works MUCH better for stretch and washability, and for vibrance. I’ve tried about every kind of fabric paint out there, and this is by far the very best for long term durability. You can find all sorts of colors on Amazon — in fact, I just bought myself a starter kit so I get a bunch of colors (this one: http://bit.ly/1WSeVIR). They’re smaller containers, but you really don’t need very much so they’ll last a long time. Good luck!
Quick question – when you add bust darts does it shorten the front of the dress? Or in other words, when drafting my dress-front pattern do I need to make it longer than the back if I’m going to add darts?
I love this dress! Those flutter sleeves are so fun!
Paige
http://thehappyflammily.com
OK. Wow. I absolutely love that you made this yourself and I was going to find where you bought it. Very crafty. Maybe I’ll try this look day! Thank you for sharing. You’re truly creative!
BeyondBasicBlog.com
I love how simple and easy this tutorial is, and I love that you hand-stamped this fabric yourself! It makes the dress so unique!! Our due dates are about a month apart, and I’ve loved watching your baby bump grow!! Love your blog!!
xoxo
Lauren
http://www.dressingdallas.com
I am a bit confused by the dimensions of the sleeves. So the sleeve is 20 inches from top to bottom, but what is the 12 in. measurement? From the bottom to the top of the INSIDE horseshoe shape? Does that make sense? So from the top of the sleeve (or sleeve hem) to the inside horseshoe (the shoulder seam) would be 8 inches??
I think I am more perplexed by how BIG the sleeve looks as I am creating this pattern.
Yes, inside the horseshoe is the remaining 8 inches. I just didn’t put that number in because of space. Remember, you’ll loose 1/2 an inch on either side when you attach it to the dress and when you hem the sleeve, so really the widest part of the sleeve will be 7 inches (unless you want to hem it more than 1/2 an inch). Hope that helps!
That is SUCH a beautiful dress. I am super impressed with your fabric painting too!
Would you consider selling this or making one for me? I’m 36 weeks along and would LOVE to wear this for my 35th birthday on the 8th. It’s my furst pregnancy so I’d wear it again:). [email protected]
Hey girl, thanks so much for your interest! Unfortunately I don’t sell any of my items, but I think you should try to make it for yourself! You can do it! xx