_______________________
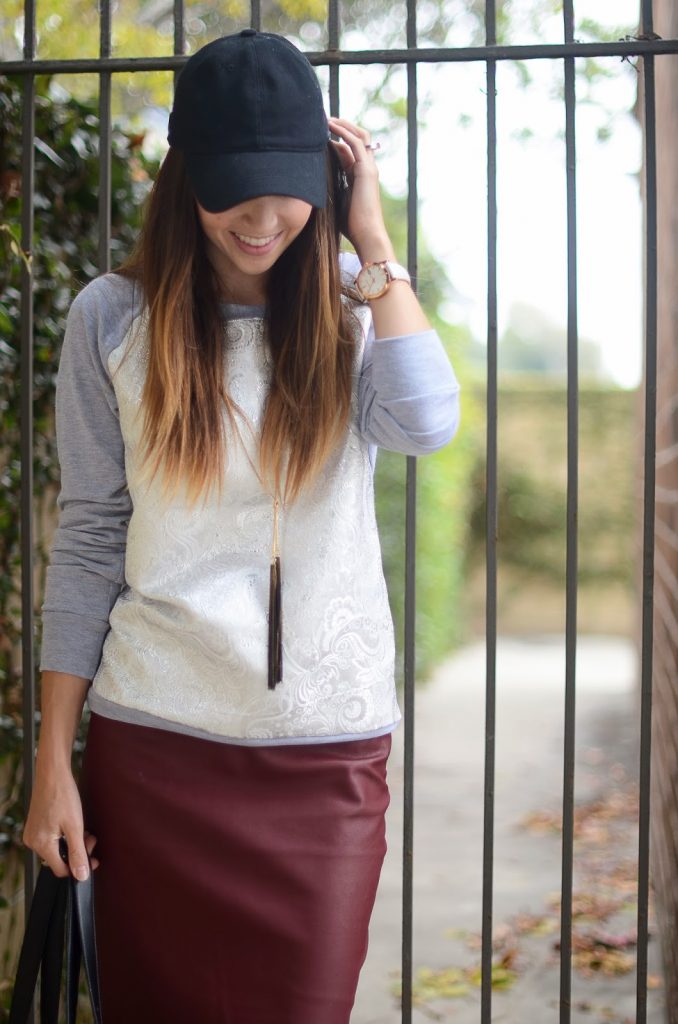
sweatshirt: target, refashioned by me
skirt: c/o lulu’s
heels: kohl’s
bag: c/o oasap
watch: burberry
hat: target
necklace: c/o groopdealz
- sweatshirt (I found mine at Target)
- contrasting material, such as brocade (I found mine in the home decor section at Jo-Ann’s)
- matching thread
- seam ripper
Step 2. Using the section you just removed, cut a piece of your contrasting fabric. IMPORTANT: If your contrasting fabric is NOT stretchy, add 1 1/2 inches of seam allowance on each side and the top, and 2 1/2 inches of seam allowance on the bottom.
Step 3. With right sides together, pin your contrasting fabric to the remaining sweatshirt and sew up the sides and raglan seam with a straight stitch. Trim and serge or zigzag your raw edge. Repeat on the other side.
Step 4. Now your sweatshirt should look like this. Next, with right sides together, pin the neckline ribbing to the contrasting fabric, stretching the ribbing to fit across.
Sew in place with a straight stitch, pulling the ribbing flat in between pins as you sew.
Your neckline should now look like this. Top stitch right below the ribbing with a wide straight stitch.
Step 5. With right sides together, pin the waistband ribbing to the contrasting fabric, stretching it to fit. Sew it up with a straight stitch, pulling the ribbing flat in between pins. Press all your seams and you’re done!


Absolutely love this! My mom is coming to stay with us over Thanksgiving & I might just have to enlist her sewing skills to help me recreate 🙂
http://www.pennypincherfashion.com
I love this idea! I definitely want to try it.
Perfect! Love it!
I tried clicking to your links about the other sweatshirts you made and they weren't working. I had the same problem last week with your "Sisters Share it All" post.
Wow this looks very cool 😀 Nice DIY!
xx Stephanie (www.stephaniesstyleblog.com)
Omg i love it!!! Adding to my DIY list! I love comfy and cute!
Amazing idea, amazing new sweatshirt, I absolutely love it! 🙂
xoxo Renee
Awesome idea!!
Merrick, how are you lightening your tips? Honey? Hydrogen peroxide? I'm in the market. Thanks!
Incredible!!! I love it!!!
http://diyandglam.blogspot.com.es/
This turned out so cute!!
Kristina does the Internets
Oh! I love that you did this! Been thinking of doing the same thing. Those Jcrew contrast sweaters are something aren't they? I'm a new reader, and love everything about your blog! Thanks for the inspiration!
this is awesome! how do you make these things look so easy!!
I happen to have a lot of lace fabric and I was wondering what to do with it. This is perfect Merrick! Thank you.
Cute Merrick! I made something very similar but with a leather front instead! http://greylustergirl.com/anthropologie-leather-shirt-refashion/
I love it! I can't wait to get my sewing machine out of storage and challenge myself a little!
So cute! Your tutorials are always the best.
This is precious and I always find your work inspiring! I love that so many people (myself included) have seen these in store and thought, "I can do that."
http://ulterioralterations.blogspot.com/2013/11/diy-lace-overlay-sweatshirt-refashion.html#.UofIuZHN-Bg
Have you considered doing a lace front or back one yet? If I'm only adding the lace, would I need to pick all the seams out? or could I fudge and basically sew it on top AT the seams?
Very cute! I cant' wait to refashion a few things to wear for after baby.
I can't wait to try this!
http://www.thepreppylittlepolkadot.blogspot.com
Great idea, I love it!!!
Great idea, I love it!!!