
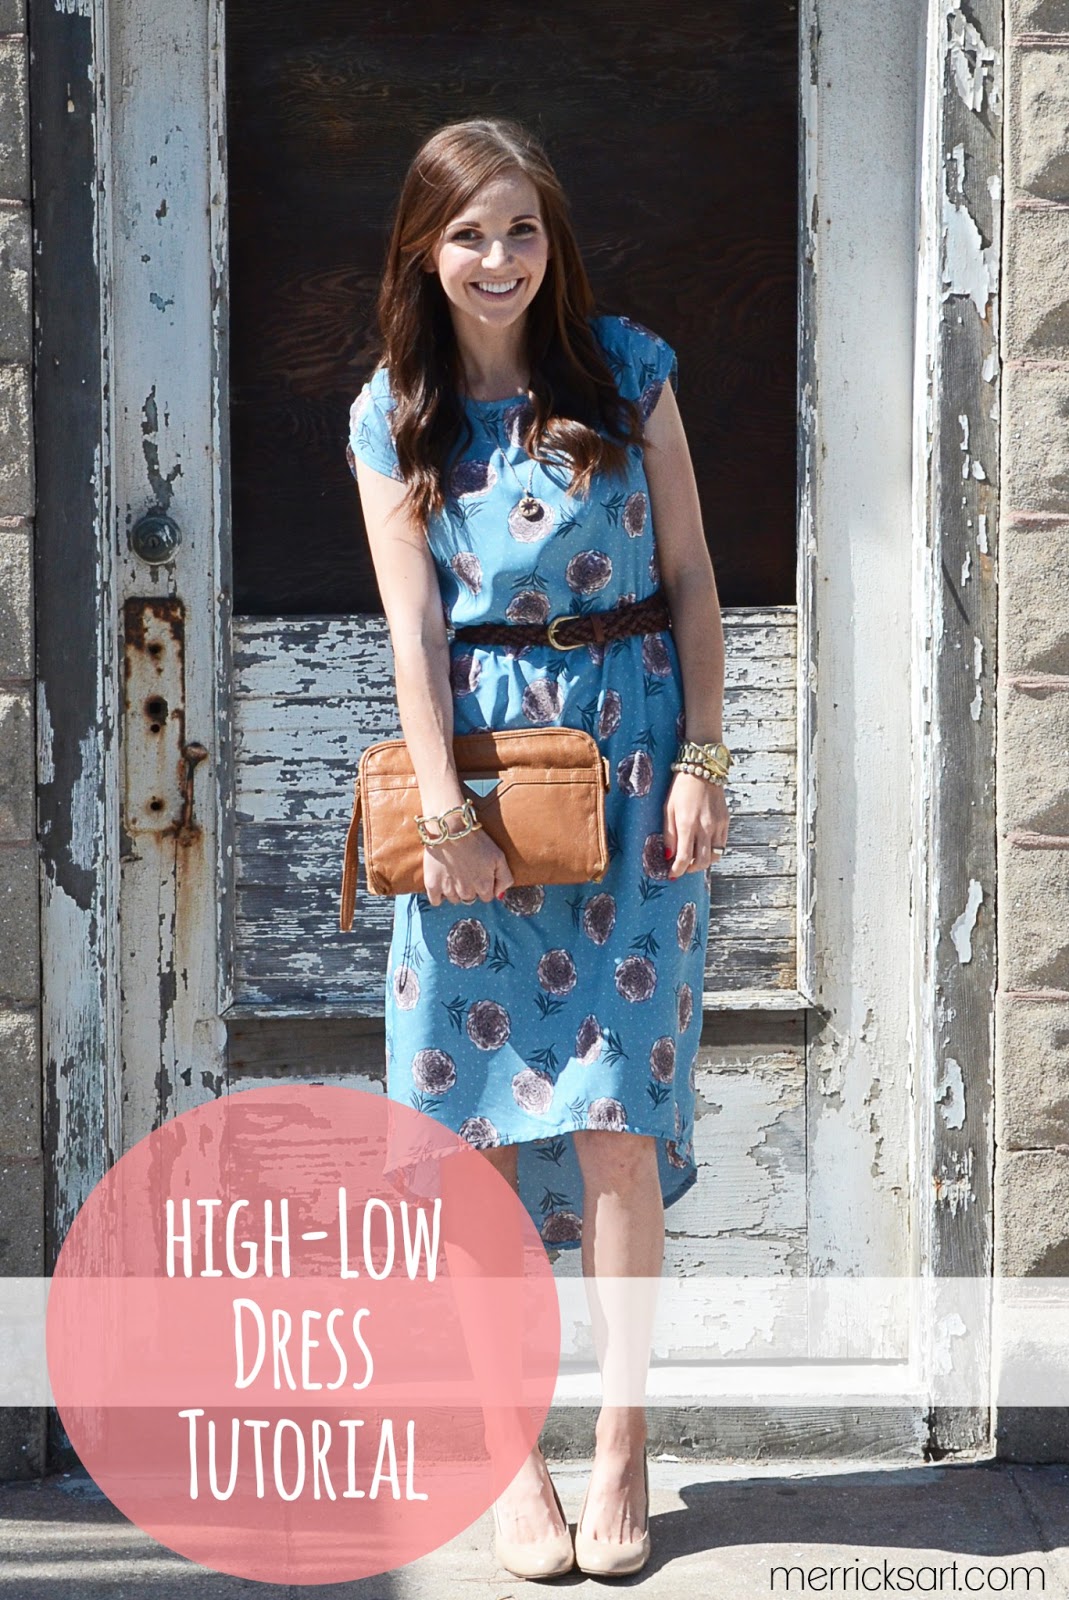
 Back in January, Kayla, from See Kayla Go, came to visit me here in SoCal. She was only here for two nights, but she managed to sneak out to the LA fabric district one afternoon and she came back bearing gifts. She picked up this gorgeous floral silk (for $2 a yard!) in two colors, so we each took a color and set off with the goal to make something pretty and report back.


 |
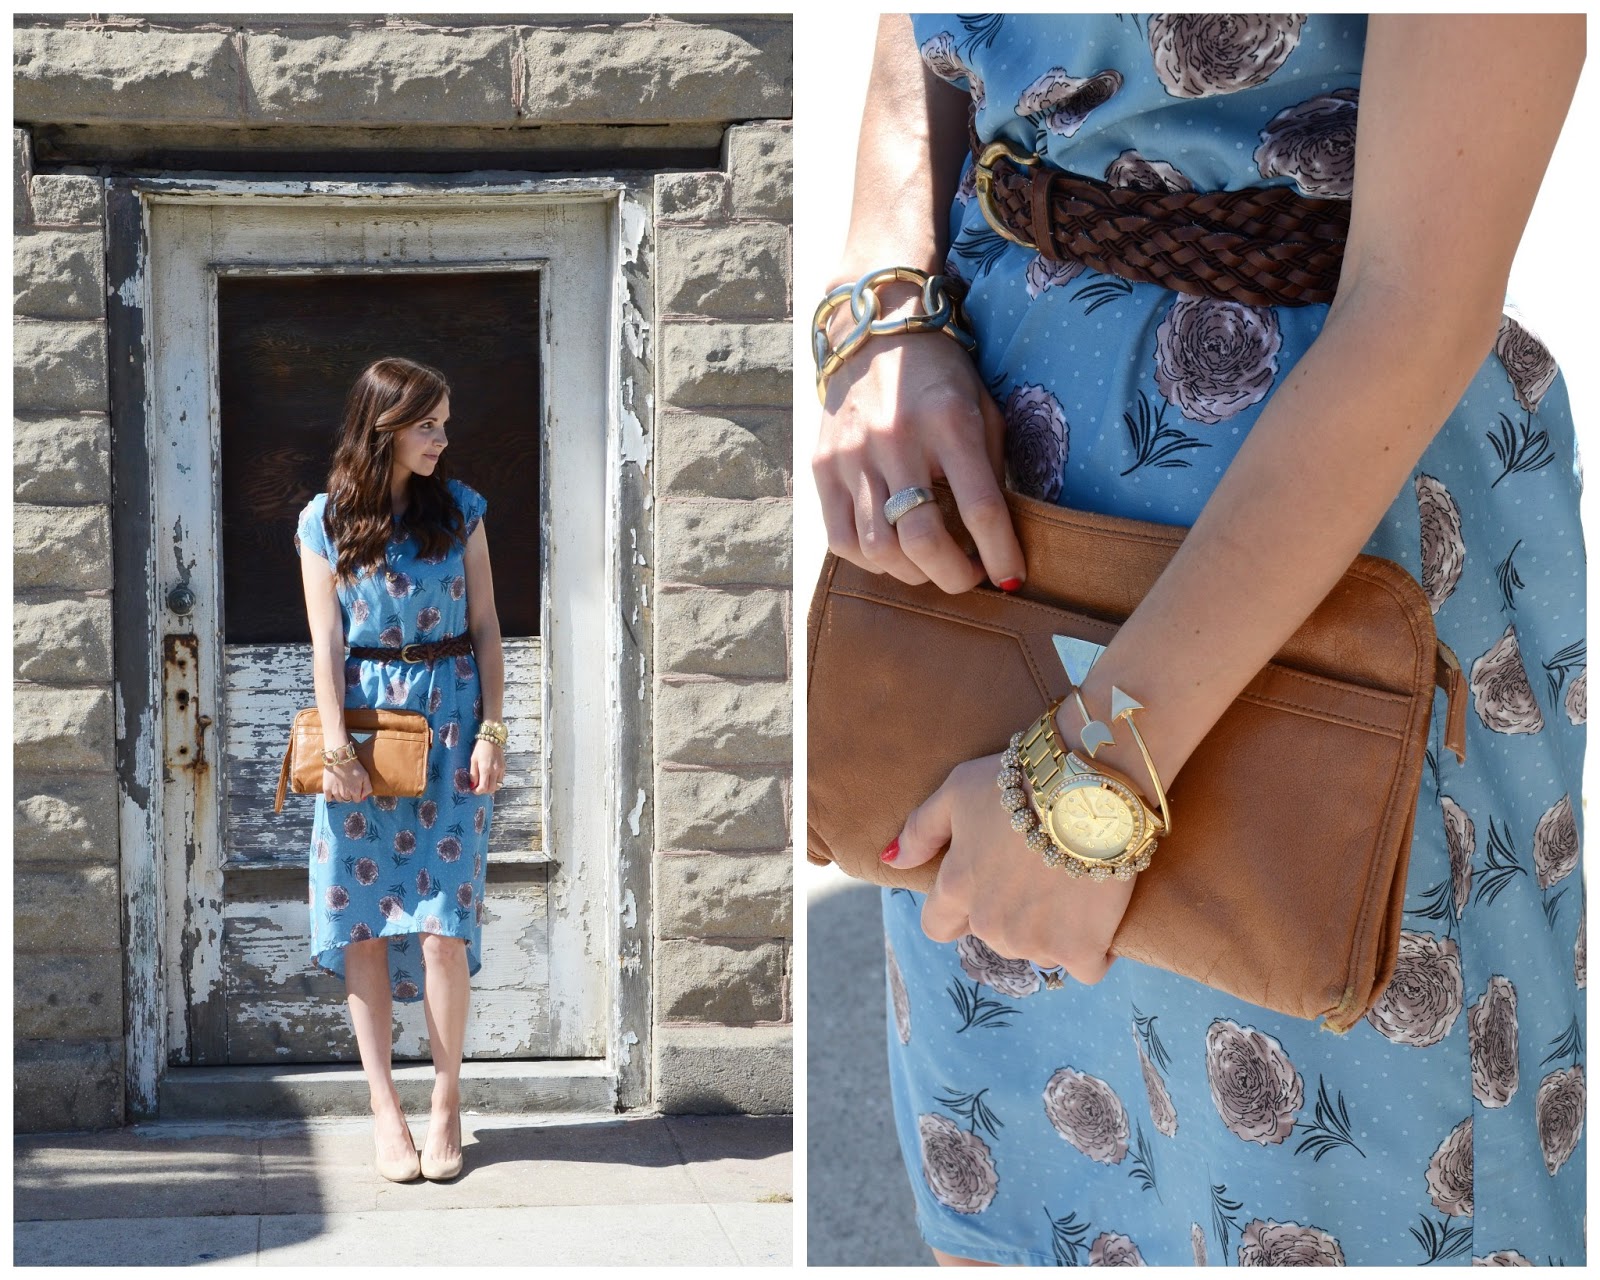
| dress: made by me // belt: thrifted (similar) // shoes: kohls (similar) // clutch: thrifted (similar) // necklace: forever 21 (similar) // watch: michael kors // bracelets: target & c/o poshlocket (here & here) |
Materials:
- 2 yards of fabric (mine is silk, but a polyester or lightweight cotton with a nice drape should also work well)
- matching thread
- 1/8″ wide elastic
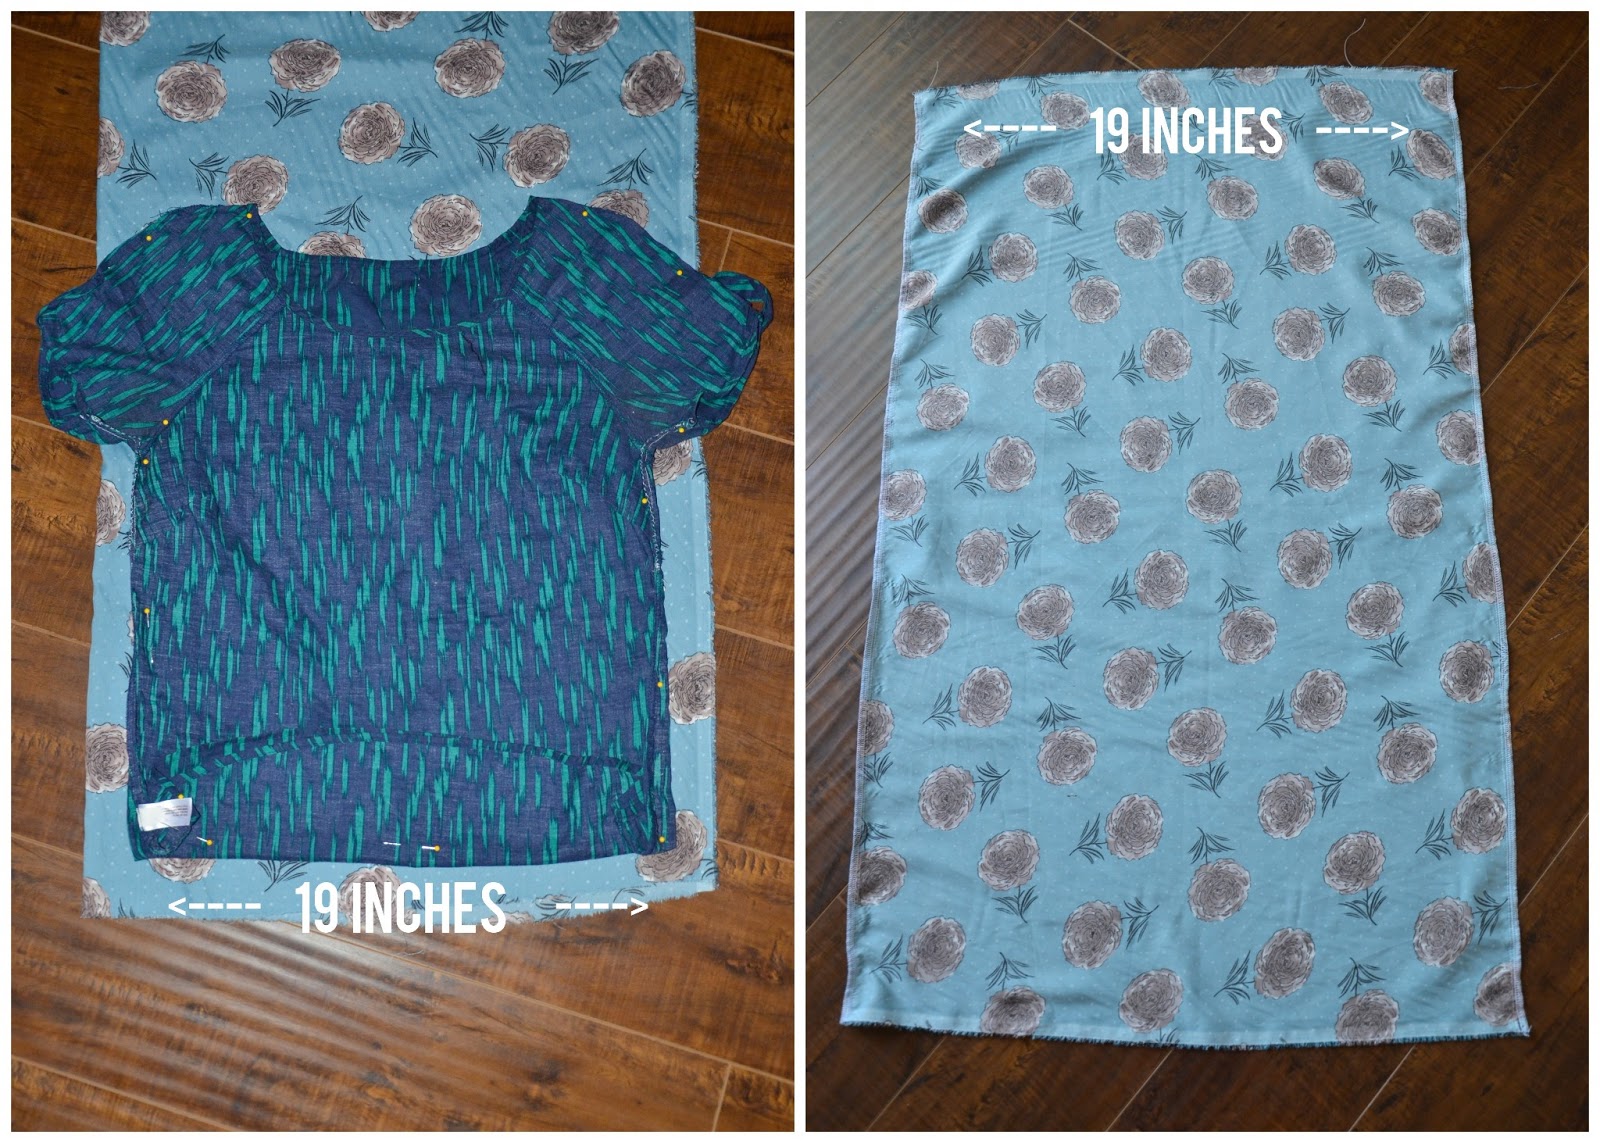
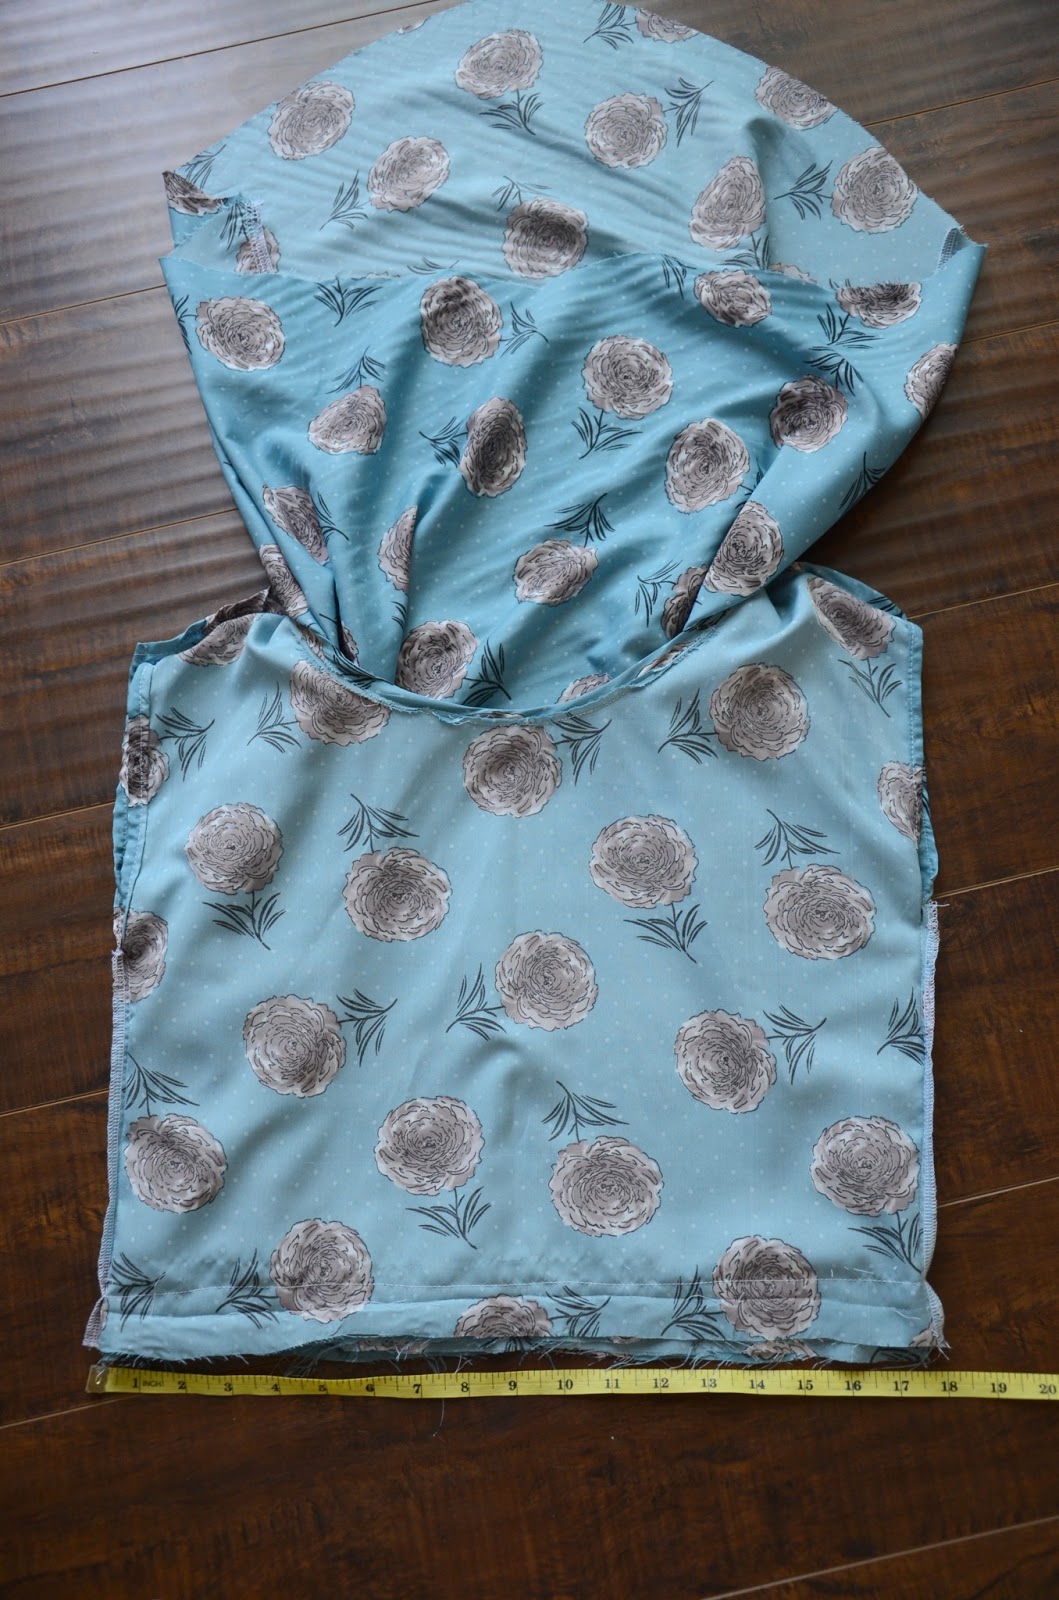
Step 1. Using a loose blouse as a pattern, cut out the top part of your dress. Add a 1/2″ seam allowance around the entire shirt. Also, note that the top part of your dress will only go down to your natural waist, so measure and cut the top length accordingly.
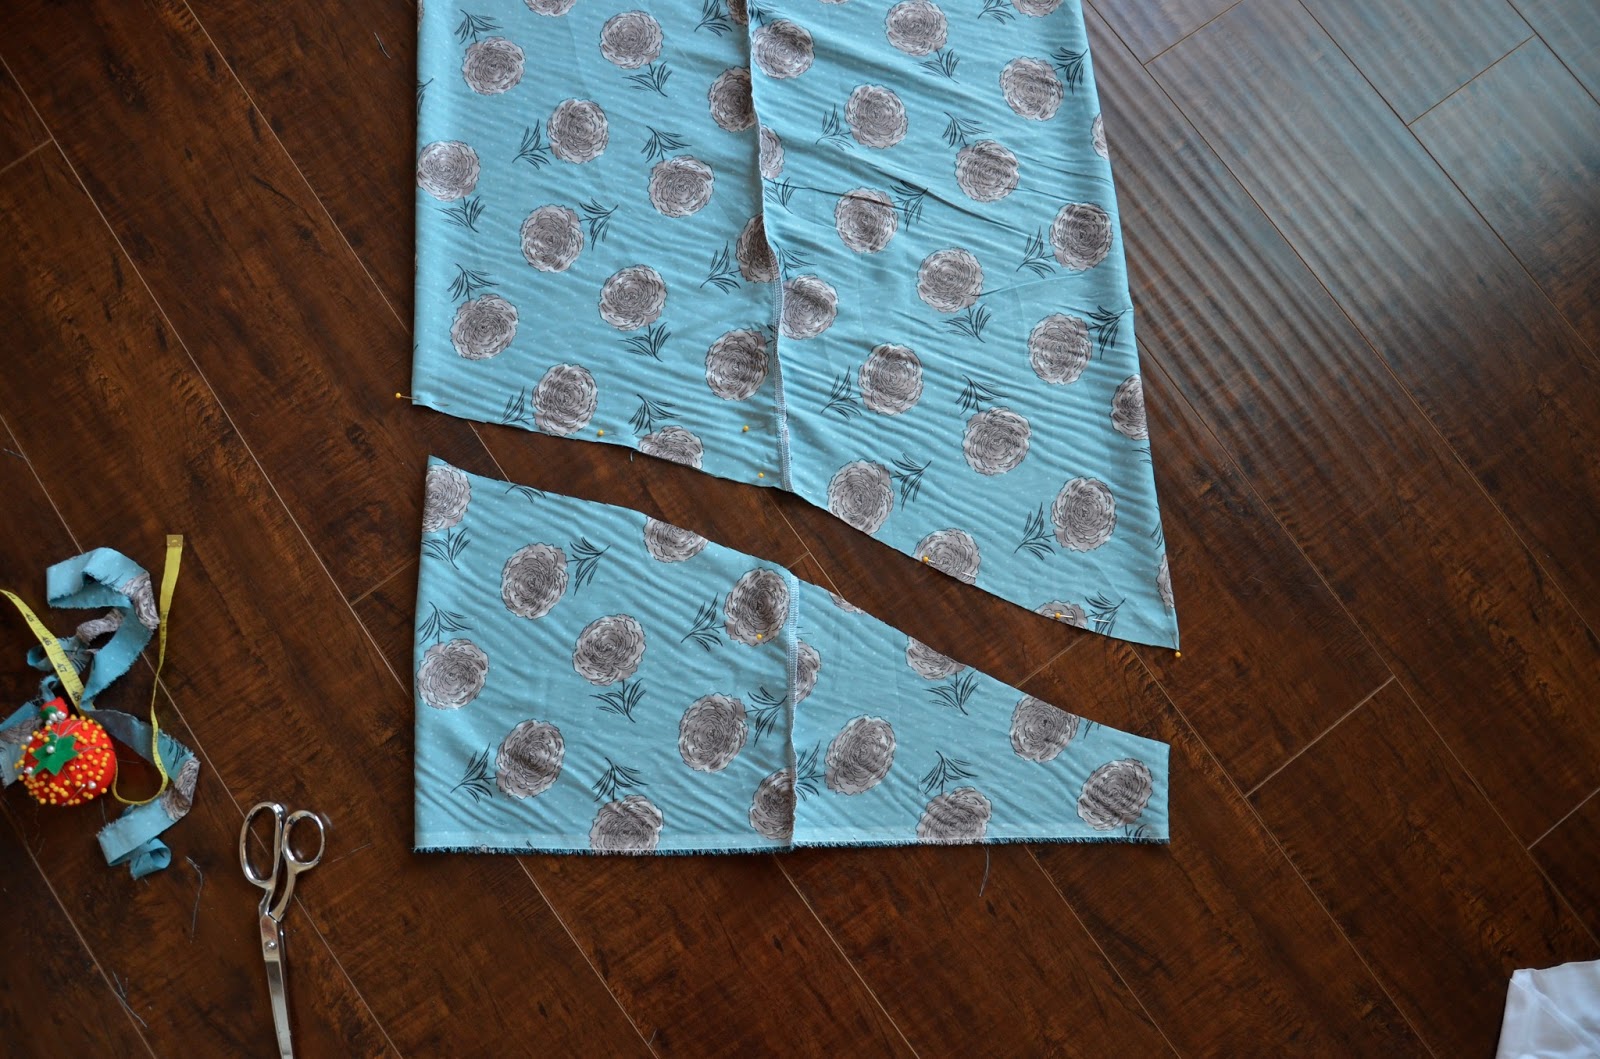
Now cut a large, slightly tapered toward the waist, rectangle for the bottom half of your dress. Make sure the shirt and skirt are the same width where they will connect at the waist. Mine was 19 inches, as seen below.
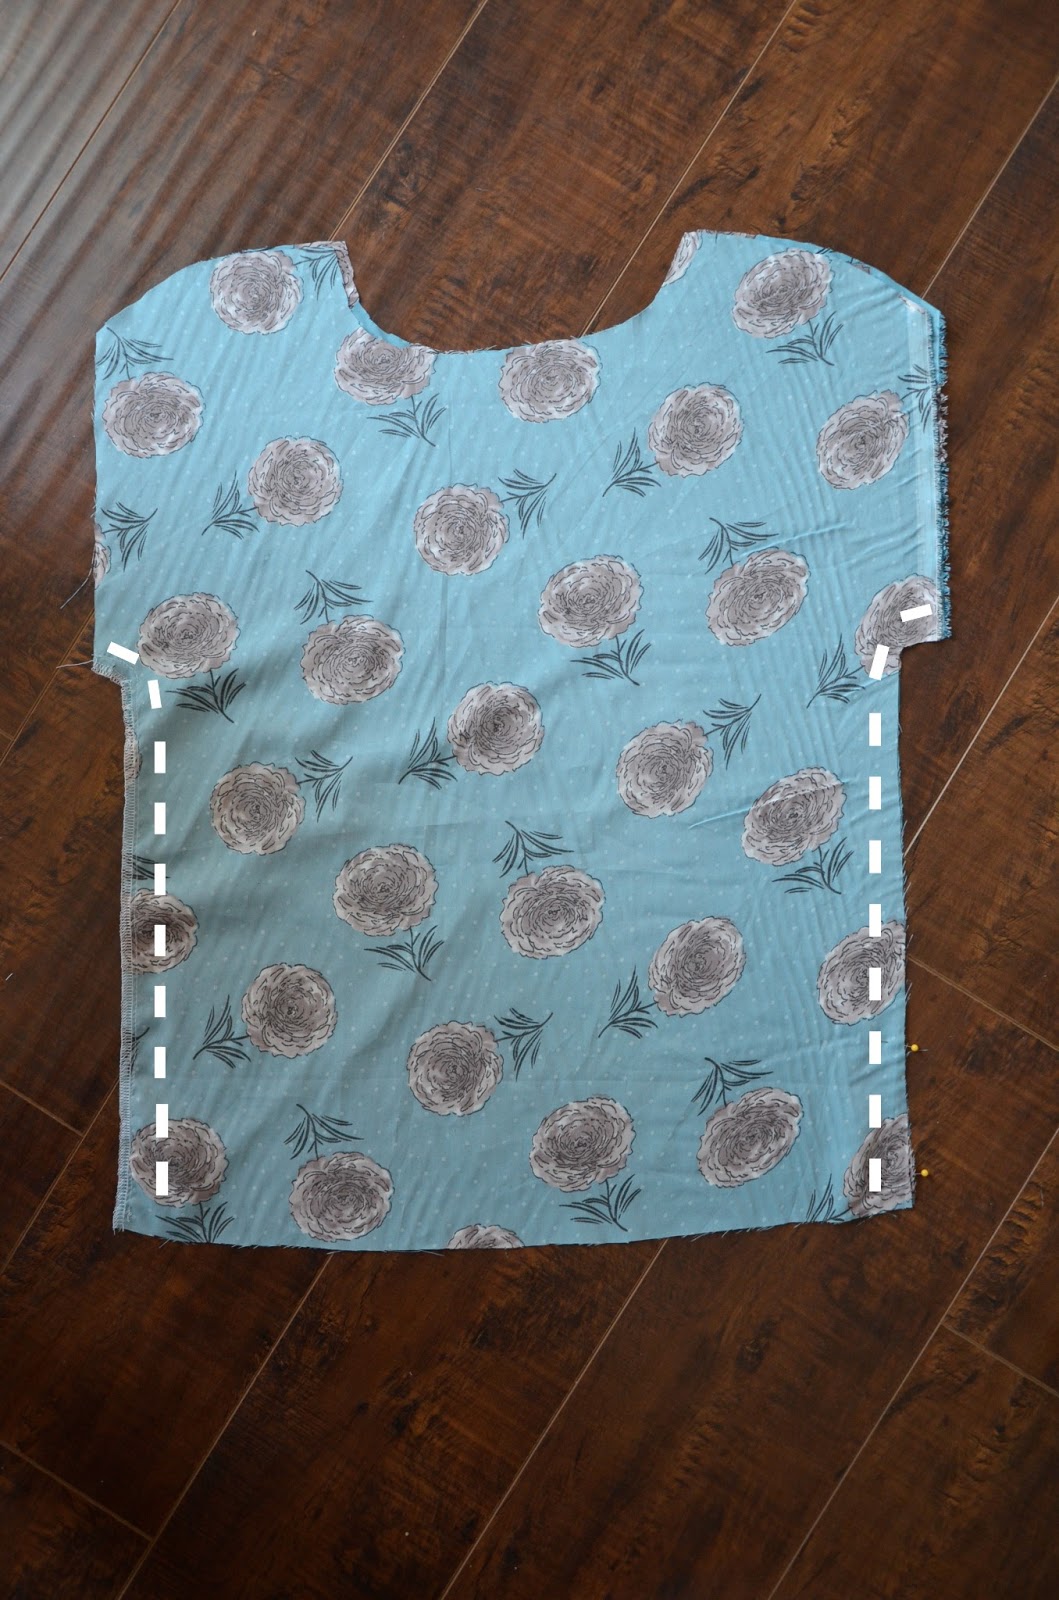
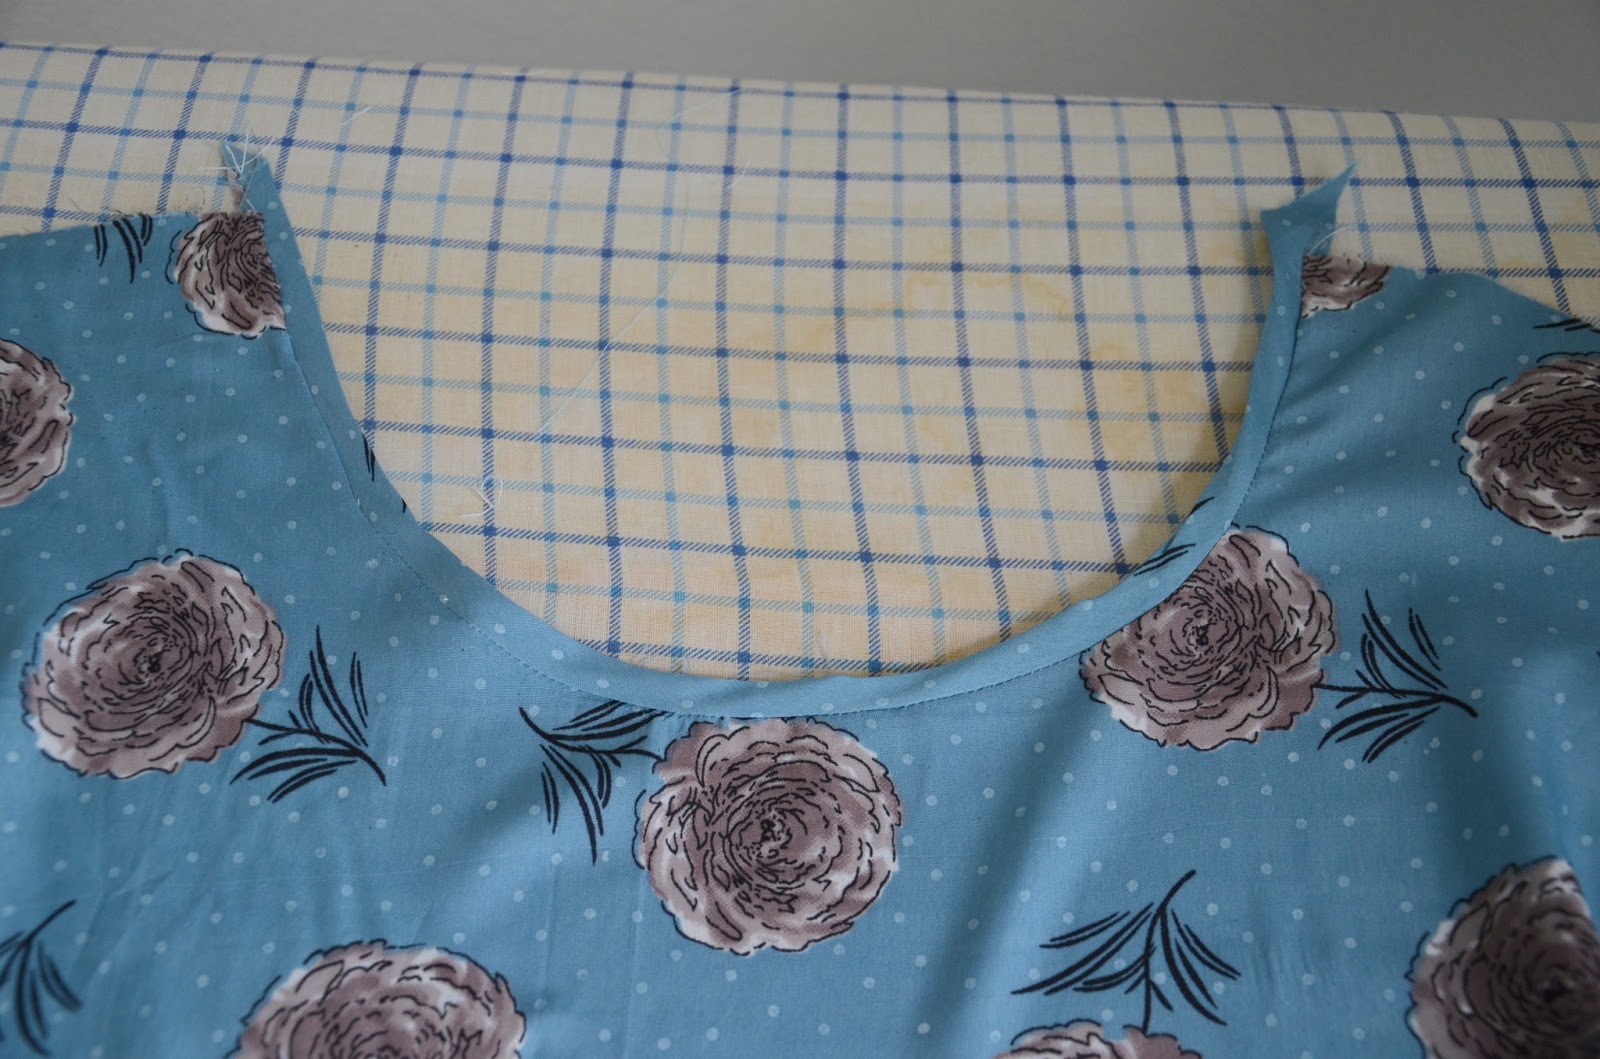
Step 4. Cut the front neckline to your desired depth.

Next, cut the neckline “ribbing.” Measure your neckline front from shoulder to shoulder, but measuring around the scoop of the neckline, and then subtract an inch from that measurement. Now cut a 1″ thick strip of fabric on the bias (so it should be as stretchy as possible) in that measurement length.
Repeat for the neckline back.

Fold your two strips of fabric in half (wrong sides together) and press. They should now be two long strips, 1/2″ wide each.
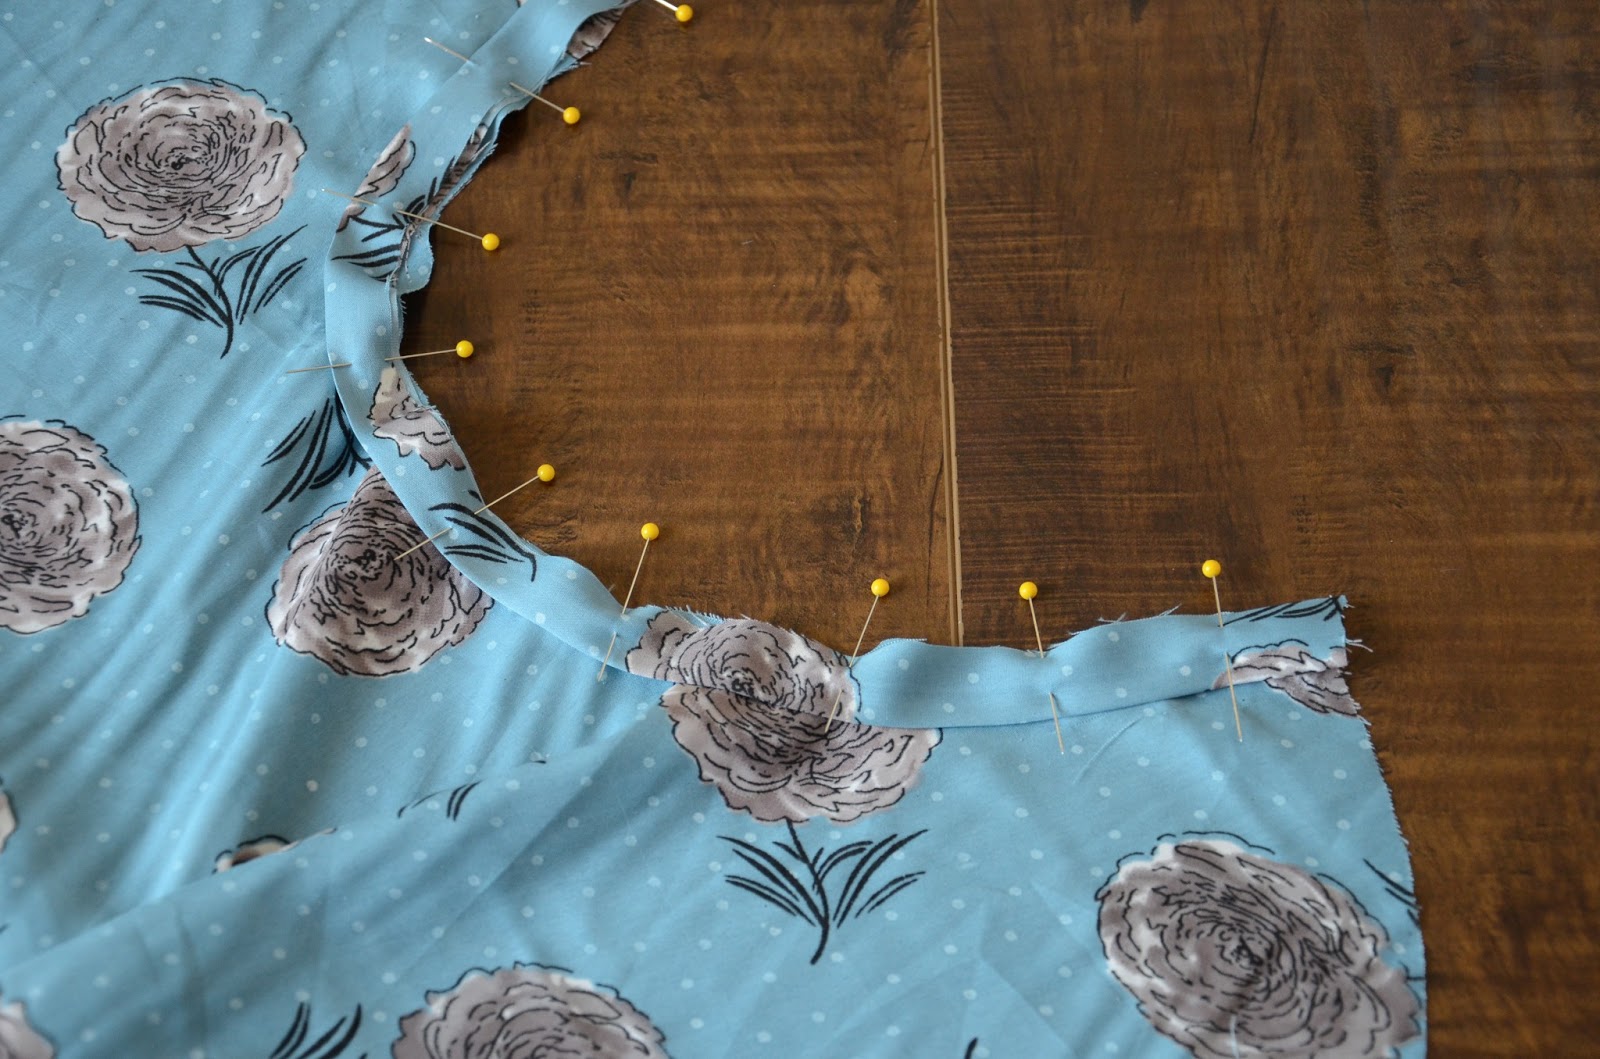
Pin the “ribbing” strips to the front and backs of your necklines (as seen below), making sure that the ends of your “ribbing” match up with the shoulders. The neckline will be bunched to accomodate the “ribbing’s” shorter length. Sew around the neckline, as close to the raw edge as you can, stretching the “ribbing” in between pins as you sew.
Press the ribbing flat and repeat for the neckline back.
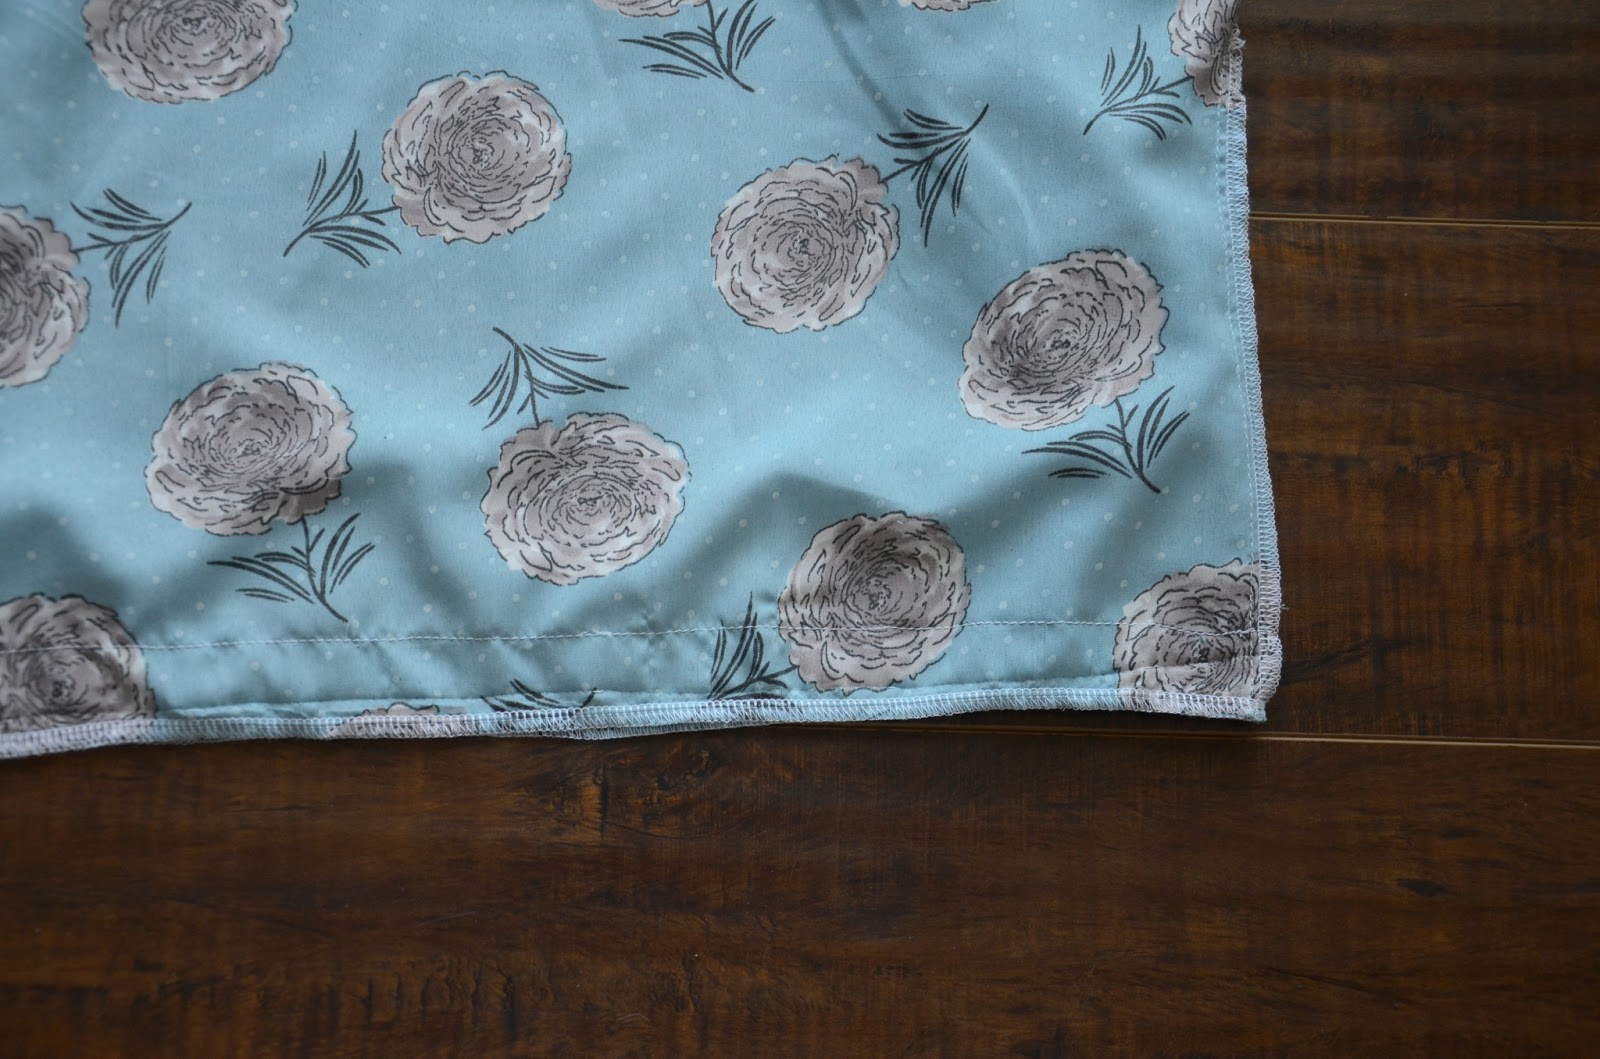
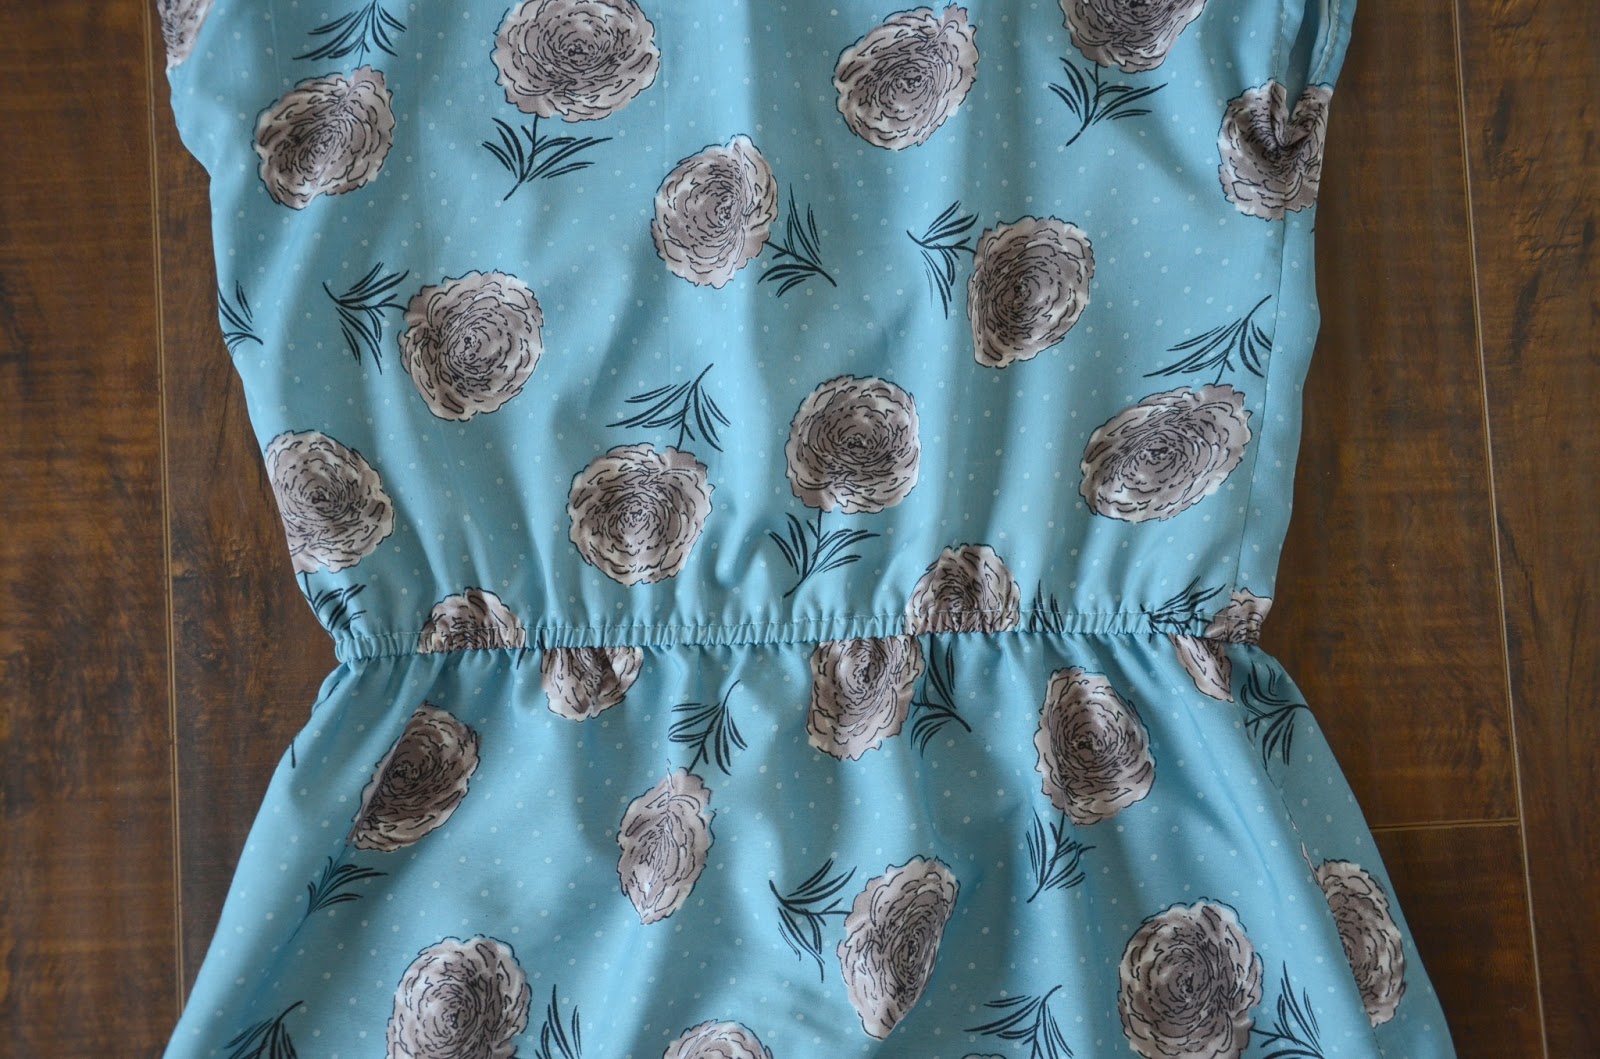
serge or zigzag the raw edge, but do not trim the large seam allowance since this will become the casing for your elastic.
Next, pin the large seam allowance up toward the top of the shirt and sew around the waistband again, 1/4″ above the previous seam. Leave two inches open at the end of this seam so you can insert the elastic.

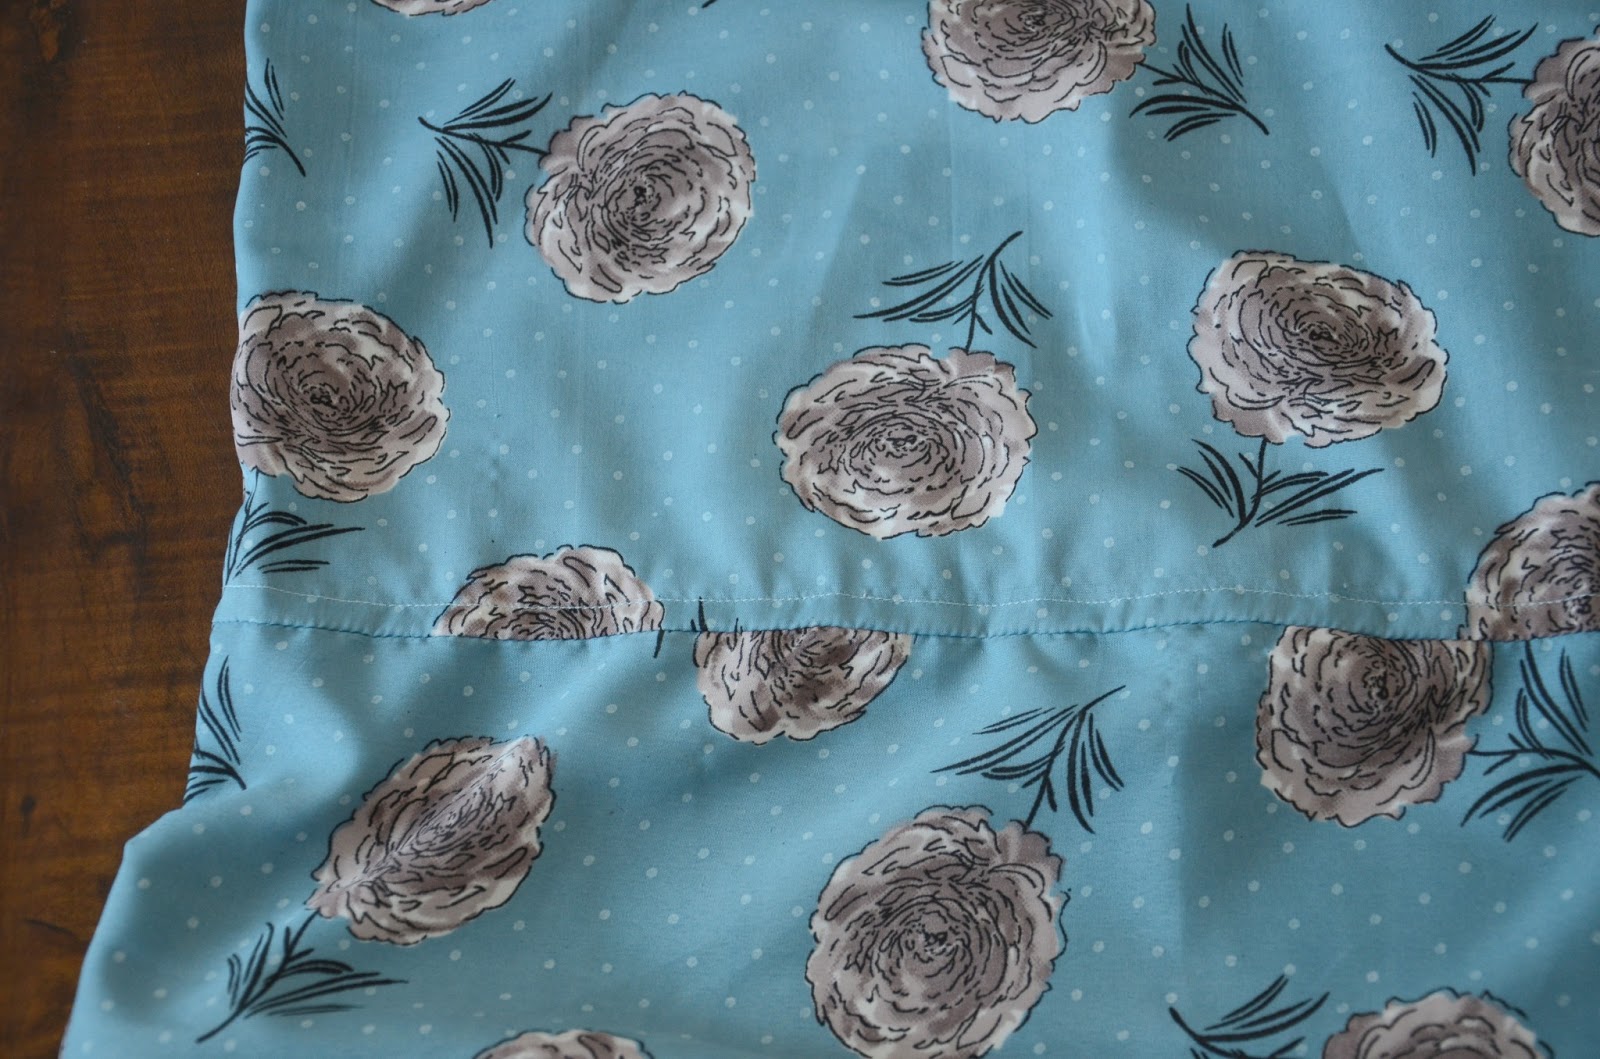
Measure your natural waist and cut a piece of elastic in that length. Thread the elastic through your casing, then sew the two ends together to make a circle. Sew up the two inch opening in the casing.
Step 7. Hem the dress to your desired length and you’re done!


That dress is beautiful! Great job on it.
Wow- this is gorgeous! You have my undying admiration, as usual 🙂
Gorgeous! I am so impressed- way to push through the seam unpicking. I can't handle it and usually give up at that point!
kilee
Don't be too impressed…I wouldn't touch the dress for about two weeks cause I was mad at it for being so difficult 🙂
Beautiful color and the dress looks awesome on you, great job. Love this tutorial
Love. Can't wait to make my own…now if the northwest would only warm-up.
Love. Can't wait to make my own…now if the northwest would only warm-up.
You're so crazy talented. This dress is super cute – you did a great job and I love your matchy outfits. 🙂
What an adorable dress! You are definitely a sewing rockstar, and your matching outfits are just too cute!
You are amazing. How you do this without a real pattern is beyond me. The dress is beautiful.
Love your dress. Gorgeous. You are very talented. I could never do that. YOu look very pretty in this dress.
Agi:)
vodkainfusedlemonade.com
Never say never! Even a year ago, I wouldn't have thought I could do it either! Lots of practice and lots of patience are paying off 🙂
I like this even better than the original! Gorgeous!
This turned out so cute, looks great on you!!
Kristina does the Internets
Love it! I've been looking for a high-low dress or skirt project. I like this one that I saw this one on c&c http://cottonandcurls.blogspot.com/2012/12/sheer-gathered-low-high-skirt-tutorial.html but I now I might have to make a dress too! Thanks for the tutorial!
Love Liz's high-low skirt tutorial…I might be making one of those for myself too 🙂
Gorgeous! I have scads of fabric I've been hanging on to to make a dress with, I'm going to try it now!
Send me a picture if you do make one! I'd love to see it!
Aaaagh! So stinkin' cute!!!!!
I'm glad we are friends so that when I attempt this and most likely fail, I can call you and be like "what did I do wrong!!!?" You look so cute and glamorous and the dress turned out so cute!
Cute dress and nice tutorial!
http://www.target.com/c/kate-young-for-target-brand-shop/-/N-55wot#?lnk=Other_HP_041413_ESPOT-0|ESPOT-0&intc=1008160|null
AHH you rock. Love this dress!
Everything you make looks amazing and so much easier than it really is!
Come enter my giveaway for some awesome accessories!
http://fourseasonsandaroadtrip.blogspot.com/2013/04/a-monday-giveaway.html
I love seeing a modest high low dress! Great work. You are beautiful!
Aubree
Lookfeelbebest.blogspot.com
Cute girl, and thanks for featuring see Kayla go.
oh I love this! So classy! I'd love to try this out to make a skirt! You and your friend look great!!
OMG HOW CUTE ARE YOU, MERRICK? Stop it, just stop it. It looks so good!
Very creative,has been great 🙂
[email protected]
LOVE this!! I just featured it on my facebook page!
Jenny Hall – owner/designer
Seamingly Smitten sewing patterns
https://www.facebook.com/SeaminglySmitten.DownloadableSewingPatterns
Thanks for sharing the post with us:).Love the "BOLD FLORALS: High-Low Dress Tutorial ". I found this "vintage plus size wedding dresses" Very good!
what a great tutorial! i really want to push myself through to doing this but I am stuck right now at step 6 ( i guess i need more visuals 😉
do you happen to have a picture of this -> "pin the large seam allowance up toward the top of the shirt and sew around the waistband again, 1/4" above the previous seam"? my brain won't allow me to comprehend this right now….
thank you!!
I did the same type of waistband in this tutorial — it has another photo that might help: http://8f8.ac9.mwp.accessdomain.com/2013/02/greek-goddess-shirt-dress-tutorial.html
Hope that helps!!
Nice dress, good job, come one
http://www.missesdressyonline.com/
Thank you so much for your wonderful tutorial. I just made this for my tween granddaughter and she loves it. So easy from start to finish.
Very Nice dress Tutorial
T Shirt And clothing