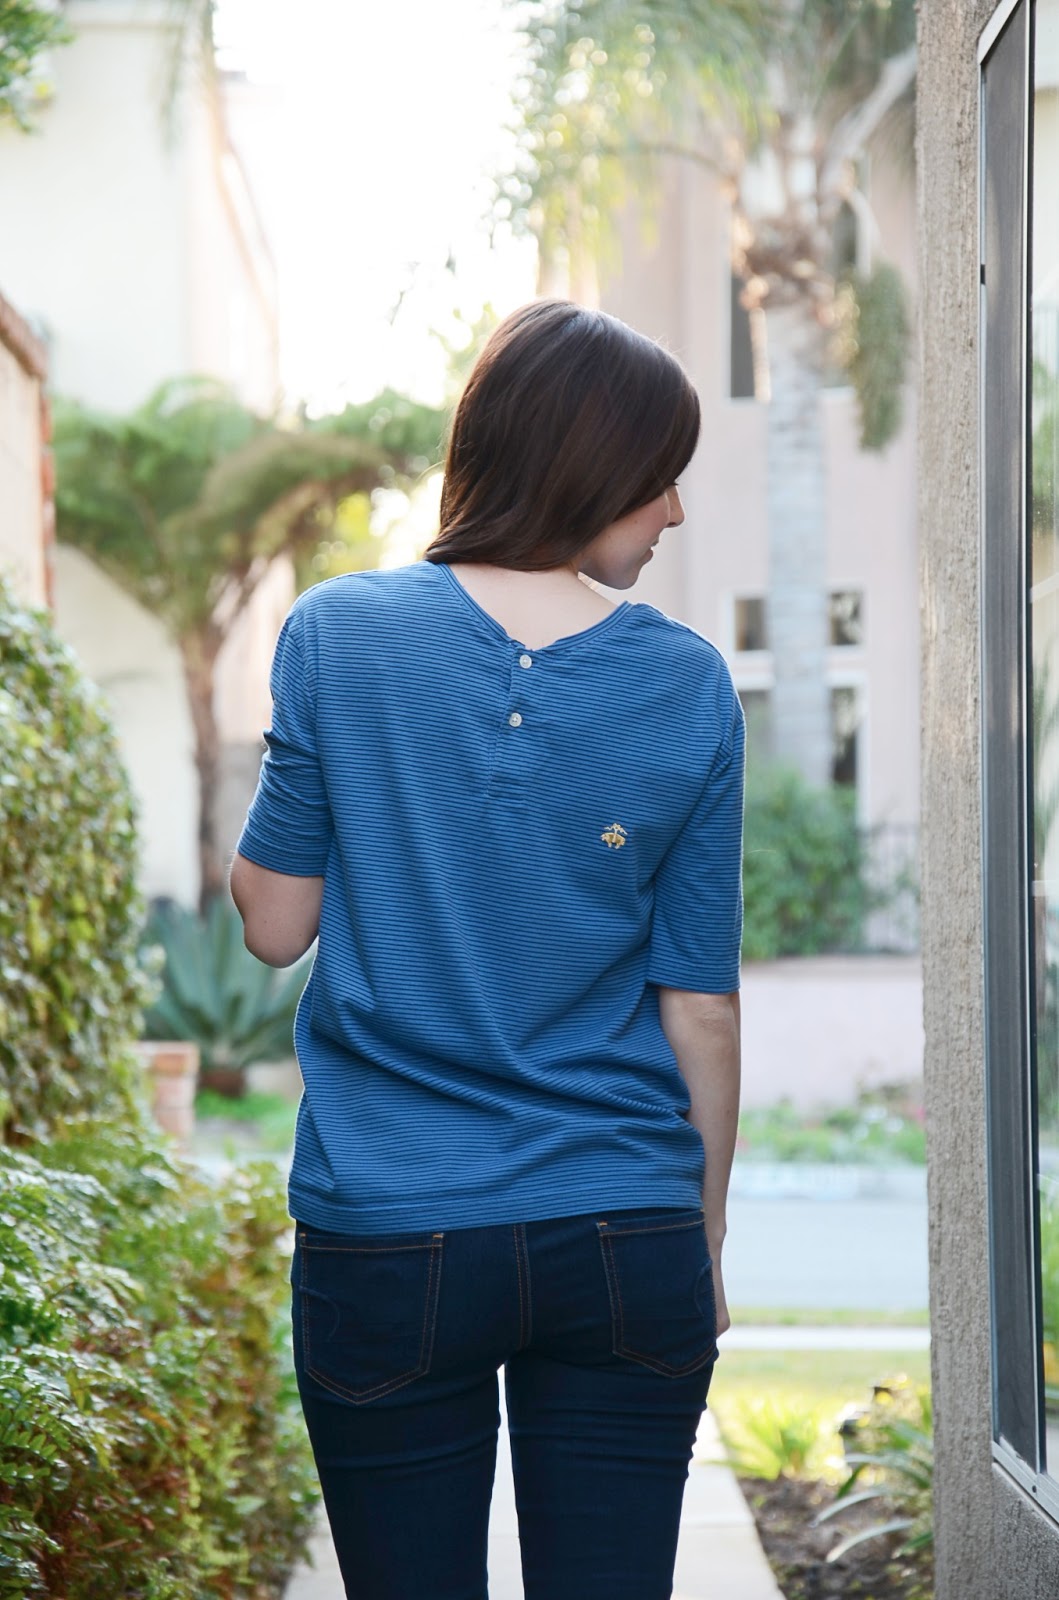
This was a polo that Philip bought a few years ago, but when it accidentally went through the dryer and shrunk quite a bit, he no longer liked it. It’s from Brooks Brothers, so it’s very high quality knit, and has a fantastic drape — the fit and feel is so nice. Also, with a year and a half of refashioning under my belt, this refashion turned out quite a bit better than the original polo refashion. I’m in love with my new slouchy half-sleeve tee.
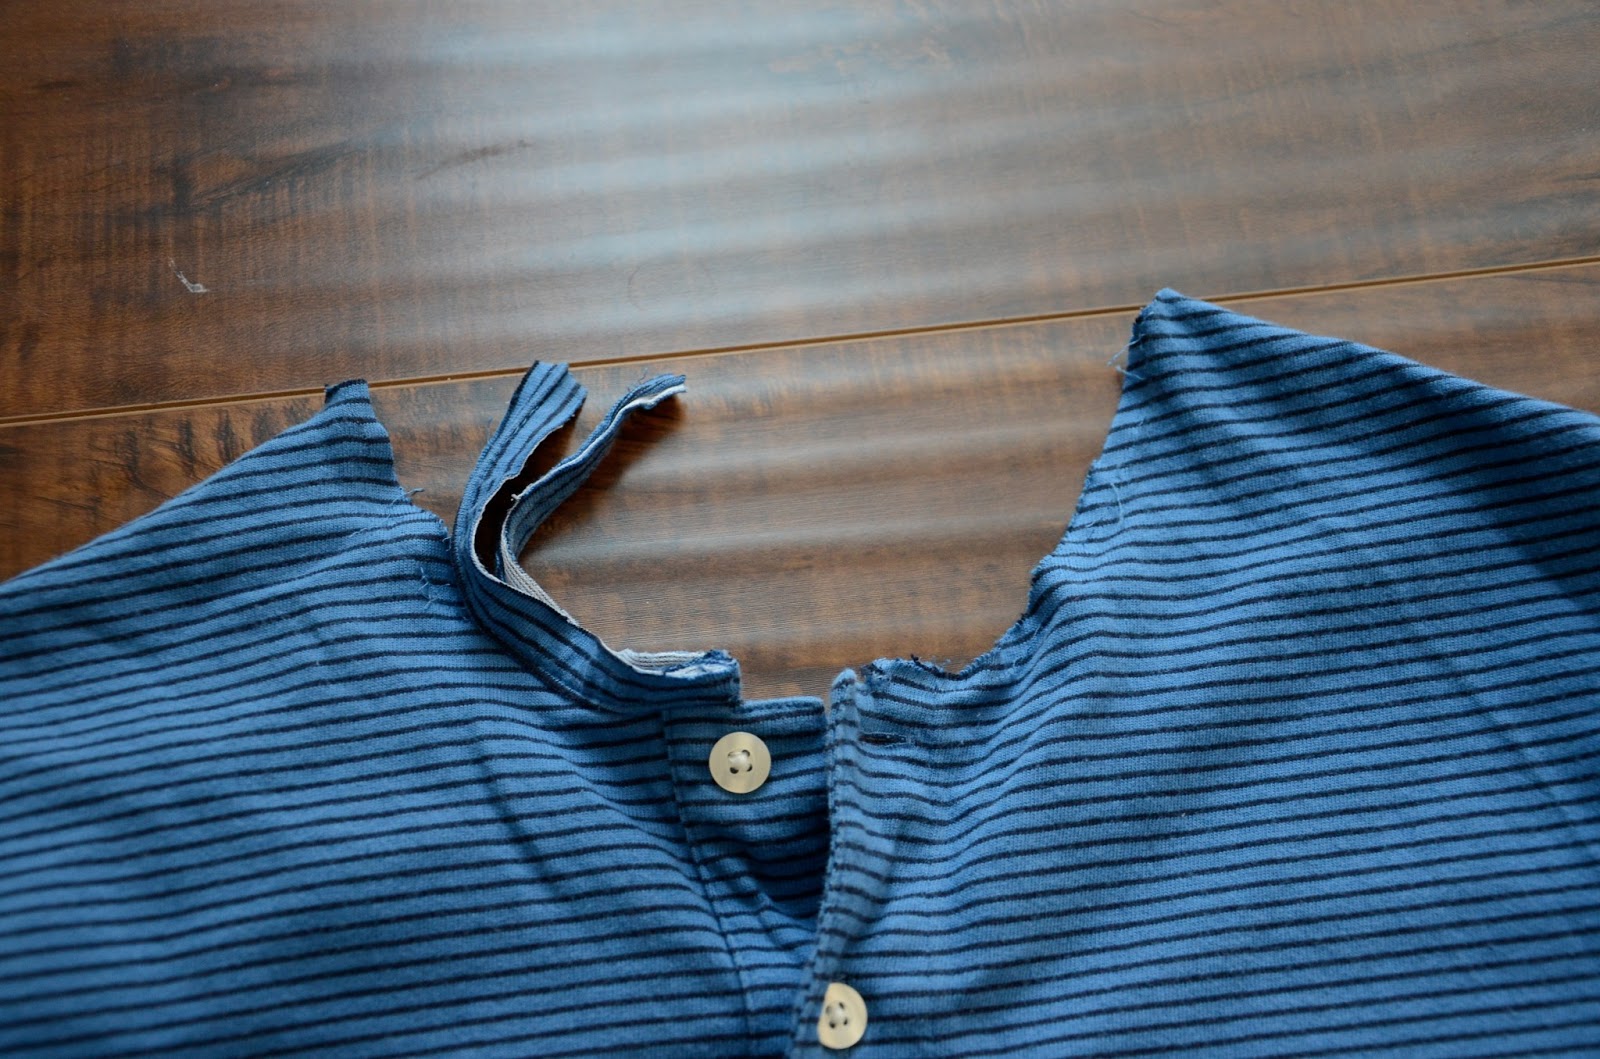
step one. Cut off the collar. Set it aside to use later.
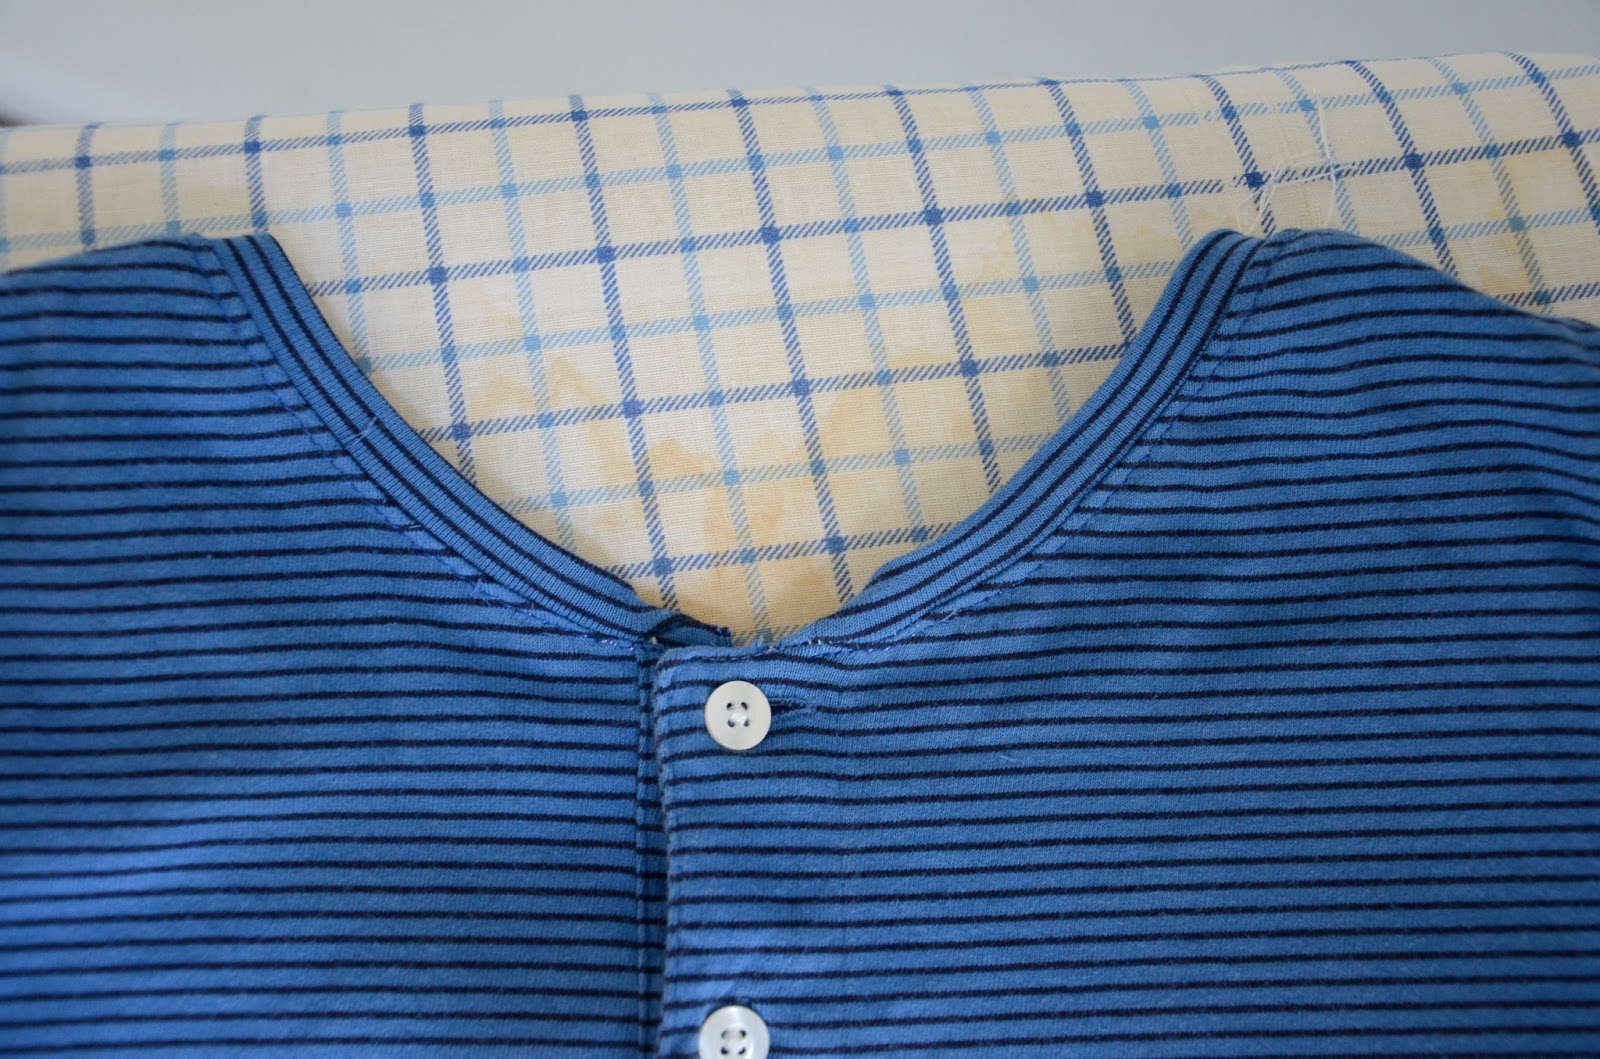
step two. Try the shirt on backward (buttons in the back) and mark the new neck hole with pins. Then cut out the neck hole, as shown below with the dotted line.
step three. Since we cut the collar off, go back with a seam ripper and remove the rest of the collar bits, as seen below.
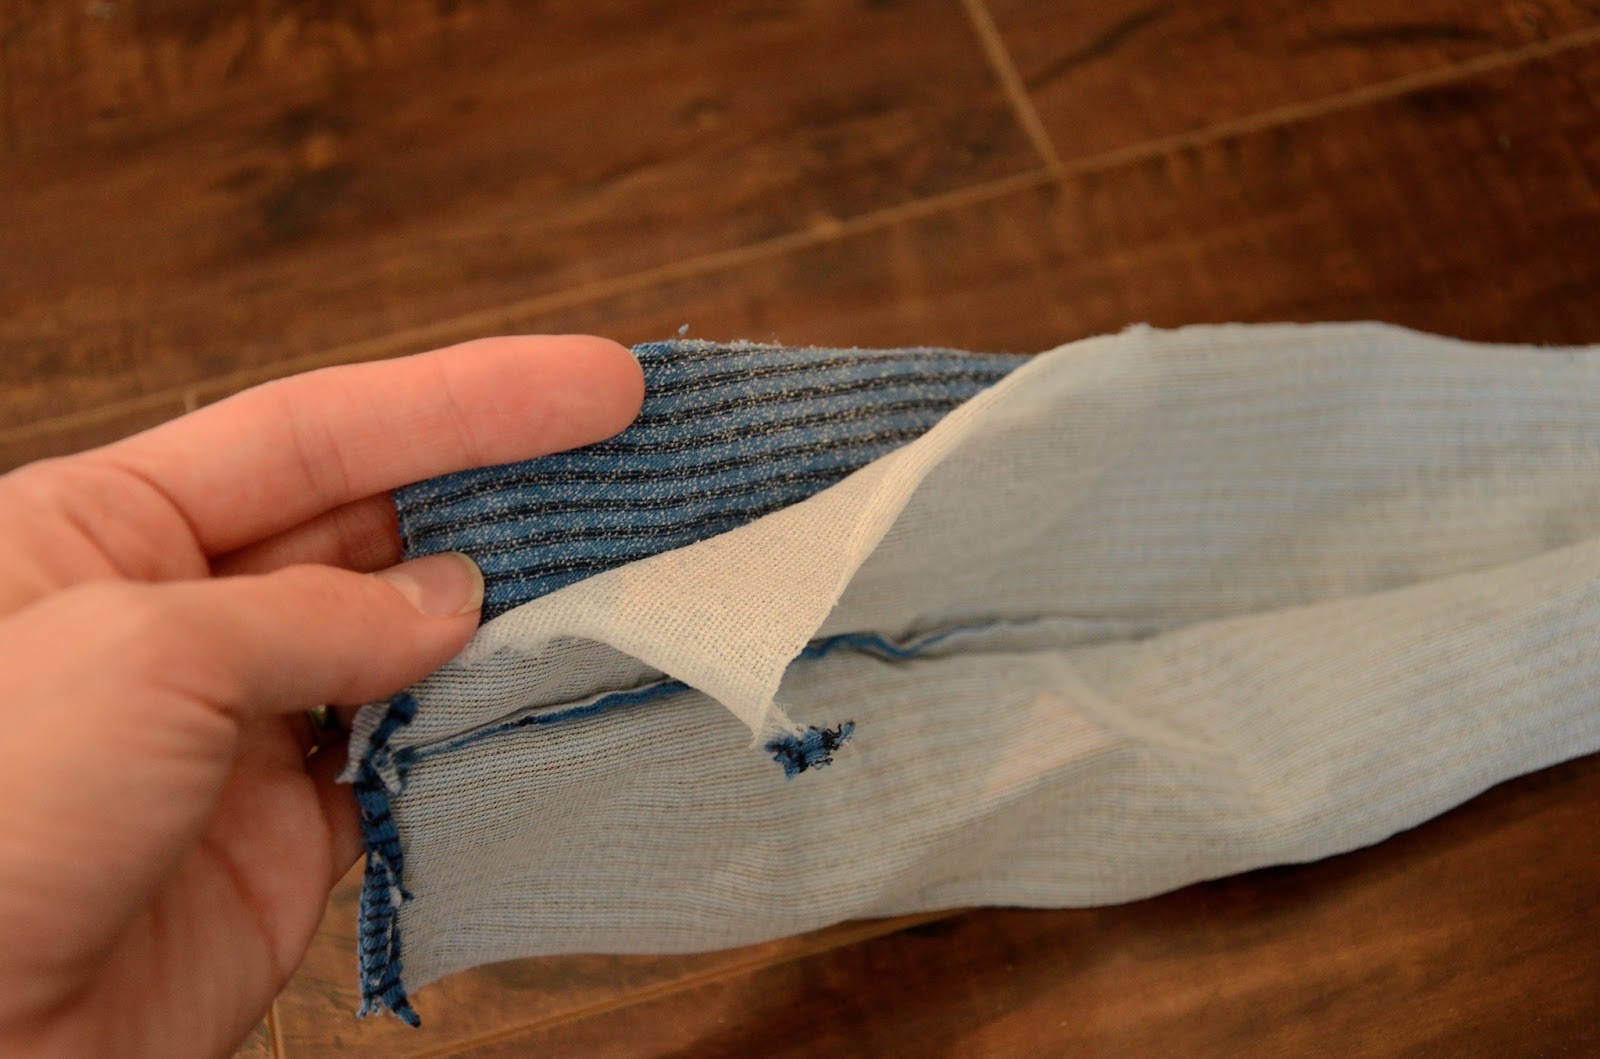
step four. go back to the collar piece and open it up, tearing off the interfacing if there is any.
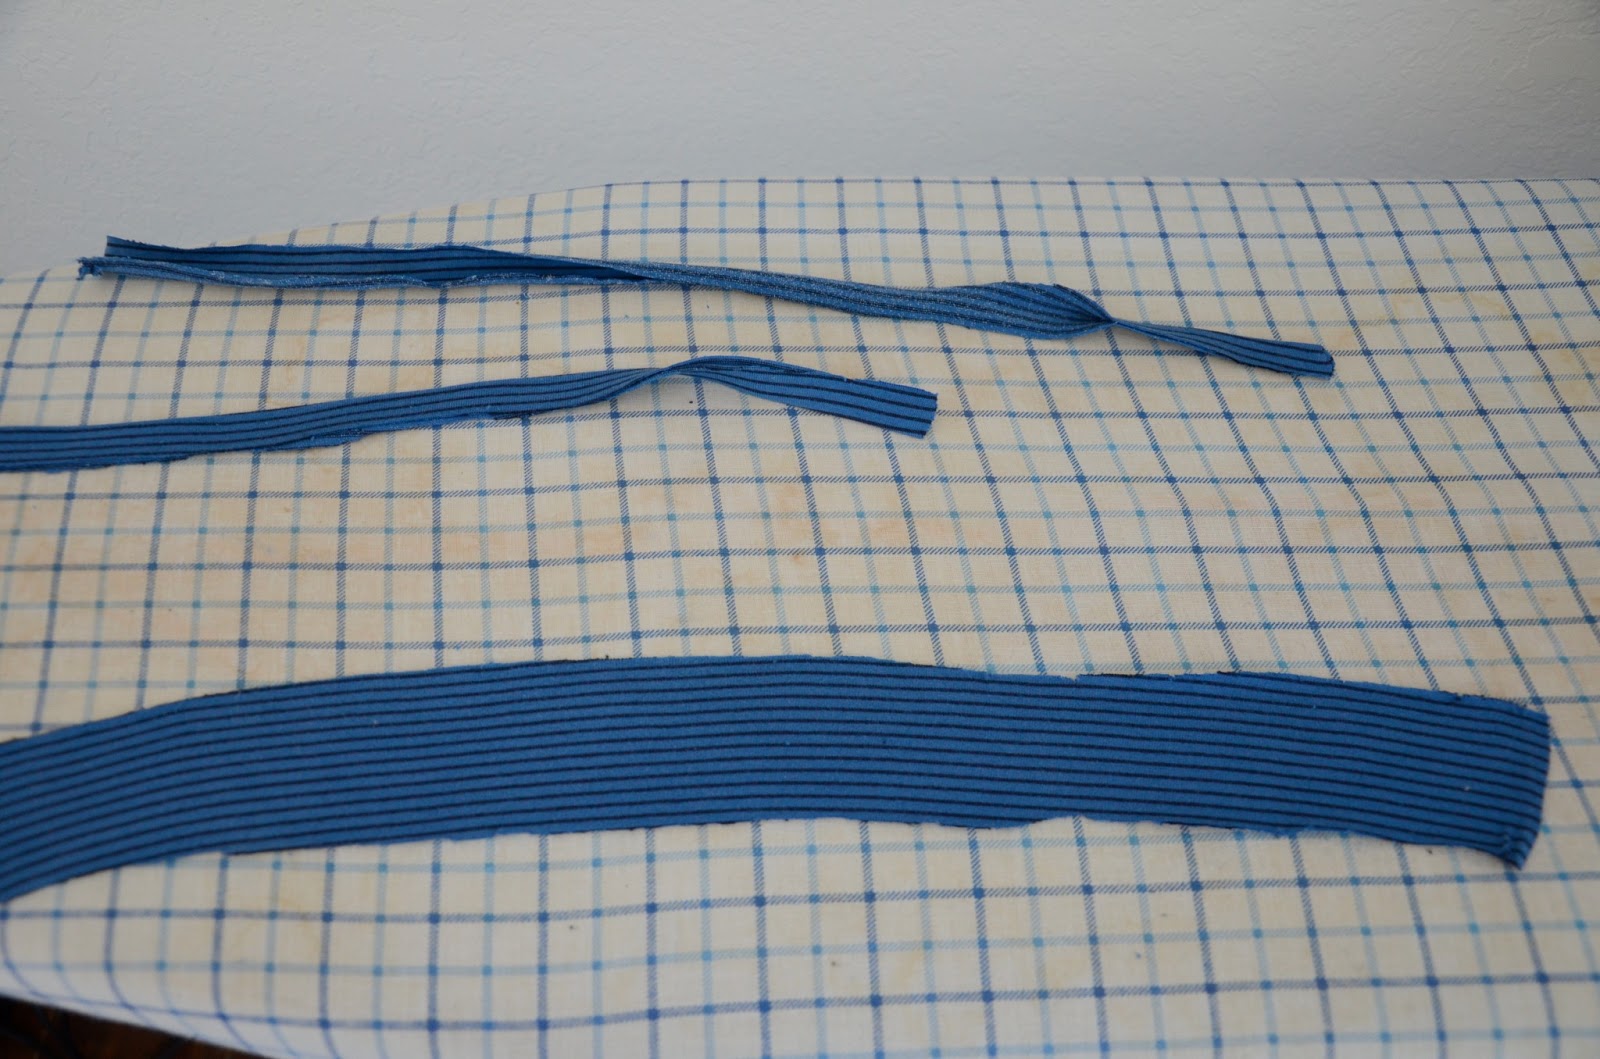
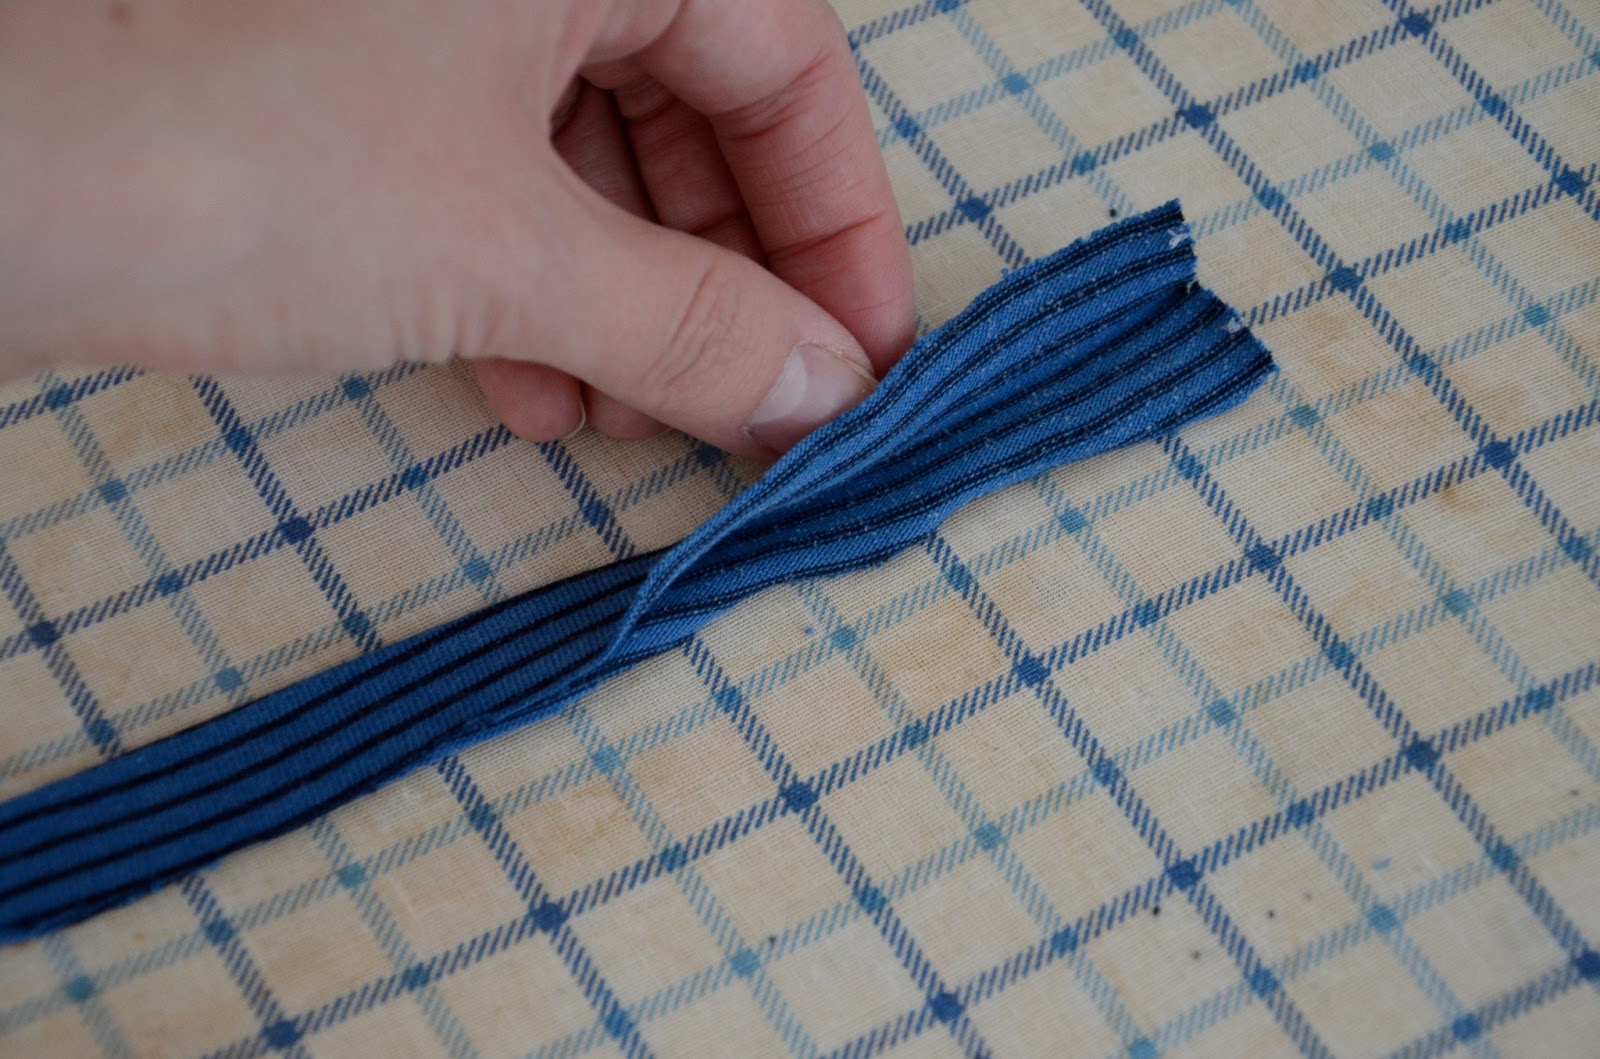
salvage as long of a strip as possible and iron it flat (as seen with the bottom strip in the photo below).
now fold it in half, wrong sides together, and press it flat. This will be the “ribbing” for your neckline. If you can’t get a long enough piece, just use a few pieces and sew them together.
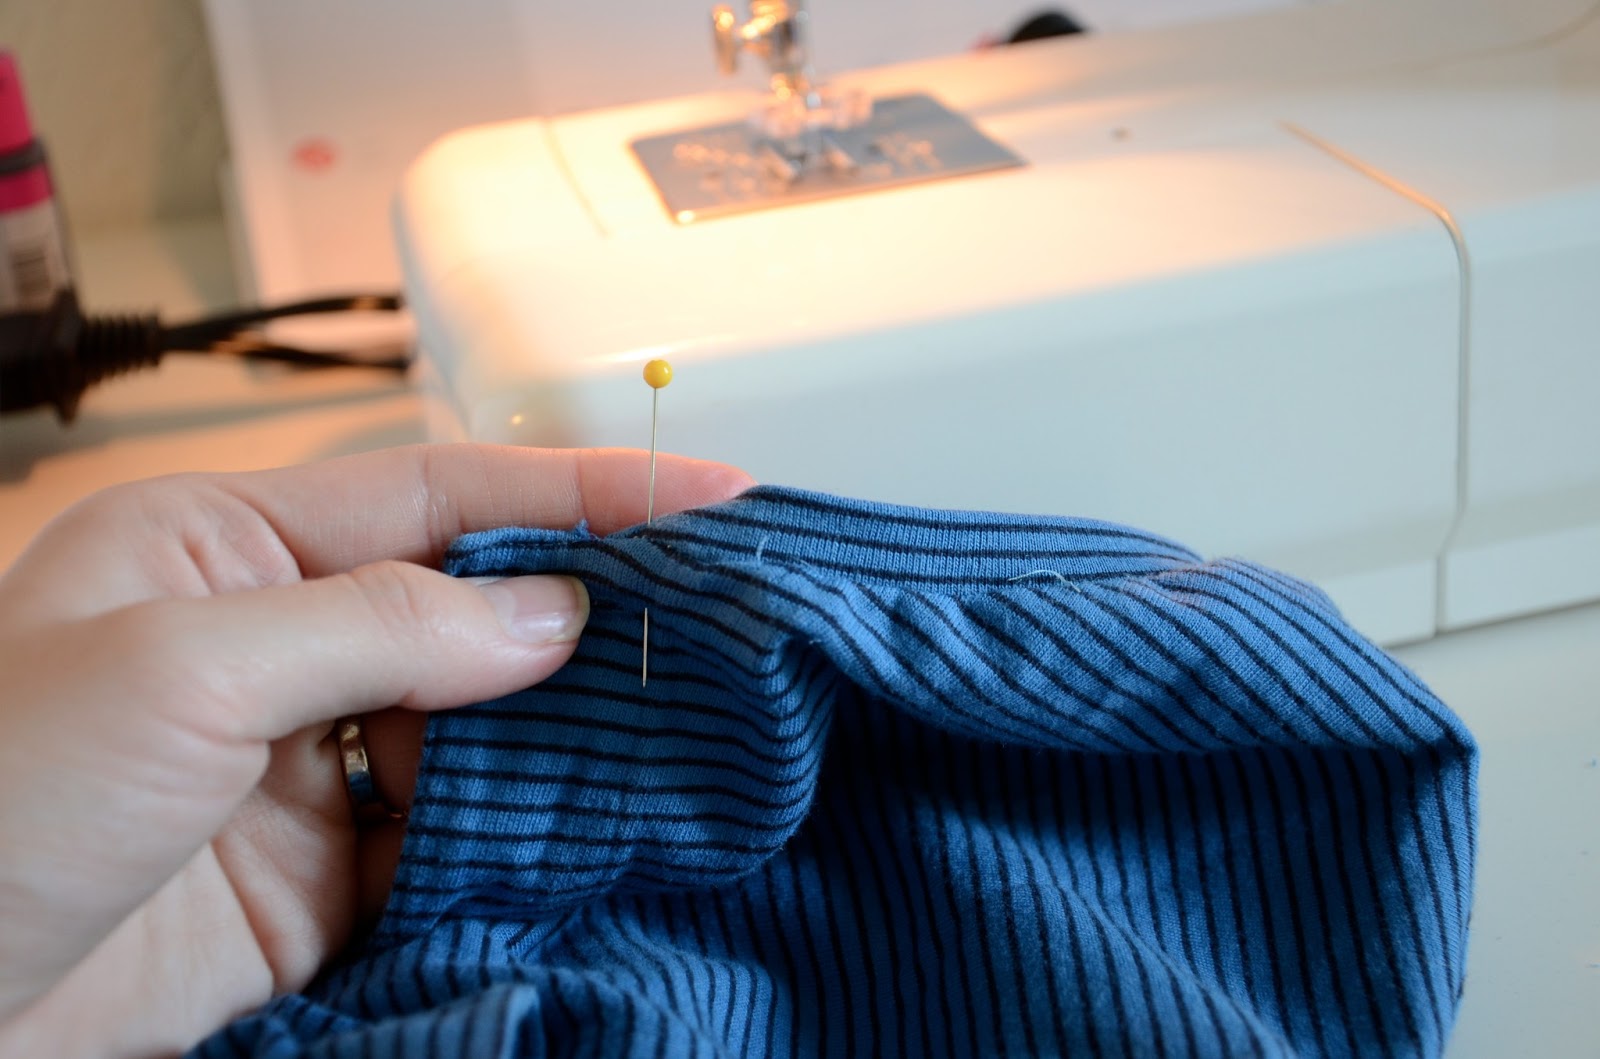
step five. attach the ribbing to the neckline with a straight stitch, as seen below.
The length of my ribbing was about 2 inches shorter than the neck hole, so I pinned it evenly and then pulled the ribbing in between pins as I sewed. This achieved a nice tight neckline. If your ribbing is the same length and isn’t pulled tight when sewn, the neckline will be wavy and loose.
Press the neckline flat and then sew around the neckline with a wide straight stitch just below the ribbing, as seen below.
Fold the raw ends of the ribbing down at an angle and pin, sewing over them to secure them in place as you sew that seam.
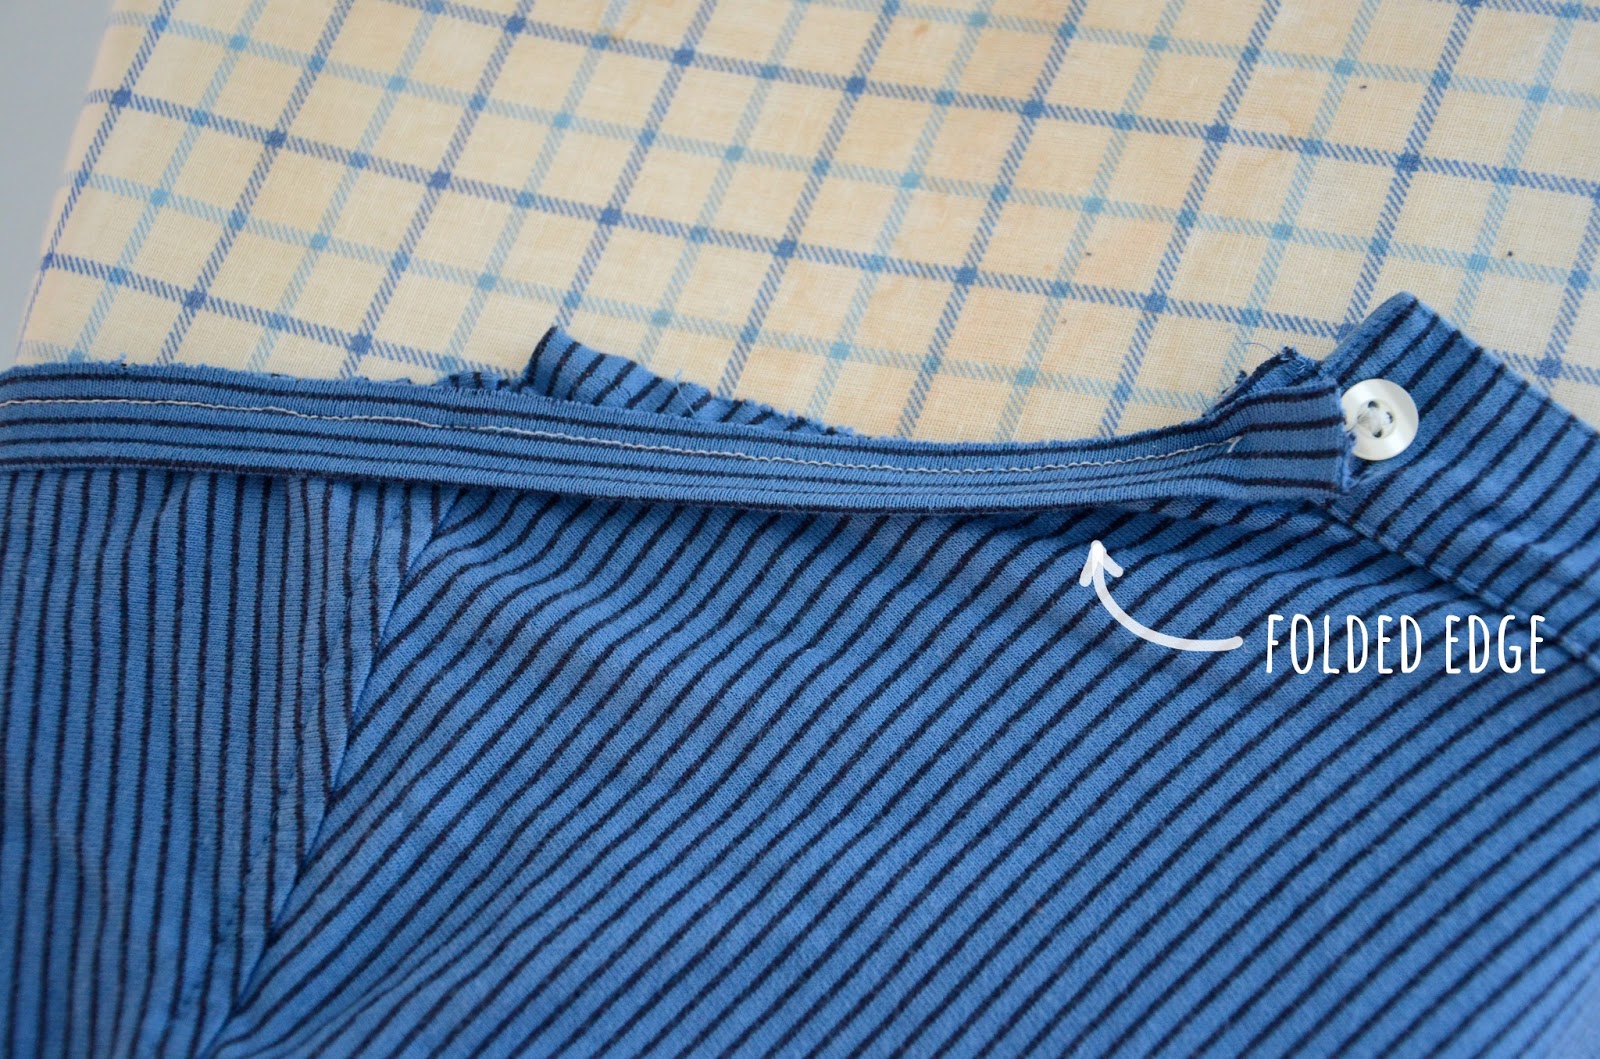
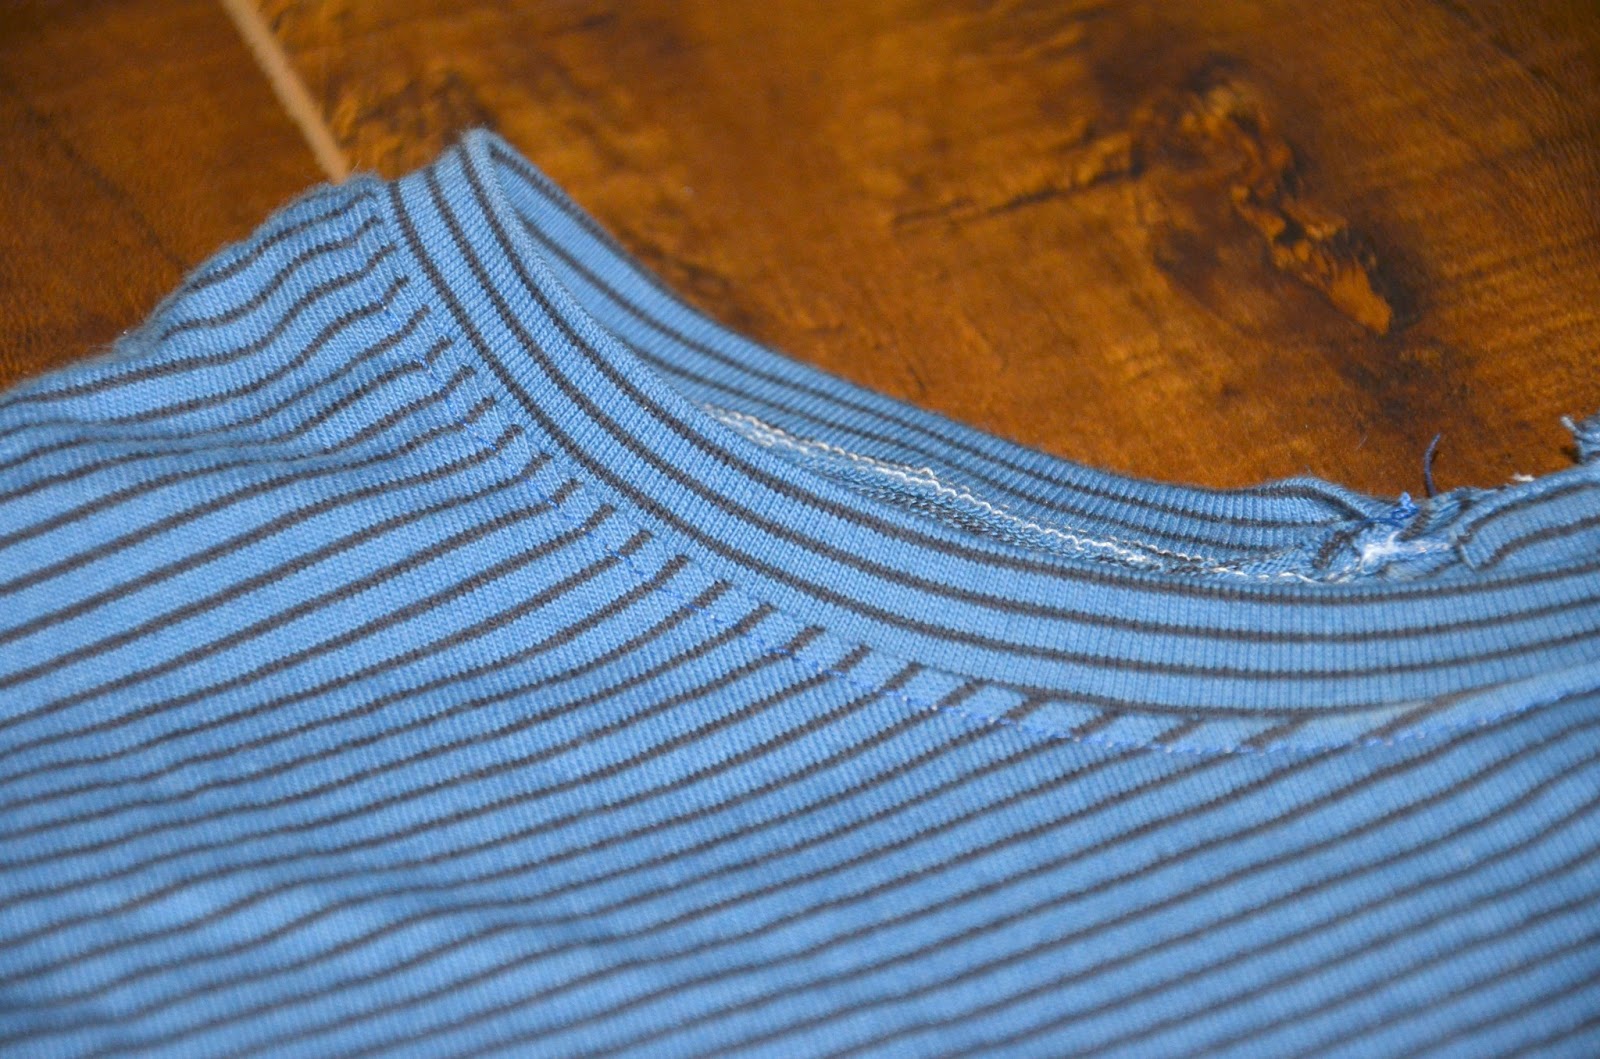
The front of your neckline will now look like this:
and the back will look like this:
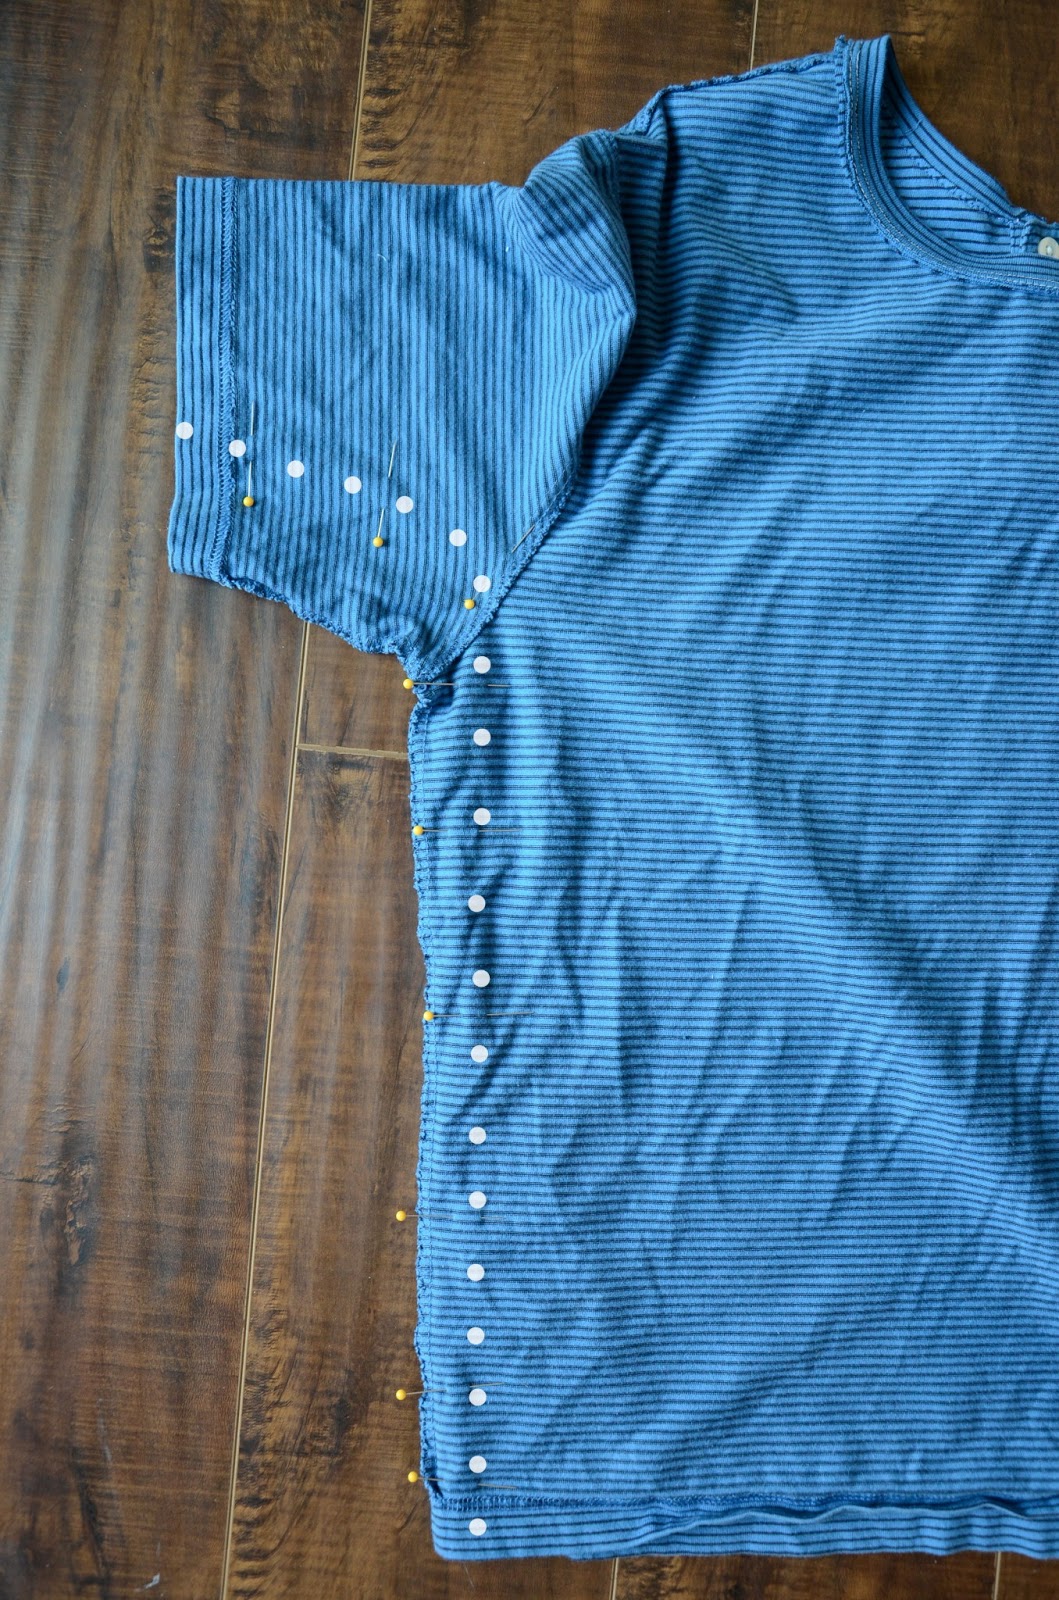
step six. try the shirt on and determine how much you want to take in on the sleeves and the sides. Then lay the shirt flat on the ground and pin in place. Then sew from the sleeve hem to the shirt hem with a straight stitch. Trim the seam allowance and serge or zigzag your raw edge (optional since knits don’t fray).
This was a polo that Philip bought a few years ago, but when it accidentally went through the dryer and shrunk quite a bit, he no longer liked it. It’s from Brooks Brothers, so it’s very high quality knit, and has a fantastic drape — the fit and feel is so nice. Also, with a year and a half of refashioning under my belt, this refashion turned out quite a bit better than the original polo refashion. I’m in love with my new slouchy half-sleeve tee.
step one. Cut off the collar. Set it aside to use later.
step two. Try the shirt on backward (buttons in the back) and mark the new neck hole with pins. Then cut out the neck hole, as shown below with the dotted line.
step three. Since we cut the collar off, go back with a seam ripper and remove the rest of the collar bits, as seen below.
step four. go back to the collar piece and open it up, tearing off the interfacing if there is any.
salvage as long of a strip as possible and iron it flat (as seen with the bottom strip in the photo below).
now fold it in half, wrong sides together, and press it flat. This will be the “ribbing” for your neckline. If you can’t get a long enough piece, just use a few pieces and sew them together.
step five. attach the ribbing to the neckline with a straight stitch, as seen below.
The length of my ribbing was about 2 inches shorter than the neck hole, so I pinned it evenly and then pulled the ribbing in between pins as I sewed. This achieved a nice tight neckline. If your ribbing is the same length and isn’t pulled tight when sewn, the neckline will be wavy and loose.
Press the neckline flat and then sew around the neckline with a wide straight stitch just below the ribbing, as seen below.
Fold the raw ends of the ribbing down at an angle and pin, sewing over them to secure them in place as you sew that seam.
The front of your neckline will now look like this:
and the back will look like this:
step six. try the shirt on and determine how much you want to take in on the sleeves and the sides. Then lay the shirt flat on the ground and pin in place. Then sew from the sleeve hem to the shirt hem with a straight stitch. Trim the seam allowance and serge or zigzag your raw edge (optional since knits don’t fray).
your refashioning tutorials are so good! I recently refashioned some old pants from one of your tutorials and absolutely love them! (I blogged about it here: livelaughloveandlindsay.blogspot.com/2013/02/refashioned-skinny-pants.html)
This is a really good tutorial. I love your blog because on a college budget, I can't really always afford to buy new clothes, but when you put up tutorials/ideas like this I can take old clothes and make them better! I'll definitely be trying this out with some of my old, too-big high school clothes that having been sitting around in my closet for the past couple years. Thanks for taking the time to explain all of it step-by-step!
I love the way this turned out! It looks great! Your first post about refashioning a polo is how I found your blog! I love the tutorials and can't wait to try this one out soon!
MB, that is a really fine refashioned shirt. So much so that I find myself moved to comment on it, even though I'm not interested in refashions, from the TSA line in the Philadelphia airport. Well done.
What sewing machine do you have? Mine is just about the crappiest little thing. I want to chuck it across the room every time I get it out. The tension is always messed up.
These shirts are great. They are fully cut, made of a nice stable cloth, and seem to be well made. I liked my first two so much I ordered two more. Always need to have sport tek port authority polo shirts for either jeans or jacket and this one is perfect.
No, I don't have any tutorials like this. I would recommend going to a tailor for wedding dress alterations, as those are much more important and delicate, and also use fabrics that are tough to work with. Good luck!
This is such a neat refashion. I have quite a few solid color women's polo shirts that are a bit too big for me to wear now. Now I finally have a summer project to begin! http://bfrog.com/solid-color-womens-polo-shirts/
I love the great job you did on this clever remake! I like the logo. Particularly if the shirt logo is a cute logo or one that is a well respected brand!
Hi,
Best apparels site for man and woman and also for kids with specials discount with free shipping so pease click for amazing apparels Champion Adult Short Sleeve T Shirt
Your website is very inspiring with high-quality content. We are sure that you will find additional useful information on our website. Come on, visit us at Konveksi Seragam Kerja and we can collaborate with each other.


This is great! Can't wait to try it. Thank you!
your refashioning tutorials are so good! I recently refashioned some old pants from one of your tutorials and absolutely love them! (I blogged about it here: livelaughloveandlindsay.blogspot.com/2013/02/refashioned-skinny-pants.html)
thanks for the tips & inspiration 🙂
This is a really good tutorial. I love your blog because on a college budget, I can't really always afford to buy new clothes, but when you put up tutorials/ideas like this I can take old clothes and make them better! I'll definitely be trying this out with some of my old, too-big high school clothes that having been sitting around in my closet for the past couple years. Thanks for taking the time to explain all of it step-by-step!
you are so talented at refashioned old clothes and making them look fab — thanks for sharing this! xo
http://allthingsprettyandlittle.blogspot.com/
I love the way this turned out! It looks great! Your first post about refashioning a polo is how I found your blog! I love the tutorials and can't wait to try this one out soon!
oooo i totally love this!
K
Really nice!
You are able to refashion everything!!!
Kiss
Sara
This is Sara
This is great! My husband is not going to know what hit his closet once I start raiding it!
Wait. This is adorable! How are you so creative??
http://sistersintherain.blogspot.com/
This is REALLY cute–i love it!!
Wow! This turned out so great, looks a million times better than the original! I'm trying this out asap, thanks for the step by step tutorial.
MUCH cuter! It's such a gentle, subtle refashion with huge results. Brilliant.
I love this!! Think I'll try it with my daughter's school polos.
My DH has so many polos that this is the case with – hello new shirts for me!!!
Love it! I can't wait until I'm a little more confident with my machine so I can actually try them.
Once again, you amaze me with your skills!
http://www.kacieskloset.blogspot.com
http://www.daisyraeboutique.com
It turned out great and fits you nicely. You gave me an idea on what to do with my shirts that are too big for me.
Wow, it looks great!
xx Allie | A Song to Pass the Time
MB, that is a really fine refashioned shirt. So much so that I find myself moved to comment on it, even though I'm not interested in refashions, from the TSA line in the Philadelphia airport. Well done.
so cute! This is definitely something I want to try.
you are totally sticking to your guns and stepping up your sewing tutorials! this looks amazing!
unrelated to the re-fashion….where did you get those shoes?
Target, last year!
What sewing machine do you have? Mine is just about the crappiest little thing. I want to chuck it across the room every time I get it out. The tension is always messed up.
Oh and ps, this is amazing. And it doesn't look that hard. This is something I can do Merrick!! YAY!
So cute!! holy cow you are talented!
WHOA! What a chic transformation! Can't believe my eyes… and love the back. NICE WORK
These shirts are great. They are fully cut, made of a nice stable cloth, and seem to be well made. I liked my first two so much I ordered two more. Always need to have sport tek port authority polo shirts for either jeans or jacket and this one is perfect.
What a lovely reuse! Compliments and greetings from Italy
Liz
Thanks for the tutorial! It has inspired me to turn a lot of my clothes around but I started with the basics:
http://ohthatscloseenough.wordpress.com/2013/06/07/my-take-on-merricks-art-polo-refashion/
You're amazing!
This was a nice shirt, I was great impressed at the quality of this shirt. You should consider this shirt.
http://www.apparelnbags.com/port-authority/index.htm
hiya … I need to take in my wedding dress at the bust (the sides are too low to just take it – would you have a blog that shows how please ??
No, I don't have any tutorials like this. I would recommend going to a tailor for wedding dress alterations, as those are much more important and delicate, and also use fabrics that are tough to work with. Good luck!
This is really a very good idea, thanks for sharing 🙂
This is such a neat refashion. I have quite a few solid color women's polo shirts that are a bit too big for me to wear now. Now I finally have a summer project to begin! http://bfrog.com/solid-color-womens-polo-shirts/
Cute from the front but that logo makes it look like you have a shirt on backwards. A lot of work for something that looks so “homemade.”
I love the great job you did on this clever remake! I like the logo. Particularly if the shirt logo is a cute logo or one that is a well respected brand!
This polo design is best ever this is first time i’ve ever seen you blog is great
Hi,
Best apparels site for man and woman and also for kids with specials discount with free shipping so pease click for amazing apparels
Champion Adult Short Sleeve T Shirt
amazing wardrobe , the author explain it very well
https://www.ustradeent.com/adult-4-3-oz-ringspun-cotton-t-shirt-154967.html
-annachinn
[…] DIY Polo Refashion […]
Your website is very inspiring with high-quality content. We are sure that you will find additional useful information on our website. Come on, visit us at Konveksi Seragam Kerja and we can collaborate with each other.
Warm Regard.