While I’m out on maternity leave, taking care of our sweet little Buck, I have a few amazing bloggers filling in for me to share some of their awesome refashions!
Hi Everyone! I’m Brittany of The Crafted Cure and I’m beyond thrilled to be guest-posting here at Merrick’s Art today. (Hi Merrick! Hi baby!)
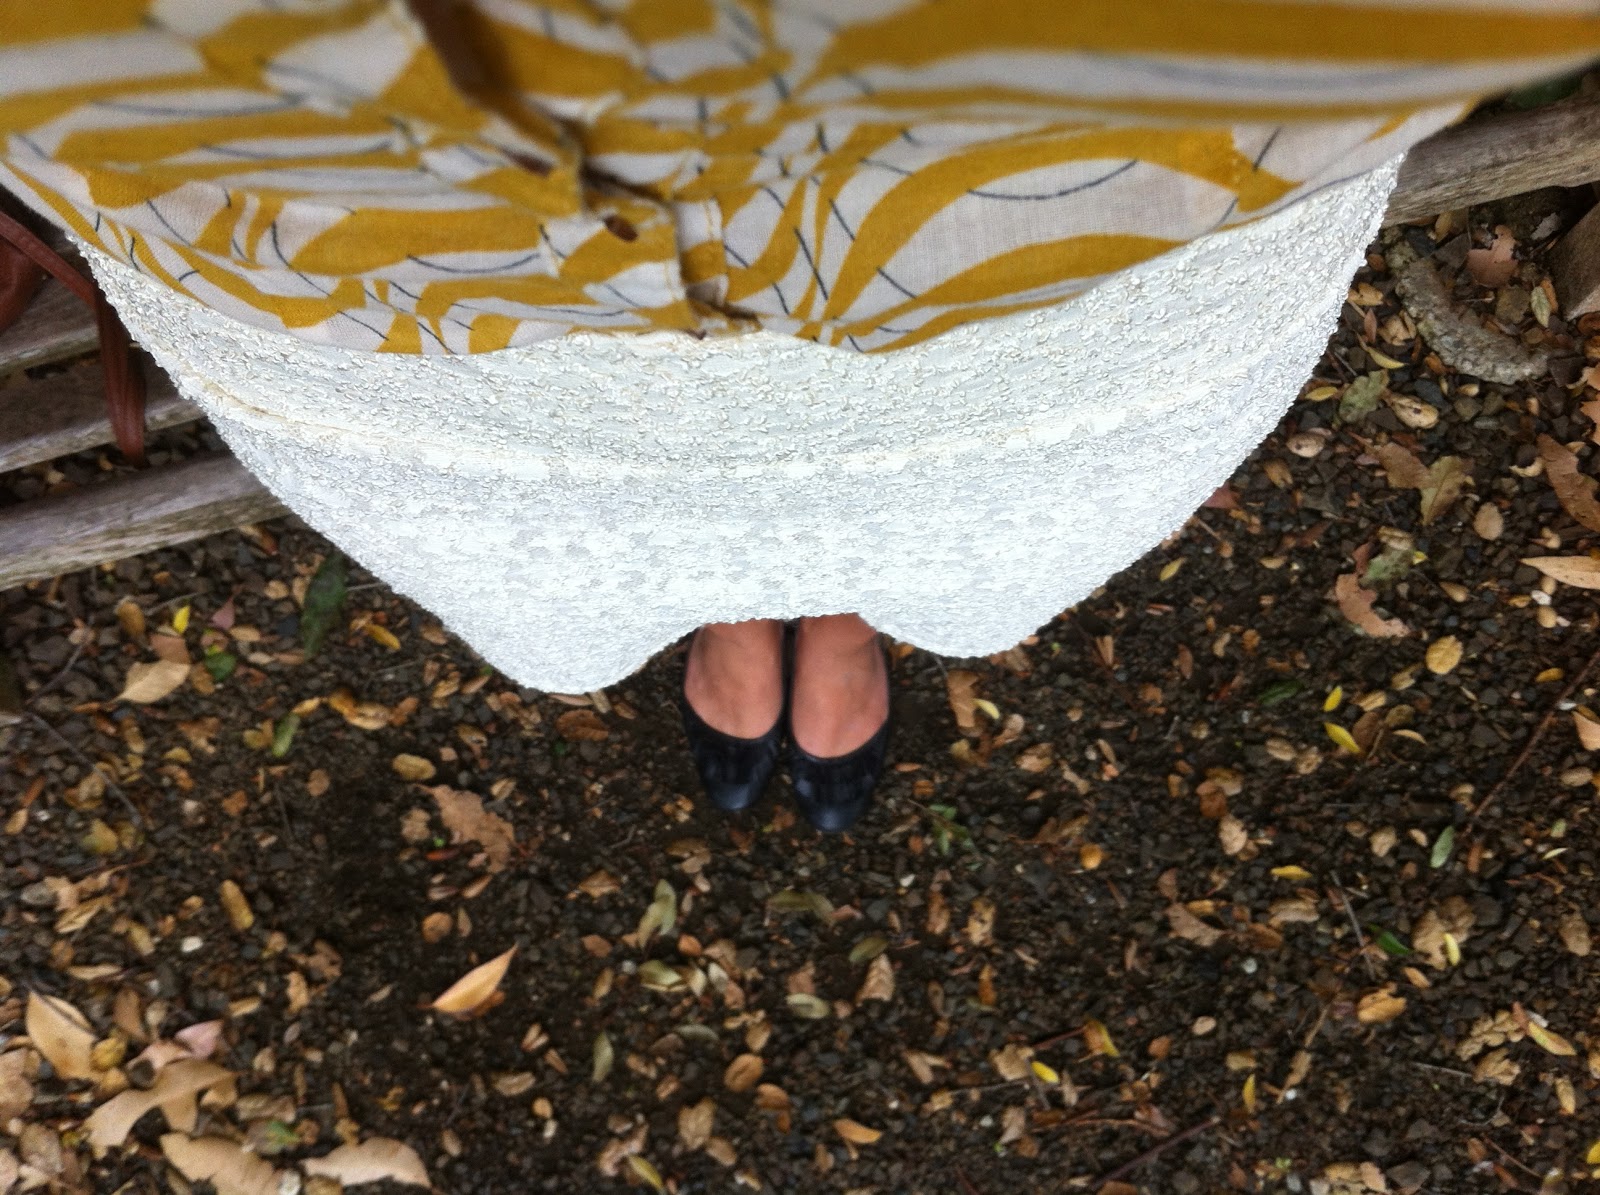
Today I’m going to show you one of my favorite thrift-store refashions ever, and show you what it takes to make one for yourself, too.
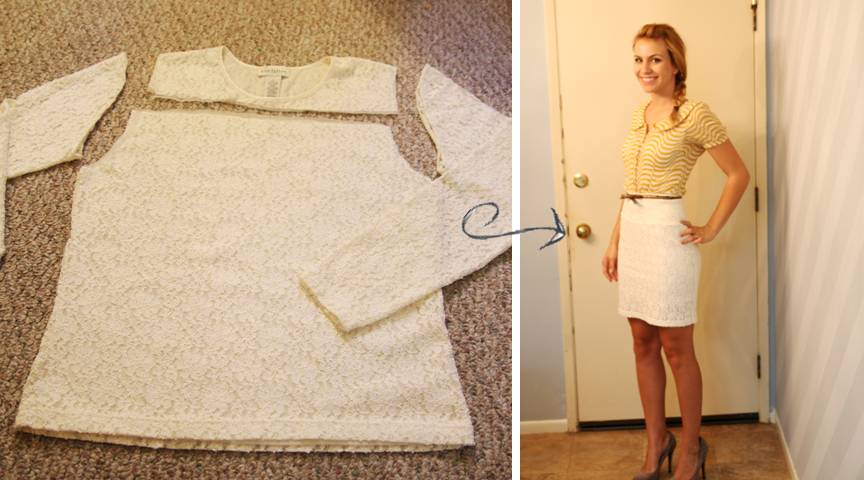
I’m giddy with joy at how this project turned out.
The whole shirt-turned-skirt concept isn’t really a new thing, but I’m going to let you in on my favorite little secret weapon on this whole project:
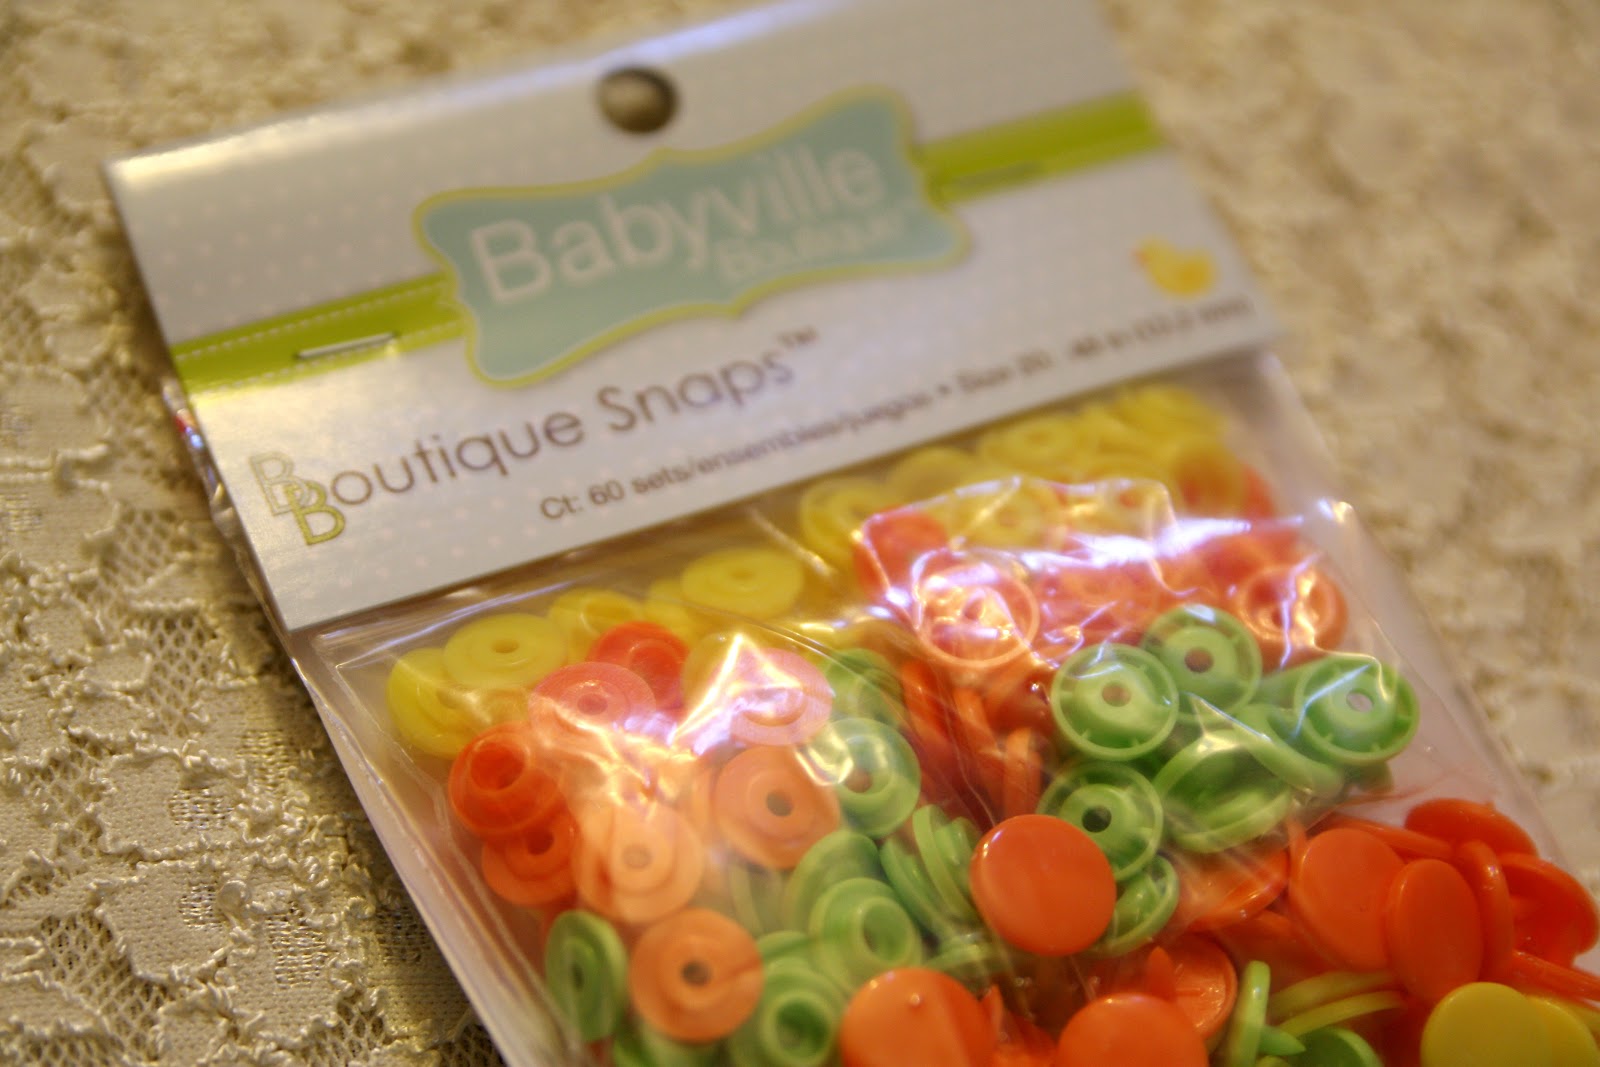
Diaper snaps.
Oh my gosh, did she just say diaper snaps? For a grown-up garment?
Oh yeah, I went there. I highly recommend that you go there, too.

Because just LOOK at them! They’re just so cute! Lots cuter than a dang zipper, which I’ve honestly never managed to get the knack of.
You do need a snappy-applicator thingy (shown in step 4), but once you’ve discovered how cute and easy and wonderful snaps are, you’ll use that sucker all. the. time. So grab one and get pressin’.
Okay, here’s what you’ll need for this project:
Materials:
Thrifted lace or crocheted long-sleeved shirt.
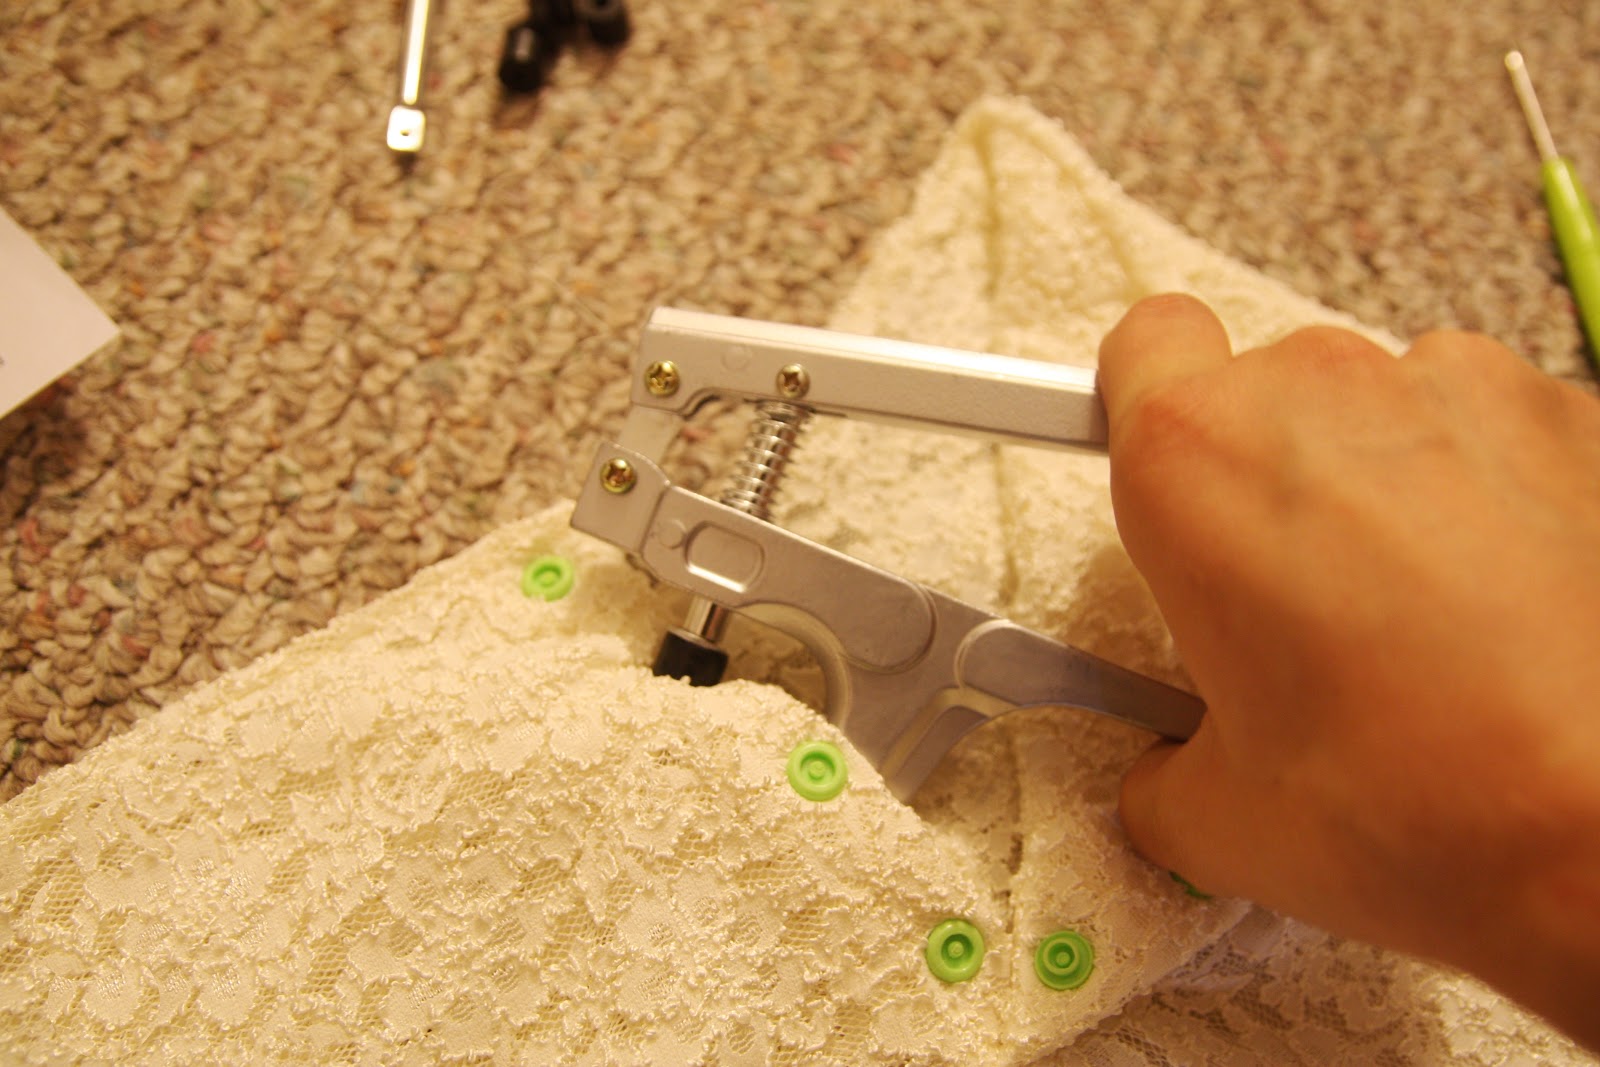
Diaper snaps in preferred color.
Snap pliers
Sewing machine
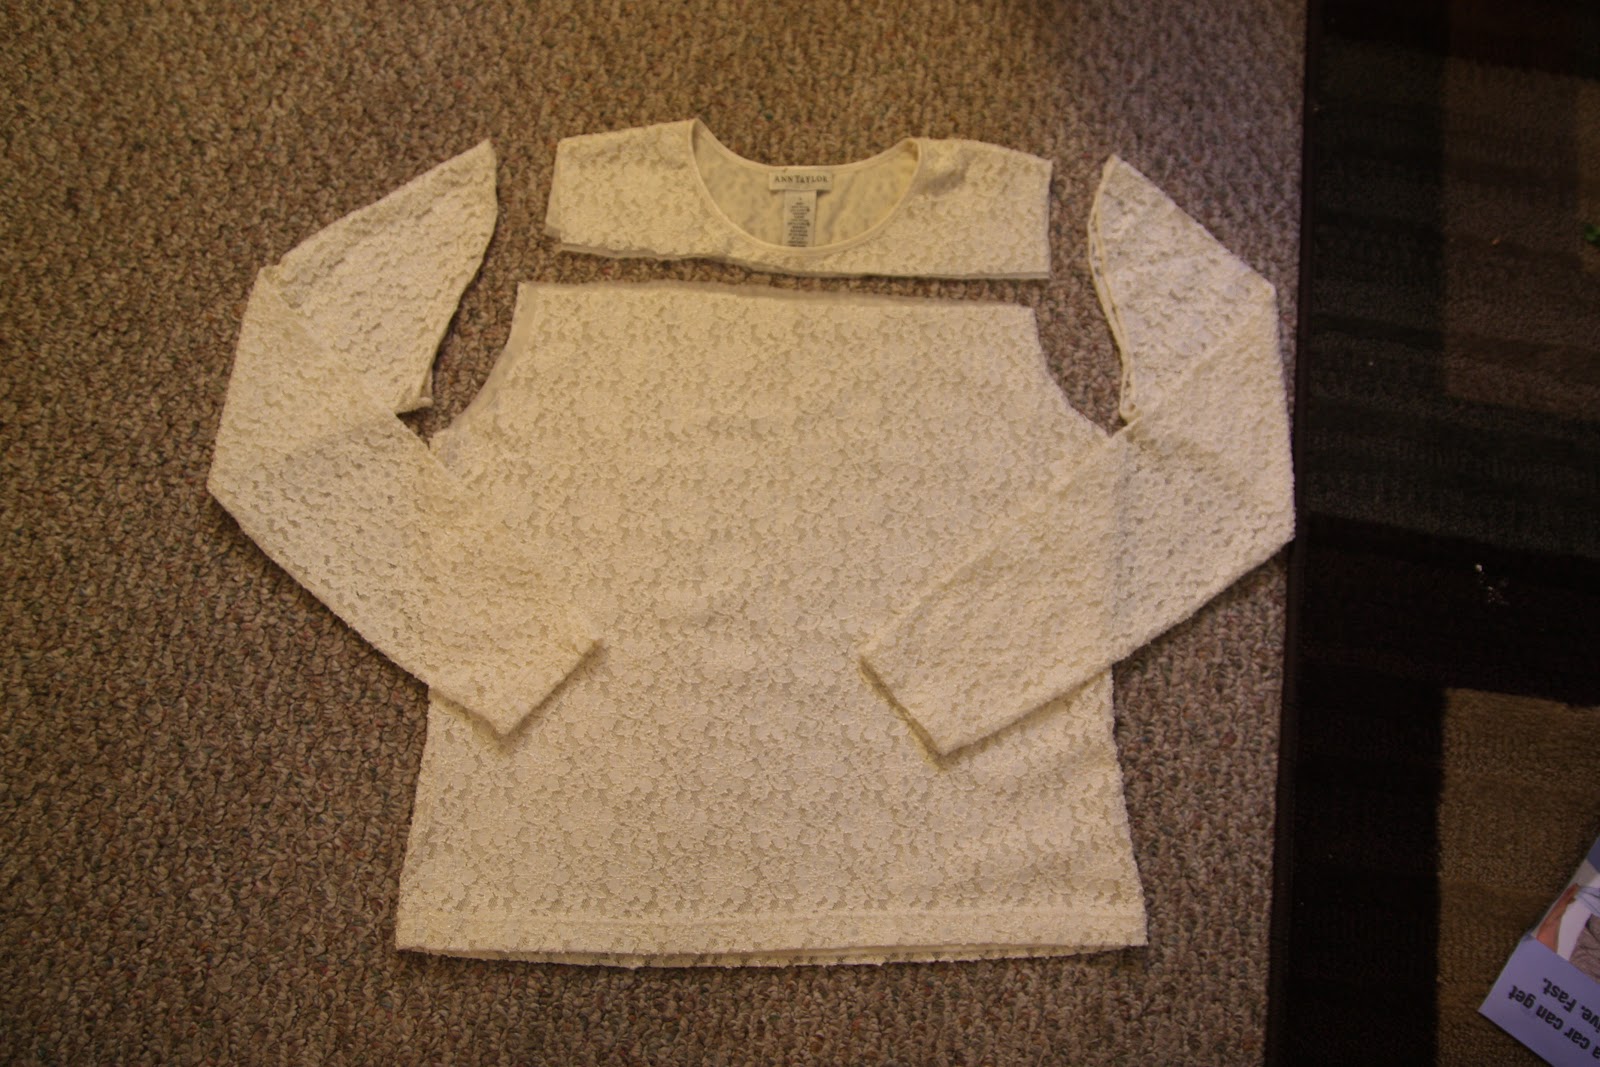
Step 1. Lay your shirt out flat, then carefully cut the sleeves and collar line. Keep close to the seams to preserve as much of the fabric as possible. Keep the sleeves for later.
Step 2. Find a skirt that fits you well and trace it on the inside of the shirt with chalk. With right sides together, sew up the sides, making a tube.

You’re done with the main part of the skirt! Seriously, it’s that easy. Now, onto the waistband.
Step 3. Lay your sleeves together and match up the seams, then sew the wrists together.
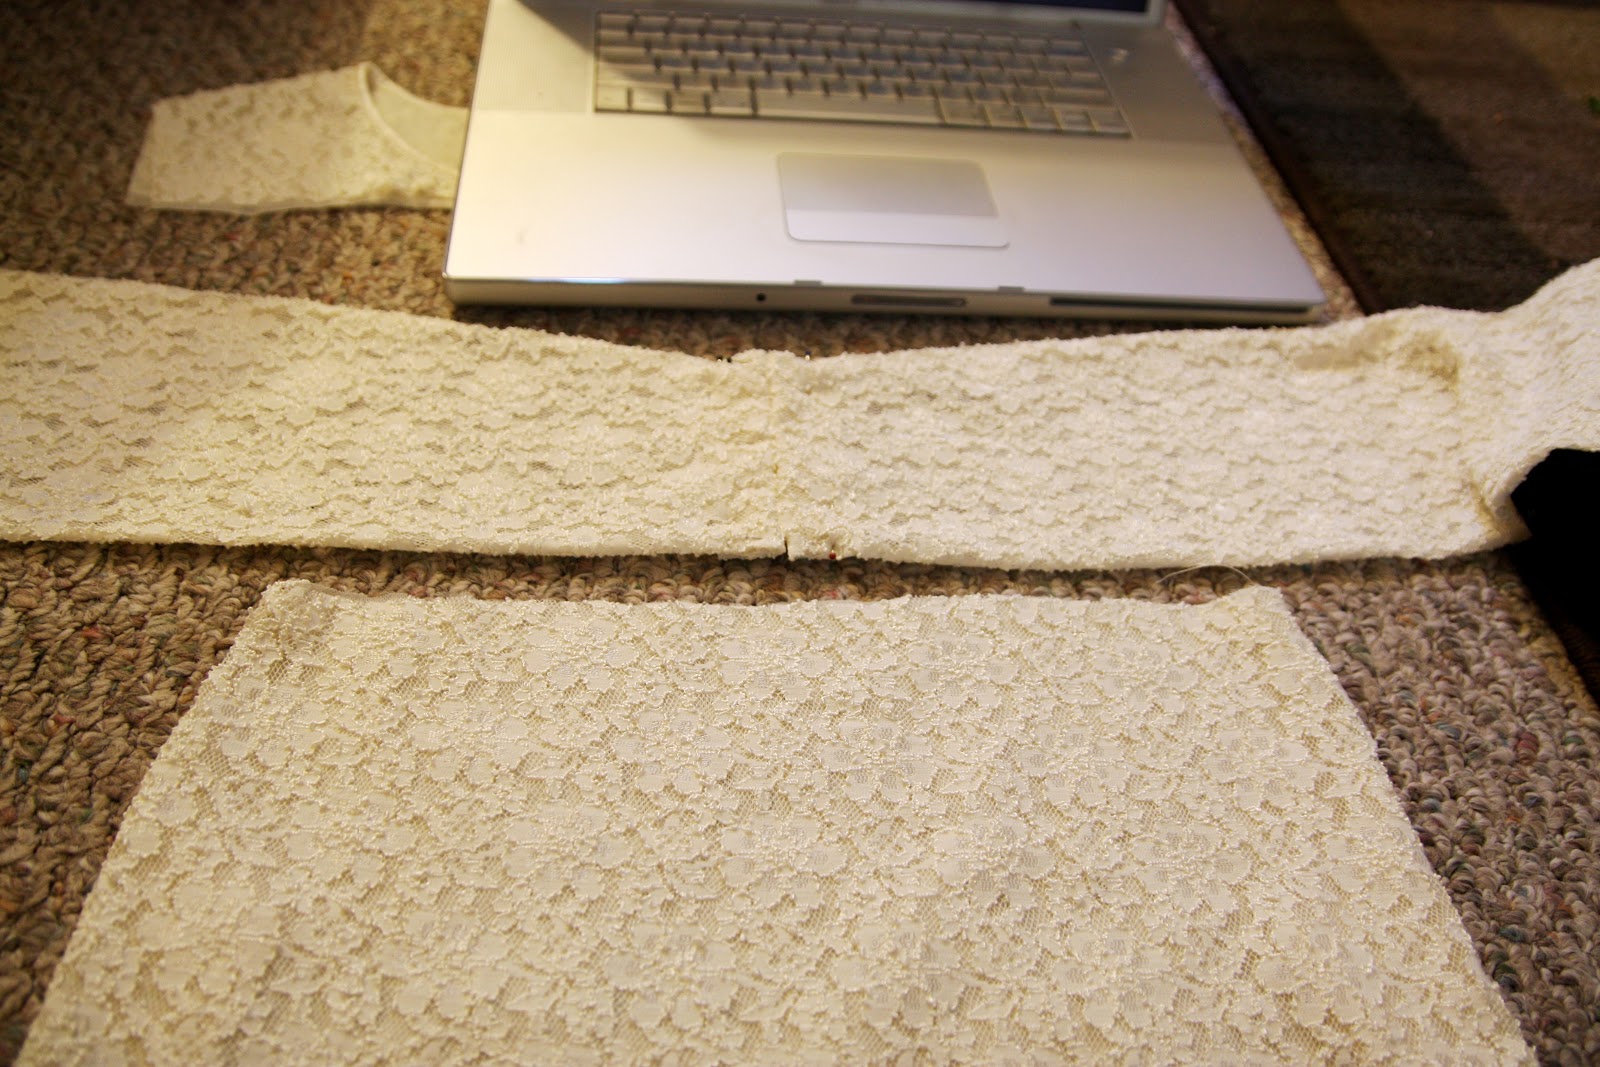
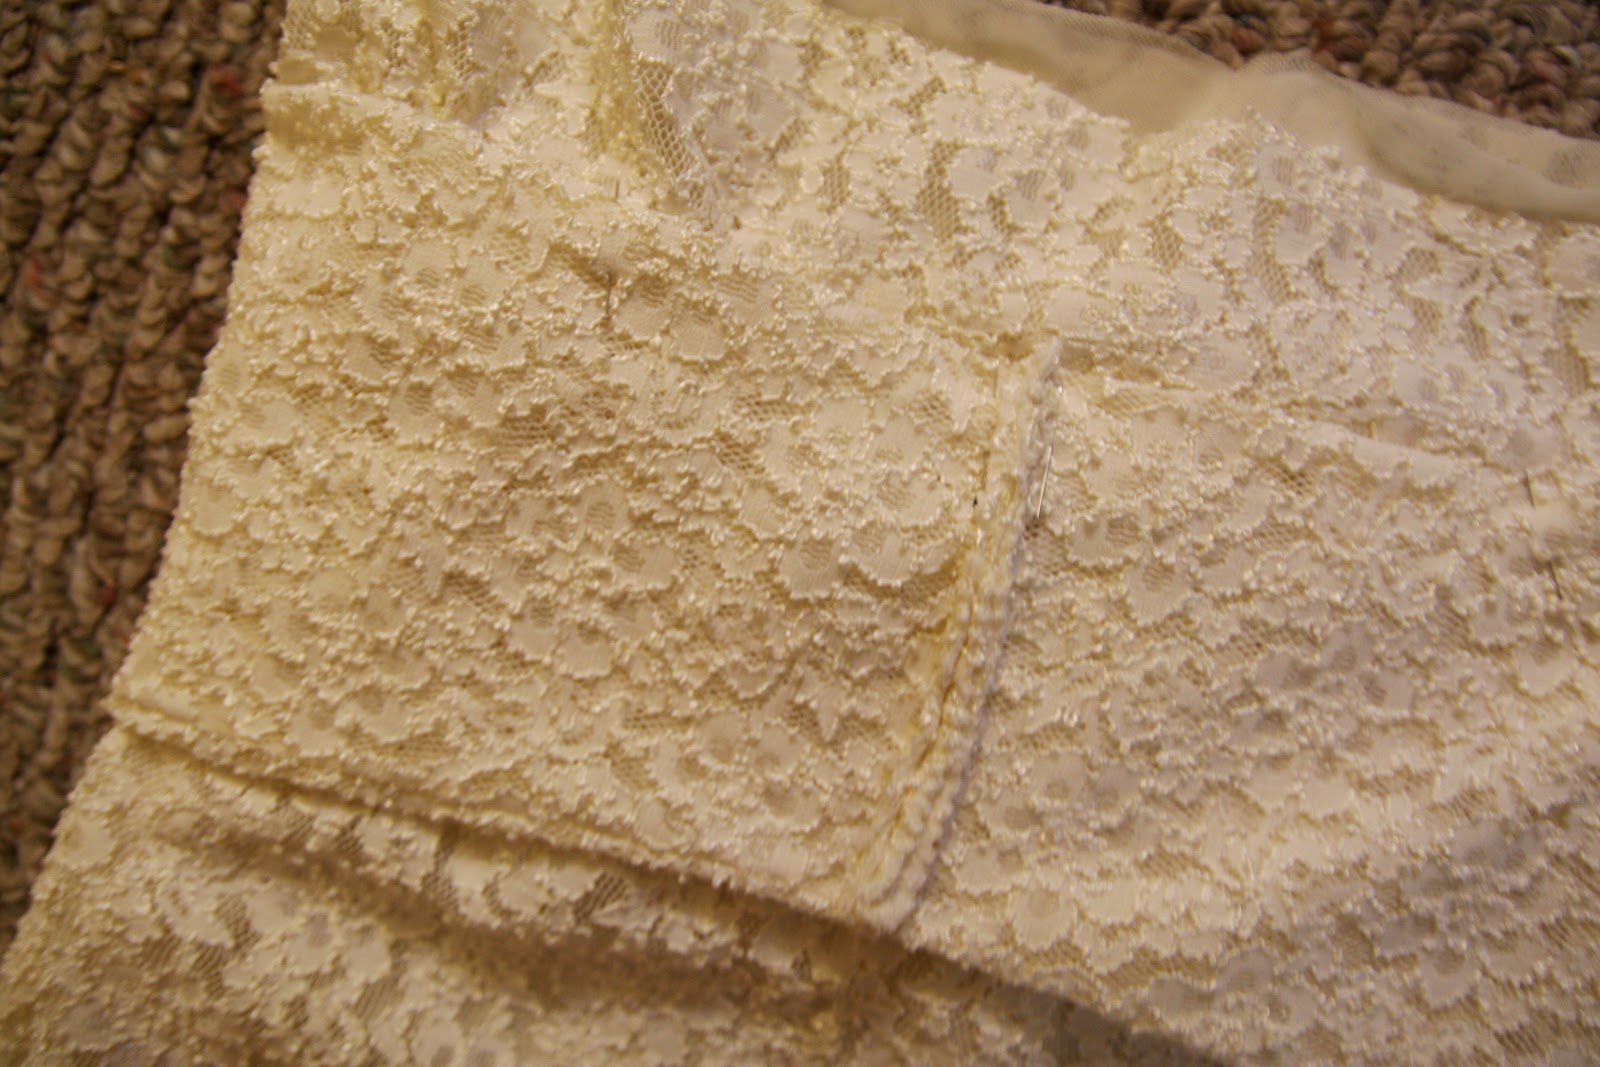
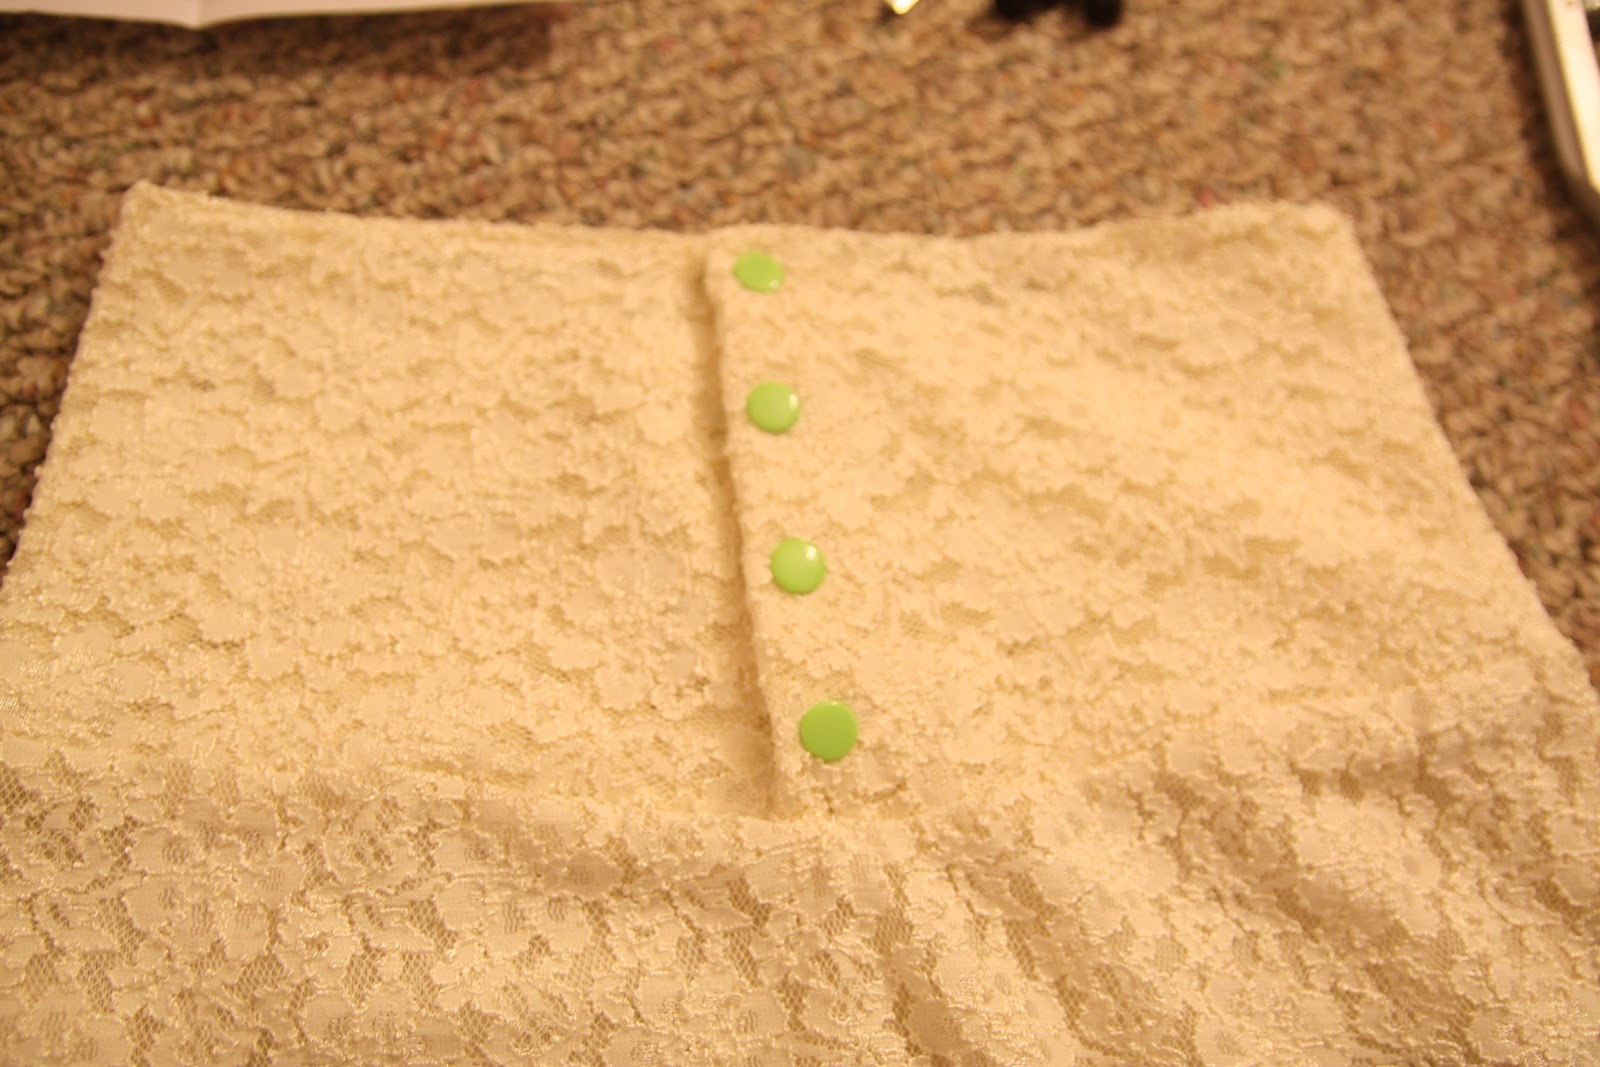
Rather than sewing the other end of the waistband closed, just pin it together. We’ll install snaps there later.
Stick the skirt inside the waistband (right sides together), pin, and sew. stretch the waistband a little as you stitch to make sure your skirt doesn’t pucker.
And that’s it! Tadaaaaaaaaaaa!
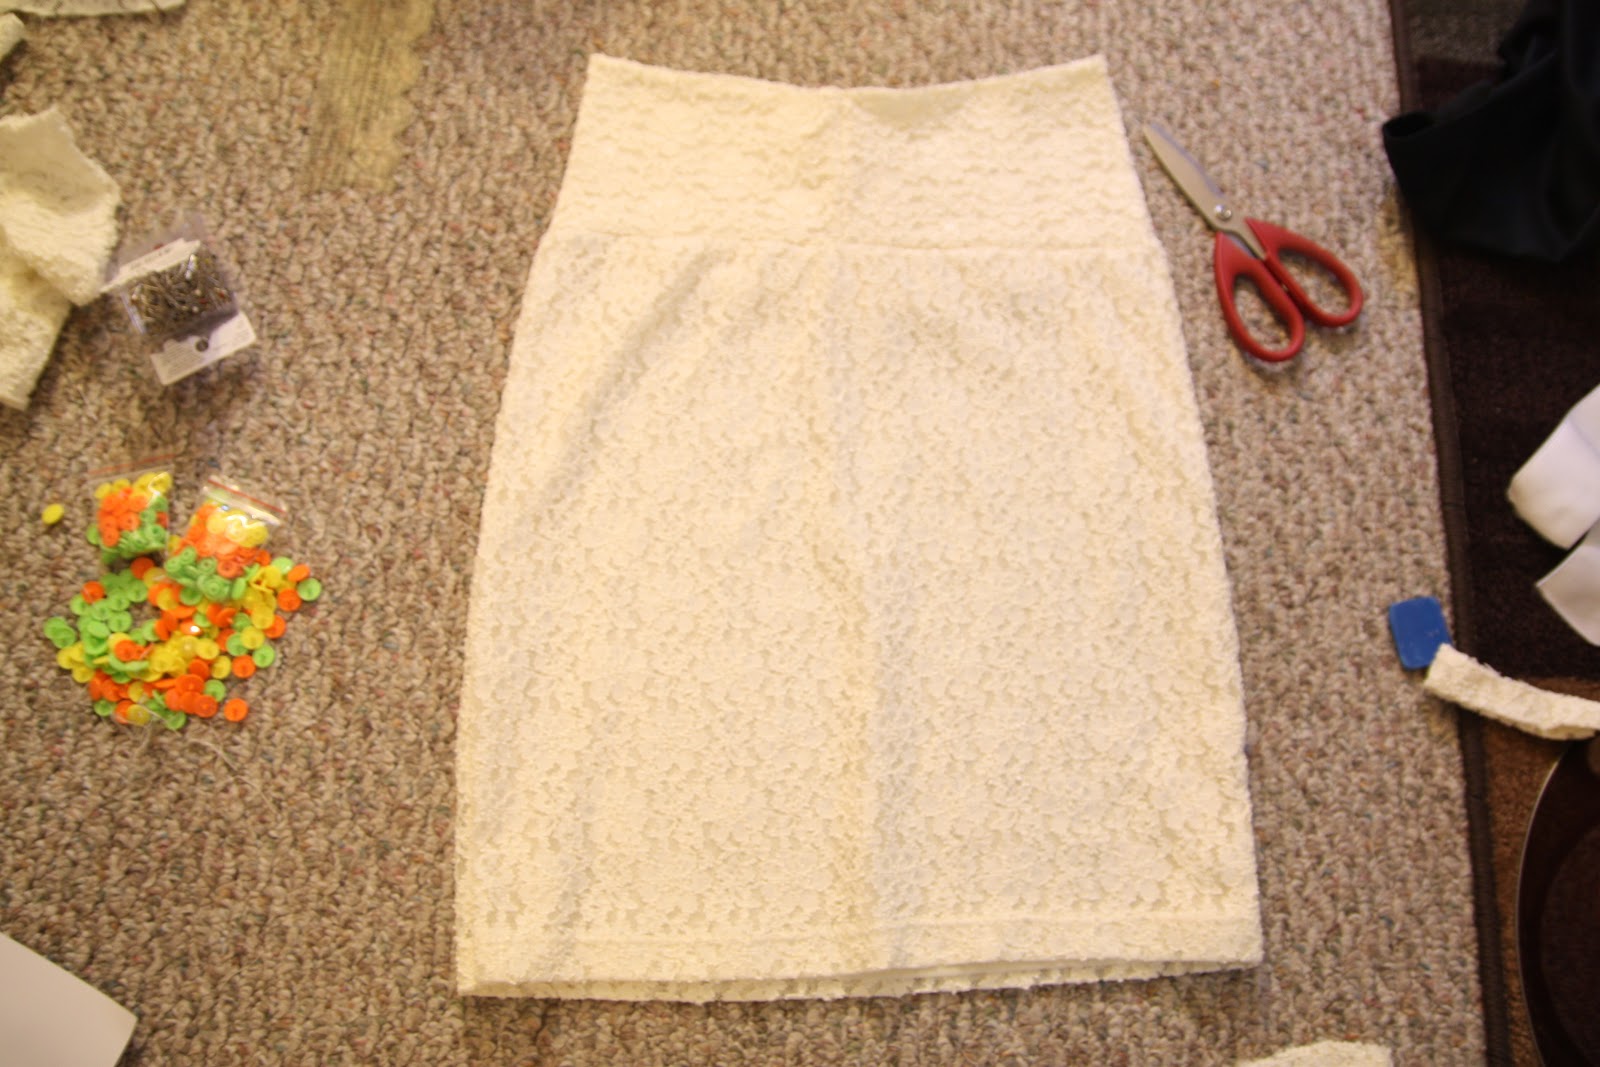
Kidding. That sucker would fall down immediately. We have to add some snappy-snaps!
My “helper” kept trying to steal the good ones. Brat.

Luckily, I only needed four of them, so I let him off the hook. He was just trying to help, right?
Step 4. So, snap installation is easy if you have the right tools. Rather than reinventing the wheel on this one, I’ll just refer you to the straightforward tutorial I followed to install them.
It’s a snap!
(sorry, I couldn’t resist).
But seriously, it really is easy. The hardest part is getting the top and bottom snaps lined up, and that’s not bad at all.
This is my new favorite skirt. I can wear it to work and not feel overdressed; I can wear it to one of Santa Barbara’s swanky restaurants and not feel underdressed. Plus, it’s so comfy!.
Thankfully, the warmer climate in which I live lets me get away with something like this almost all year round; those of you who are blessed with “seasonal climates” might have to wait until the weather gets warm again.
Me though? I’ll be wearing this sucker daily, thankyouverymuch.


Awesome tutorial! I always think people's refashion turns out so great, but am too chicken/intimidated to try myself…maybe one day…Thanks for the great Tutorial Britany!
I absolutely adore the skirt! It's unbelievably cute! I'm still a little bit afraid of all things stretchy around my hips, so it might take me awhile to get the courage to make something similar. But thanks for the tutorial. I think I'm one step closer already :).
LOOKS GREAT!I must try soon 🙂
Ohhhhhhhhhhhhhhh i love this!
Wow….that is super pretty!!!
This is so pretty! Thanks for this refashion.
I am SO impressed with this refashion!
creamyclothes.blogspot.com
Omg thats amazing! Have to try this!!
xo Emily
http://www.bupster.blogspot.com
I NEVER (ever ever ever) would have thought of diaper snaps. Genius, lady!
Samantha @ Sam ipsa loquitur
You need to go into the blogging business, Brit. Loved it and was fully amused by all of it! Then fully impressed with the end product! Amused because I love your thrift factor; amused because I remember all your projects as a kid and how your mom couldn't keep your 'stuff' contained….and impressed because it's all comin' together so nicely in your adulthood! Make some kind of business out of it, I'm serious! Aunty L
Oh my gosh, my whole world has just been turned upside-down by this tutorial! Seriously. I have so many shirts that I like the color or fabric but I don't like the shirt and now I can just turn it into a skirt! Oh I love this!
this is amazing!
Such an amazing idea! Will definitely be going home to see what I can transform x
Wow, that skirt looks amazing, I would never have guessed you could make it so easily and cheaply! Nice work, extremely impressed 🙂
Awesome job and spool adorable. 🙂
I'm pinning this for later! Thanks for the creative/stylish idea!!
I have a shirt very similar to this from Goodwill that I've been wanting to make into a skirt! I am so excited for this tutorial and will absolutely be making this asap!
This is such a smart trick and I love how the skirt turned out, so pretty! You just gave me an inspiration for those shirts that I couldn't let go but couldn't use. Thanks for this!
I love this! Such a cute idea. I will definitely be using this tutorial.