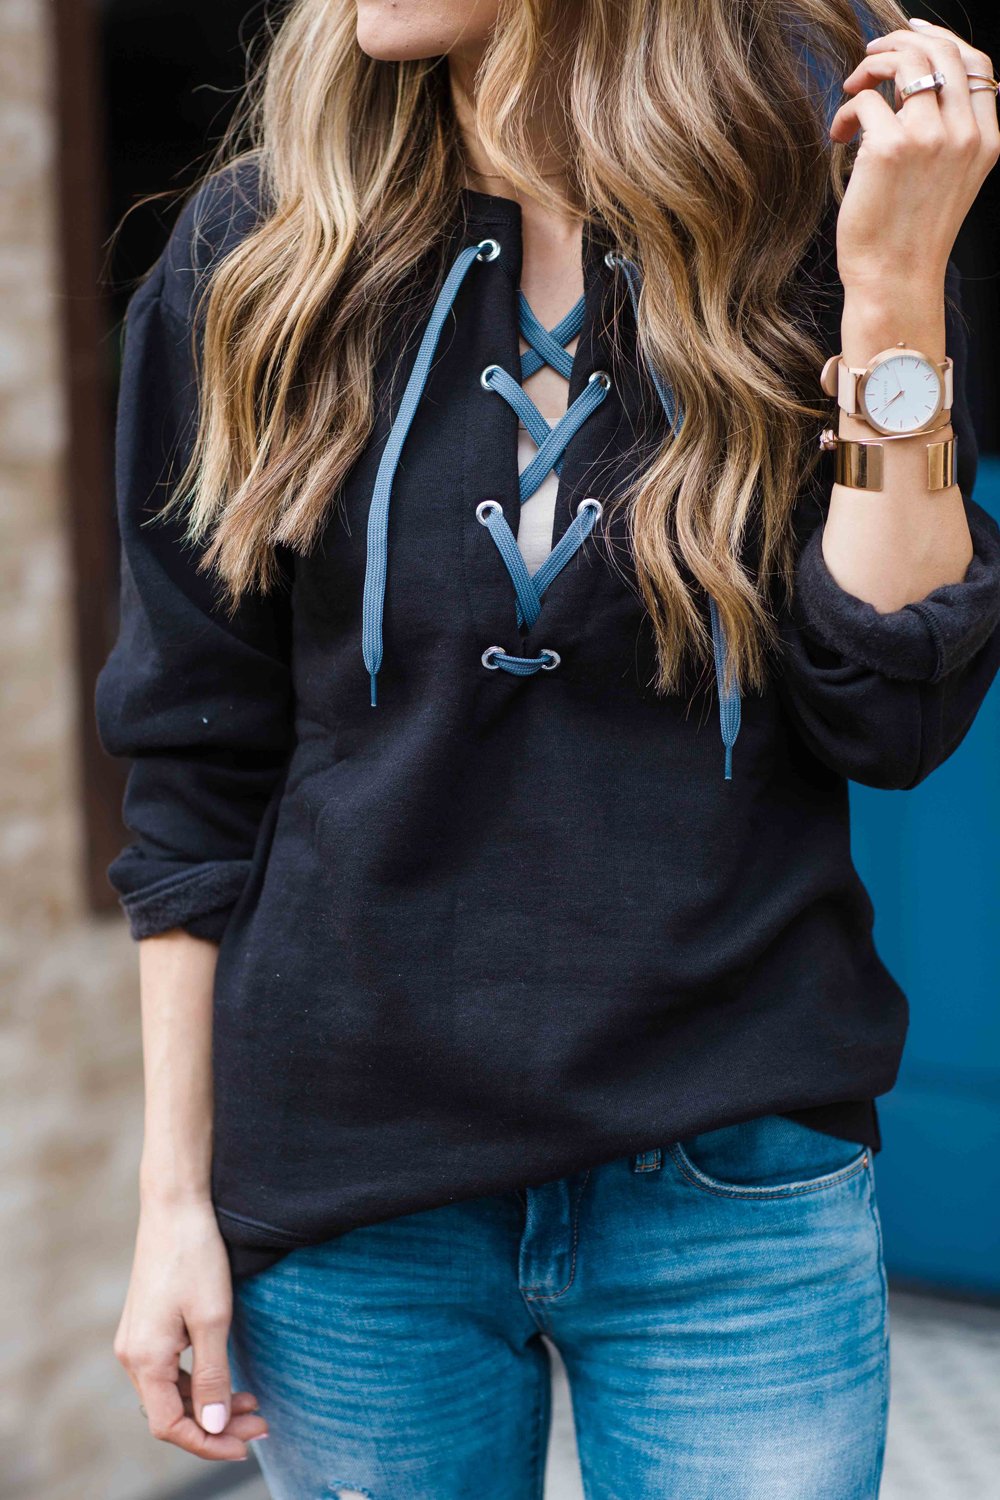
Outfit Details:
Lace Up Sweatshirt (Made by Me, Original Sweatshirt Here, Similar Version Here and Here), Nude Cami, Jeans (more sizes here), Pom Pom Shoes, Sunglasses, Powder Pink Nail Polish color “Tickled Pink,” Blush Leather Watch
The lace up trend popped up early last year and instantly grabbed my attention. I love the detail it adds to a simple piece. I’m all about basics with a little twist, so this trend is right up my alley. I added it to this shift dress here, and this time I added to a basic sweatshirt.


I made this sweatshirt the other day and it only took a few minutes. And then as soon as it was done, I threw it on and wore it the rest of the day. It’s comfy and casual, but also on trend and super versatile.
I wore it here with boyfriend jeans and fun sneakers, but it would also look so cute with skinny jeans and ankle boots, black jeans and flats, a denim pencil skirt and ankle boots, or layered under a black leather jacket with white jeans and heels. Or you could wear it with leggings and slippers around the house. So many possibilities for dressing it up or down!
Here’s how to make it.
Materials:
Hoodless Pullover Sweatshirt (I bought mine in the men’s section, but this is the women’s version and it comes in a ton of colors)
Grommets
Grommet Inserter Tool (this video is helpful, but I used a tool like this)
Shoe Lace (I used an extra one from some sneakers, but these are similar and come in a ton of colors)
Small piece of scrap fabric in the same color as your sweatshirt (mine was about 8″x12″)

Step 1. Try your sweatshirt on and measure how low you want your slit. Keep in mind it will be about 1/2 lower once you add the lining, so choose accordingly. Make a mark with a fabric chalk or marker.
Step 2. Using a straight edge, if needed, cut from the center of the neckline down to your mark.
Step 3. Now we’ll take the scrap fabric and turn it into the lining for the slit. Take your scrap fabric and place it inside the sweatshirt, then cut it to match the curve of the neckline and the length of the slit. Make sure there is at least 2 inches of lining fabric past the slit.
Step 4. Now lay your lining on top of the sweatshirt and pin down and around the slit. Then sew down from the neckline, down and around the bottom of the slit, and back up. Make sure your seams come to a point (not a square or U-shaped seam) directly below the slit.
Step 5. Trim the seam allowance, and then at the bottom of the slit, cut the slit deeper until it is only about a millimeter from the seam. If you don’t do that deeper slit, your seam allowance will bunch and your slit won’t lie flat once it’s turned right side out.
Step 6. Flip the lining inside the sweatshirt and pin in place. Then top stitch all the way around the slit and a little of the neckline. This time you can do a square shape underneath the slit. Once your top stitch is done, trim off the extra lining underneath.
Step 7. Mark where you want to place your grommets. I put in 8 and spaced them evenly down. Insert your grommets with a tool like this (or this video is helpful to use other tools).
Step 8. Thread your shoelace through the holes and you’re done!


I just purchased some eyelets and a tool for a bag project. I have loads left over and this is a perfect project. Thanks for the inspiration!
Perfect!!
I love this! Great inspo! Thanks, girl 🙂
Xo,
Megan at Lush to Blush
This is really cute. I like the way you added the tutorial on the grommets. This could be done on a t-shirt as well. I have saved this to my T-Shirt Restyling Pinterest board: https://www.pinterest.com/thelostapron/t-shirt-restyling/
Can’t wait to try this project!
This is such a fun and easy project!
Paige
http://thehappyflammily.com
I’m so happy to see this post! I was just going through some of my Pinterest boards this weekend and noticed I pinned your site as a “blog of refashions,” and while I like the other stuff you post too, I miss the refashions!
SO this is a super cutE idea!! One improvement for the instructions would be to be more specific about how wide to make your final stich around. I didnt make mine wide enoughfor my grommets. IM A BEGGINNEr so it was a total rookie MISTAKE BUT It would Be nice to have a little more detail in that area
[…] merricksart […]
[…] Full tutorial here. […]
Step 6. Flip the lining inside the sweatshirt and pin in place. Then top stitch all the way around the slit and a little of the neckline. This time you can do a square shape underneath the slit. Once your top stitch is done, trim off the extra lining underneath.
[…] Source […]
I’m a little confused about where the 12 x 8 fabric lining comes from. from the instructions it says use the leftover fabric for lining, but from my understanding you just cut a slit. can you help me, I’m sure I am just misunderstanding the instructions.
love this byw, so cute.