


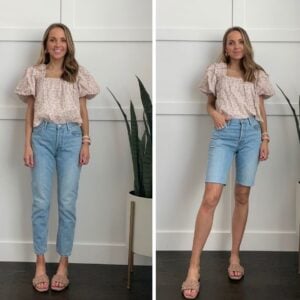
OUTFIT DETAILS: top made by me (similar here) | similar denim | similar wedges here and here | petunia pickle bottom bag | karen walker sunglasses | similar necklace here and here
A few weeks ago I was prepping for a photoshoot and needed a blouse to pair with a skirt I was planning to wear. I searched on a few of my go-to clothing sites (Asos, Old Navy, Nordstrom, J.Crew Factory and Anthropologie) without finding anything that filled my vision. And then, duh, I realized I should just make a top. So I did. And it turned out exactly how I wanted it and I love it to death. It’s the perfect semi-boxy, semi-structured, easy to dress up or down, perfect hemline length top.
Click through to find the sewing tutorial!


Materials:
1 yard medium/heavy weight knit fabric
matching thread

1. First cut your pattern pieces. You’ll need a BODICE FRONT (cut on the folded edge), a BODICE BACK piece (cut on the folded edge), NECKLINE LINING (cut on the folded edge and cut 2), and 2 SLEEVES (cut along the folded edge).
2. Sew darts into your BODICE FRONT piece.
3. Sew the BODICE FRONT and BODICE BACK pieces together at the shoulder seams (with right sides together).
4. Lay the SLEEVE flat on the floor and mark about halfway down the curve on either side, as shown. Then using a basting stitch, sew from one mark the other. Leave your threads long.
5. Using the long threads, pull them to gather the shoulder of the sleeve. Gather as much as you’d like (or until it’s the correct size to fit into your dress’s arm hole). Repeat steps 2 and 3 for the second SLEEVE.
6. Now it’s time to attach the sleeves. Line up the top of the sleeve with the bodice shoulder seam (as shown) with right sides together. Pin in place.
7. Continue pinning the sleeve to the bodice, and then sew along the arm hole with a straight stitch. Repeat for the second sleeve.
8. With right sides together, sew the sides of the bodice up with a straight stitch. If you want to insert a keyhole or zipper in the back, do that now. Otherwise, move to the next step.
9. Sew the two NECKLINE LINING pieces together, with right sides together, to make a circle.
10. Then, with right sides together, pin the NECKLINE LINING to the neckline of the BODICE. Stretch as you go so it fits evenly around the neckline. Sew around the neckline with a straight stitch, stretching as you sew so you don’t get any tucks. Flip the NECKLINE LINING inside and press your seams flat, then sew around the entire neckline again with a wide straight stitch to secure the NECKLINE LINING in place.
11. Hem the bottom of your shirt and you’re done!


You are so talented! I absolutely love this top! Gorgeous!
The Style Storm
<3, Christina
Fantastic tee, so simple and such a beautiful colour.
️http://lartoffashion.blogspot.com
This really is the perfect top for springtime! I always avoid pieces with sleeves though because I have such a hard time with them (as seen with my ample amounts of skirts!).. Do you just use an old pattern piece as a guideline?
XO, k | http://www.kokay.me
That top is gorgeous! I actually got a new skirt the other week and was envisioning wearing it with this exact kind of top, and color! I definitely need to whip out the sewing machine and make this!
Paige
http://thehappyflammily.com
Aughhhh I LOOOOOOOOVE the color of that top! Been wanting one that exact color for YEARS. YEARS!!!
This looks really nice and easy! Do you think it would work with a satin as well? Or is it too thick? Thanks!
HI! Love it and the color is gorg! Quick question, since you have to gather at the top of the sleeve, should I add an inch or so to my existing sleeve pattern? Basically, am I making the curve larger for this particular sleeve? Thanks!
This shade of purple looks FABULOUS on you! Love the D.I.Y! I need to get back to sewing again!
Unique Geek
How cute is your top?! you did a great job
HAPPY MEDLEY
I always love your DIY’s! The color of this top is absolutely gorgeous!
Heidi
http://www.wisesnadreality.com
Um how do you go about getting the pattern pieces. I just came across this. The shirt is wonderful.
Hi Susie! I don’t provide printable pattern pieces, just the tutorials. You can use this video to create your own patterns like I do! https://www.youtube.com/watch?v=vgh7EHTnQPk Best of luck!
lousy that there are no pattern pieces, and even lousier that your posting won’t allow me to print what IS there OR the instructions
Without a paper paytern i have no idea how to cut out shapes for pieces. How do others dO this?
Hi, thanks, great post! Fitness has helped me make my figure beautiful, get a confident gait, keep my back straight. I immediately feel more confident and relaxed, I like myself in the mirror, which means that others like me, because I carry the energy of love and happiness. Sport gives birth to love for yourself, your reflection in the mirror, and this is the most important thing! A great helper for me in this case was a spin-bike, which I bought here – https://formmefit.com/best-spin-bikes-under-500/.
This blog is so informative we got fantastic ideas how to decorate our house with lastes designe and how to decorate our house floor with different type of Rug.
Is this a printable pattern? I can’t find it on your site.