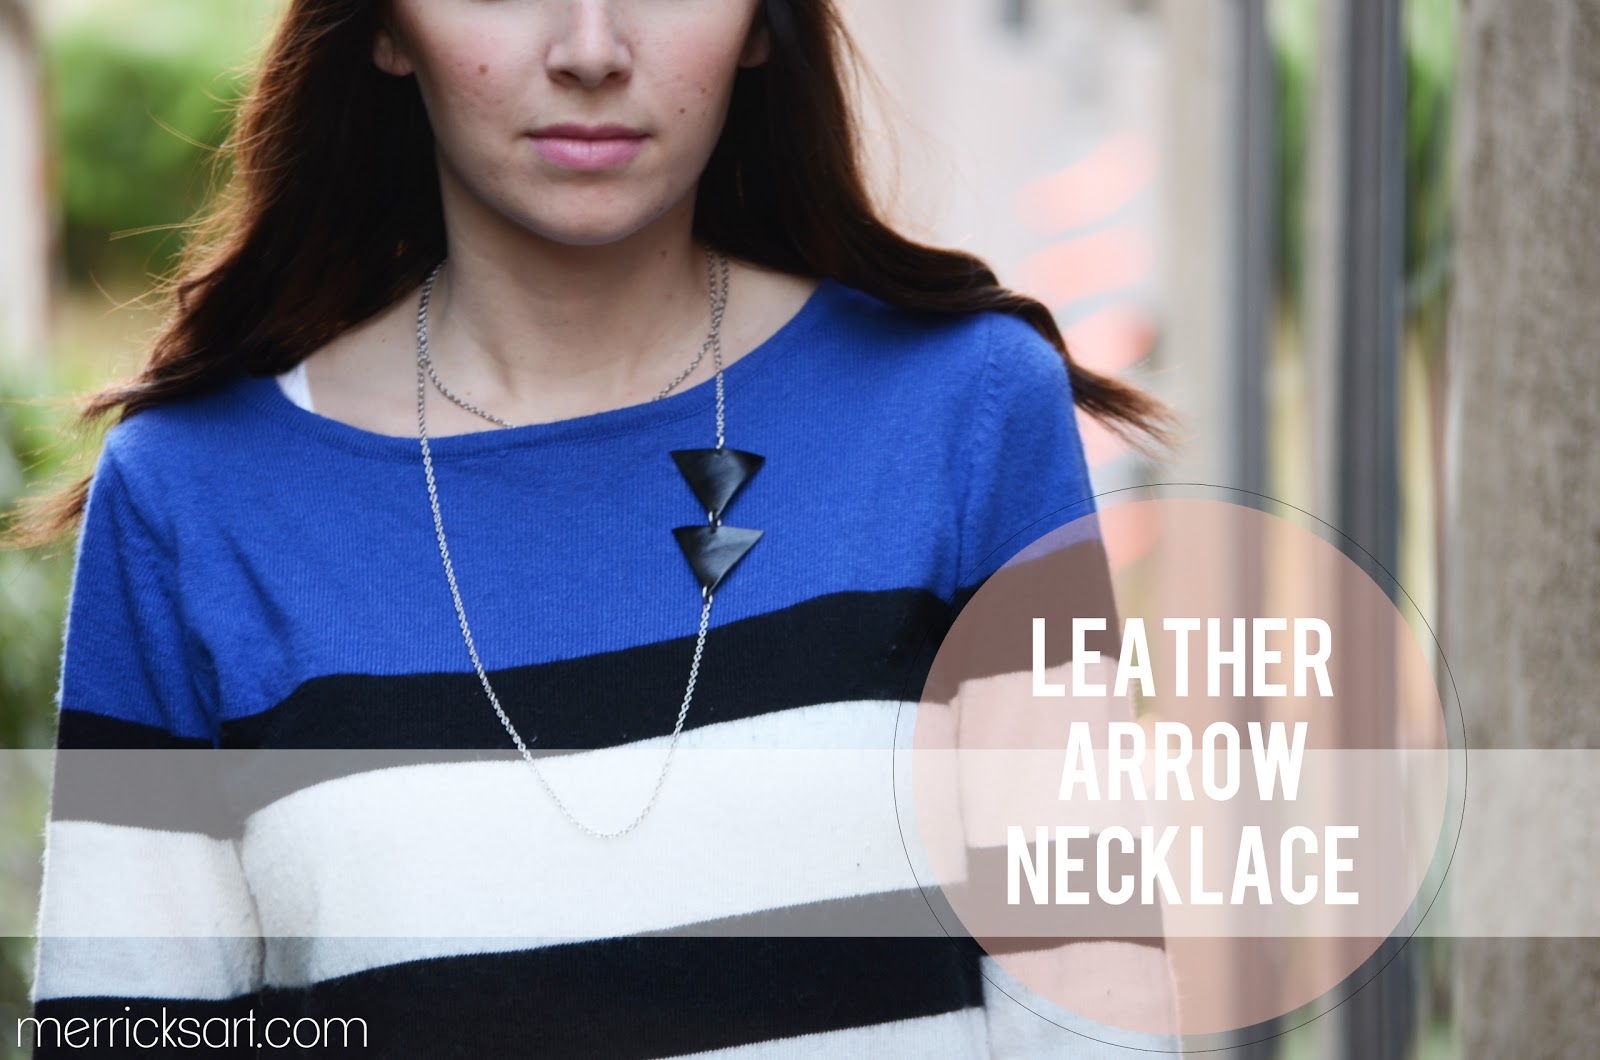
I got the idea for this necklace when I saw this gorgeous one from Fab. But since I didn’t want to try to hunt down metal triangles, and also since leather is so trendy right now, I went for leather. Easy, inexpensive, and a little edgy.
Materials Needed:
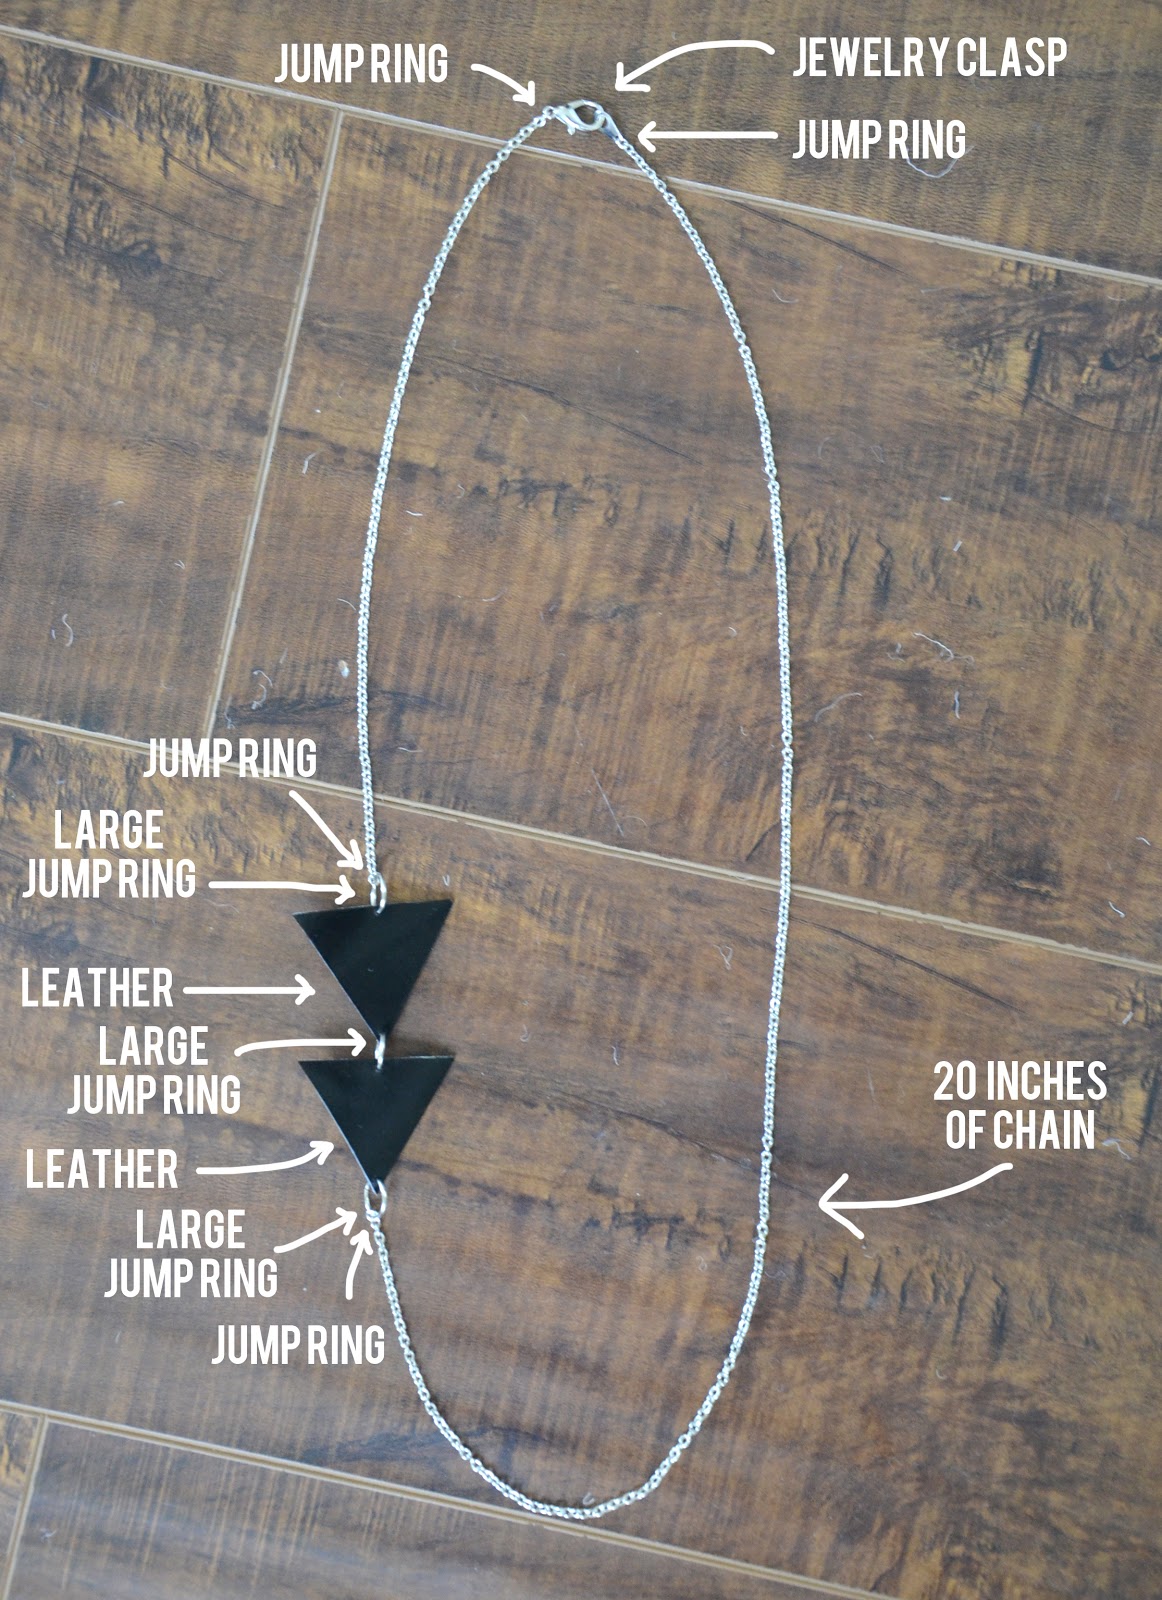
- 20 inches of fine cable chain
- 1 jewelry clasp (an easy alternative is to buy a pre-made chain necklace)
- 4 small jump rings (2-3 mm)
- 3 large jump rings (10 mm)
- 3 inches of black leather trim (I found mine at Joann’s in the lace/trim section)
- Needle nose pliers
Directions:
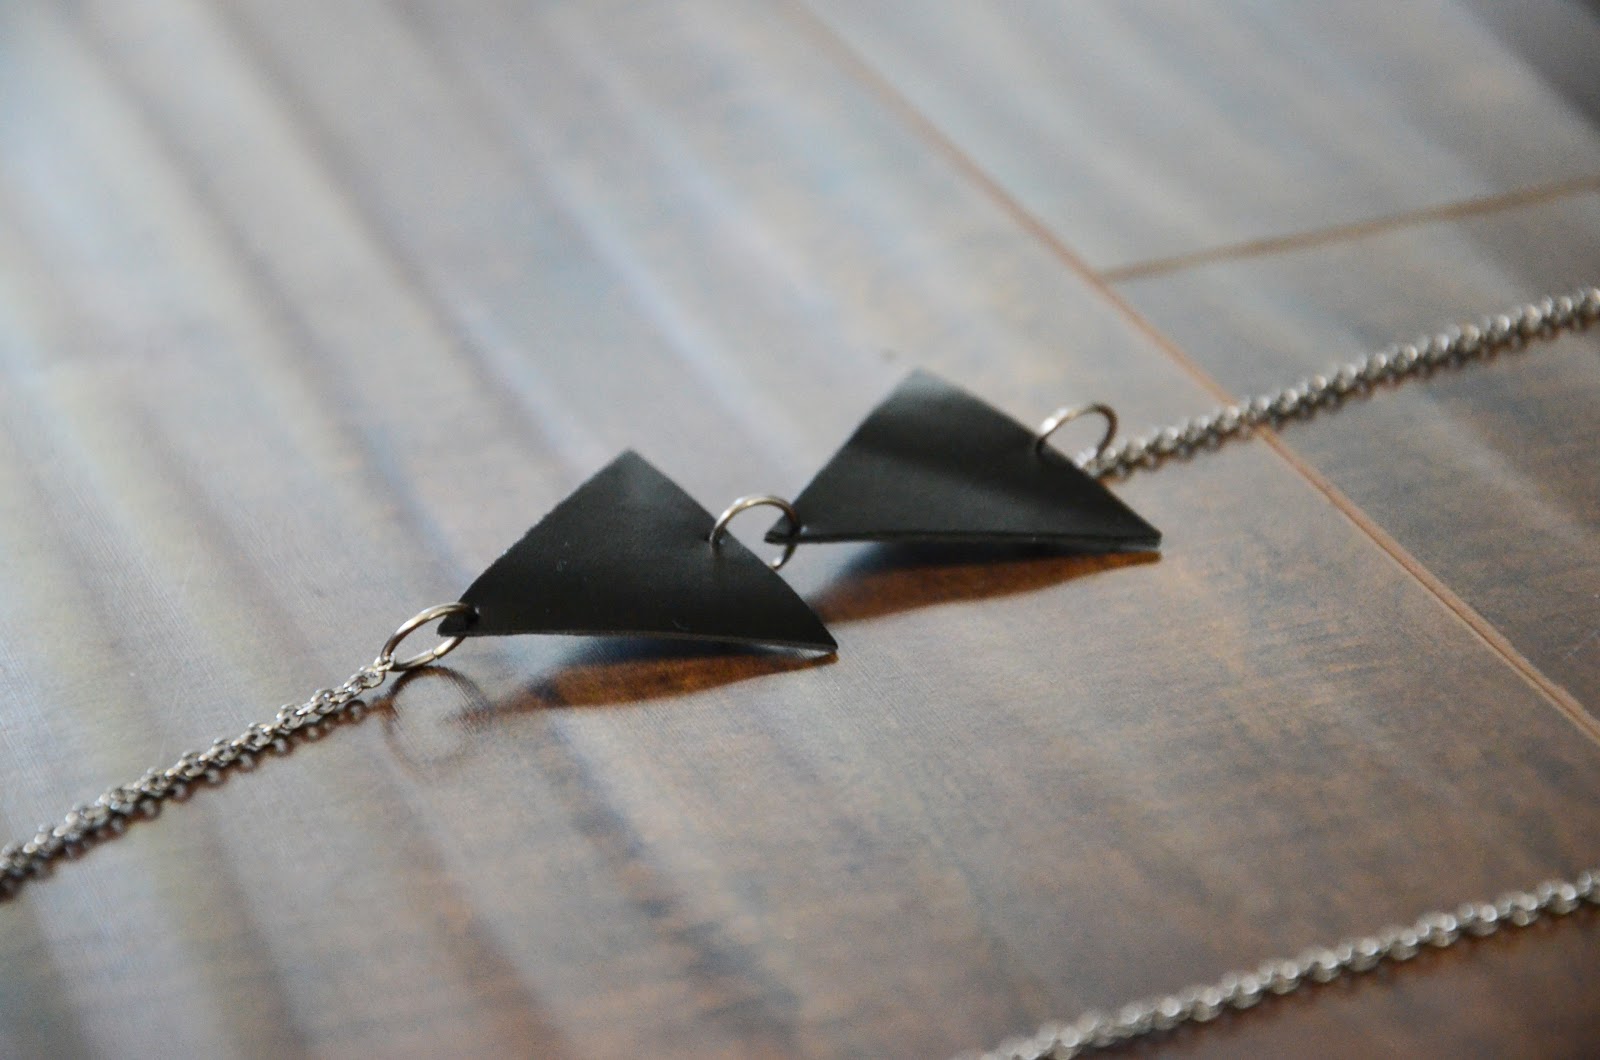
Step 1. Cut out two equilateral triangles from the leather, then use a pin to poke holes in the top and the bottom. If the holes need to be slightly larger, use the point of a sharp knife.
Step 2. See the photo below to assemble the necklace. Use needle nose pliers to open jump rings (mine were flexible enough that I could hold one side of the ring with the pliers and bend the other side open with my fingers — that was easier than using two pairs of pliers).
And that’s it!
As always, email me or comment with any questions! Happy Friday!


so simple and so beautiful 😀 😀
What a cool idea! That's really cute 🙂
~Ashlee
http://ashleenikol.com
Oh wow that's so easy! Definitely going to try it!
This is awesome! Love it.
Super cute!!! Love this!
Jenni
http://www.foundinmycloset.blogspot.com
You are so cafty!!!!
http://www.kacieskloset.blogspot.com
http://www.daisyraeboutique.com
So clever!
Just stumbled unto your blog, what an absolute blessing! You are amazing!
Love it! That is adorable.simple.cheap. I can't wait to make one! There's a lot of variety in that idea, too! Thanks for sharing!
Easy! And so cute! I'm so excited for this. Thanks
Kate from Clear the Way
Just stumbled across these Faux Leather Triangle Earrings on F21's website, and I IMMEDIATELY thought of this tutorial! Now I definitely have to make this necklace!
http://www.forever21.com/Product/Product.aspx?br=f21&category=acc_jewelry&ProductID=1057355375
I wanted to comment on that sweater 🙂 It's on the Estonian National flag colours!