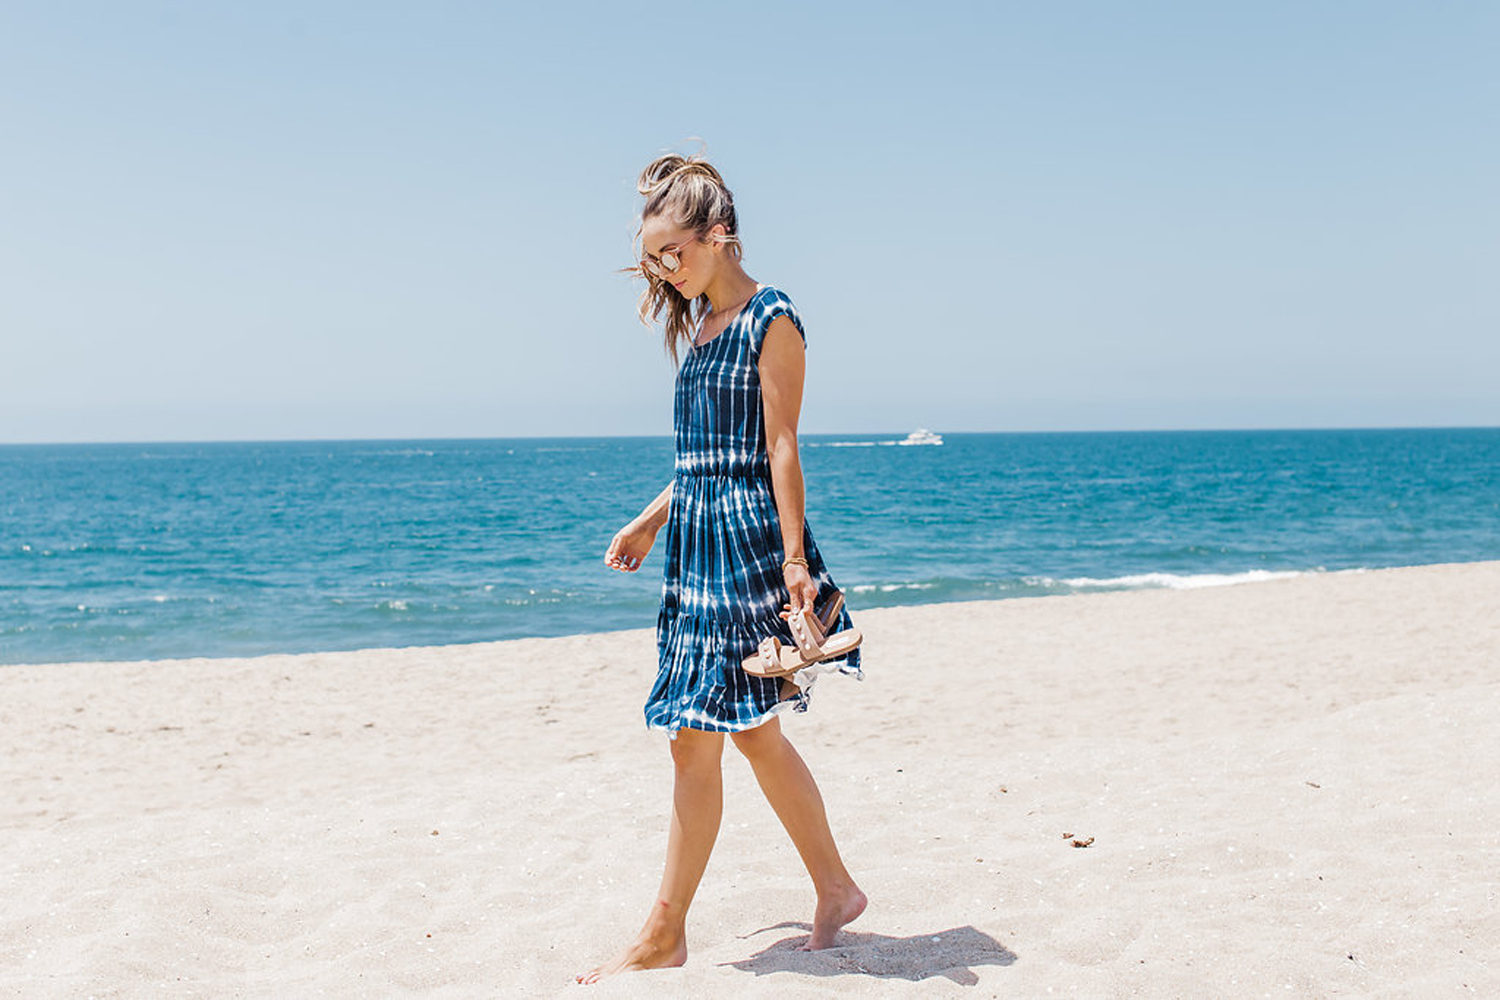
Outfit Details:
DIY Dress (similar dresses here and here, fabric sold out, similar fabric here), Pearl Embellished Sandals, Aerie Sunglasses, Bracelet c/o Katie Waltman
I bought this navy tie dyed fabric earlier this year when I saw it online and instantly fell in love with it. I’ve never been a big tie dye fan, but the dark, monochromatic pattern of this one just felt so summery, I couldn’t resist.
I’ve been debating what to make with it for months, and finally settled on a cap sleeve dress with a tiered skirt. I’d never made a skirt like this before, and although it takes some patience and a lot of fabric, I really like how it turned out.


To make this dress you’ll need:
- 3 yards fabric (mine is a lightweight stretchy knit, but any kind of lightweight knit or woven will work!)
- matching thread
- 1/2″ or 1/4″ wide elastic
First create your pattern pieces using this tutorial (no printable patterns are provided for my tutorials!) You’ll need a pattern piece for your BODICE FRONT, BODICE BACK, NECKLINE LINING, and SLEEVE. Then you’ll need two long strips of fabric for your SKIRT TOP and SKIRT BOTTOM.
- Skirt Piece Measurements:
- SKIRT TOP: 2 yards length, 12 inches height
- SKIRT BOTTOM: 3 yards length, 12 inches height

Step 1. Take your BODICE FRONT and BODICE BACK and sew them together at the shoulder seams with right sides together.
Step 2. Take your two NECKLINE LINING pieces and sew them together to form an “O.” With right sides together, pin the “O” to the dress neckline, stretching as you go so it fits evenly around the neck. Sew all the way around the neckline with a straight stitch to attach it.
Step 3. Then tuck the lining inside the neckline, press it flat, and top stitch around the entire neckline with a wide straight stitch to hold the lining flat.
Step 4. Take your sleeve and pin it to the shoulder on the BODICE with right sides together. Once it’s pinned, attach it with a straight stitch. Repeat for the second sleeve.
Step 5. With right sides together, pin your bodice together at the side seams. Sew up each side with a straight stitch.
Step 6. Now time for the skirt. Fold the skirt in half and sew the shorts sides together to form a loop. Take your SKIRT TOP piece and sew around the top with a basting stitch. Pull your strings to gather the top until the circumference matches the BODICE circumference.
Step 7. With right sides together, sew the BODICE and SKIRT TOP together.
Step 8. Measure your waist and cut a piece of elastic 3-4 inches shorter than that (you want it to stretch a little to fit all the way around. Sew it into a loop, and then pin it to the seam allowance of your dress waistband, making sure it’s evenly spaced around. Since the circumference of your elastic will be smaller than the circumference of the dress waistband, you’ll have to pull the elastic as you sew along it so it fits all the way around. Then when you let go, it will bunch up and create a perfectly stretchy waistband.
Step 9. Repeat Step 6 for the SKIRT BOTTOM, gathering it until the circumference matches the SKIRT TOP.
Step 10. With right sides together, sew the two SKIRT pieces together.
Step 11. Hem the bottom of your skirt to your desired length, and hem your sleeves to your desired length. And you’re done!

Shop this Post


That dress is so pretty! I love it!
Paige
http:///thehappyfammily.com
Thanks so much, Paige!
This might be one of my favorite dresses you’ve made to date! I am also not usually a huge tie-dye lover but this one is much more classic looking – maybe it’s the blue and white. Anyways, I am totally inspired to make something with this kind of skirt! You’re right that it takes so much fabric (and a whole lot of scrunching on the basting) but I really love it.
Julia – http://bunnybaubles.com
Thanks so much, Julia! I agree with you on this tie dye feeling different than others. Would love if you’d tag me if you make something and share it — I’d love to see! xx
Will do!!
Yeah I’m not super into tie-dye but I LOVE the indigo shibori stuff that’s all over now. This fabric is just perfect.
Thanks, Kayla! I agree — indigo shibori is dreamy!
Total bummer on so many levels.1st because i love tie-dye and secondly it looks like a perfect beach party dress. Brilliant.. With the instructions being clear and concise it will have a beginner sewer feeling like a professional sewer in no time!! I really wanna try it now but crocheting a couple of pillows but will definitely going to make one for me this weekend but in Green color.I will be subscribing you for more posts like this..
Thanks for subscribing! If you make one and share on social media, tag me so I can see! xx
[…] had the idea for a tiered sleeveless dress in lavender linen, which is how I came across this tutorial from […]
[…] by Merricksart […]
[…] Merricksart […]
[…] Merricksart […]
[…] by Merricksart […]
[…] Tie Dye Cap Sleeve Tiered Dress – Merrick’s Art […]
[…] merricksart […]