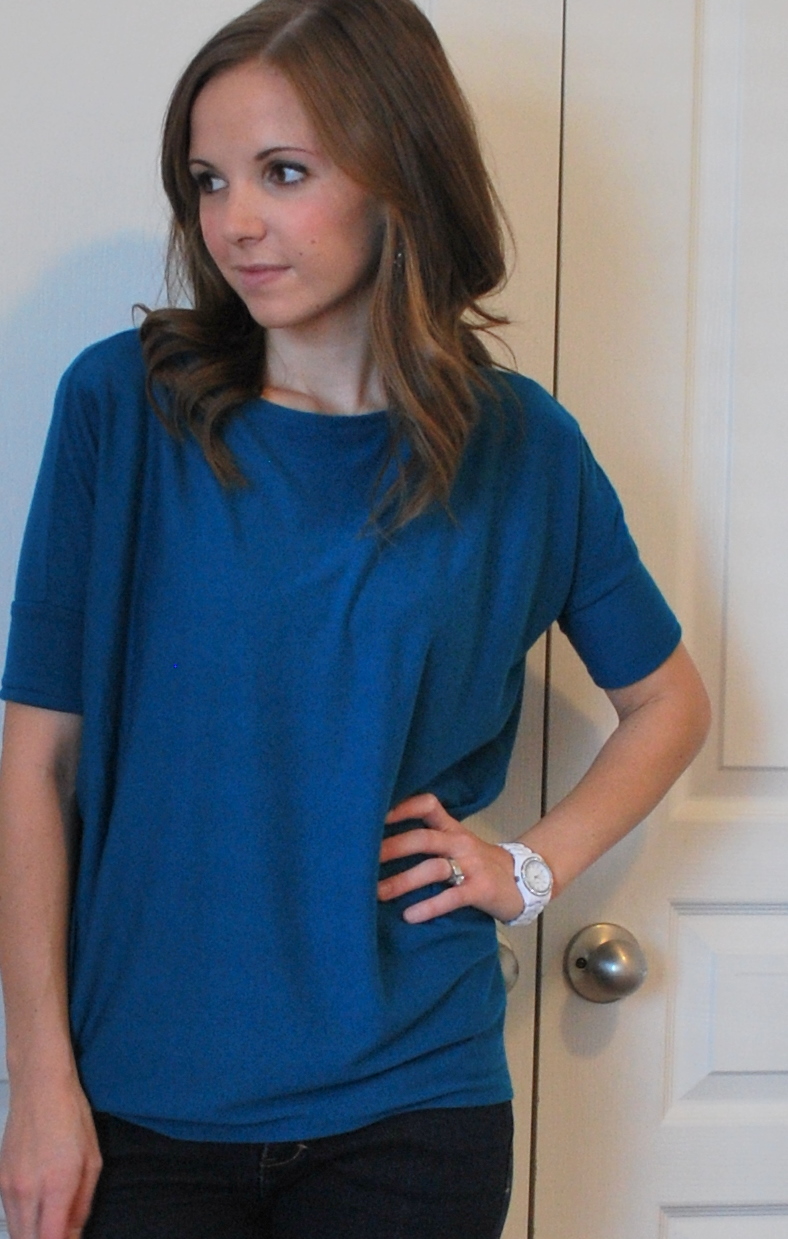
Over the past few months, I’ve seen slouchy tops popping up everywhere. Most of the tops in my closet are slim fitting, so to add a little variety to the mix I took a shot at making this blue slouchy dolman sleeved shirt.
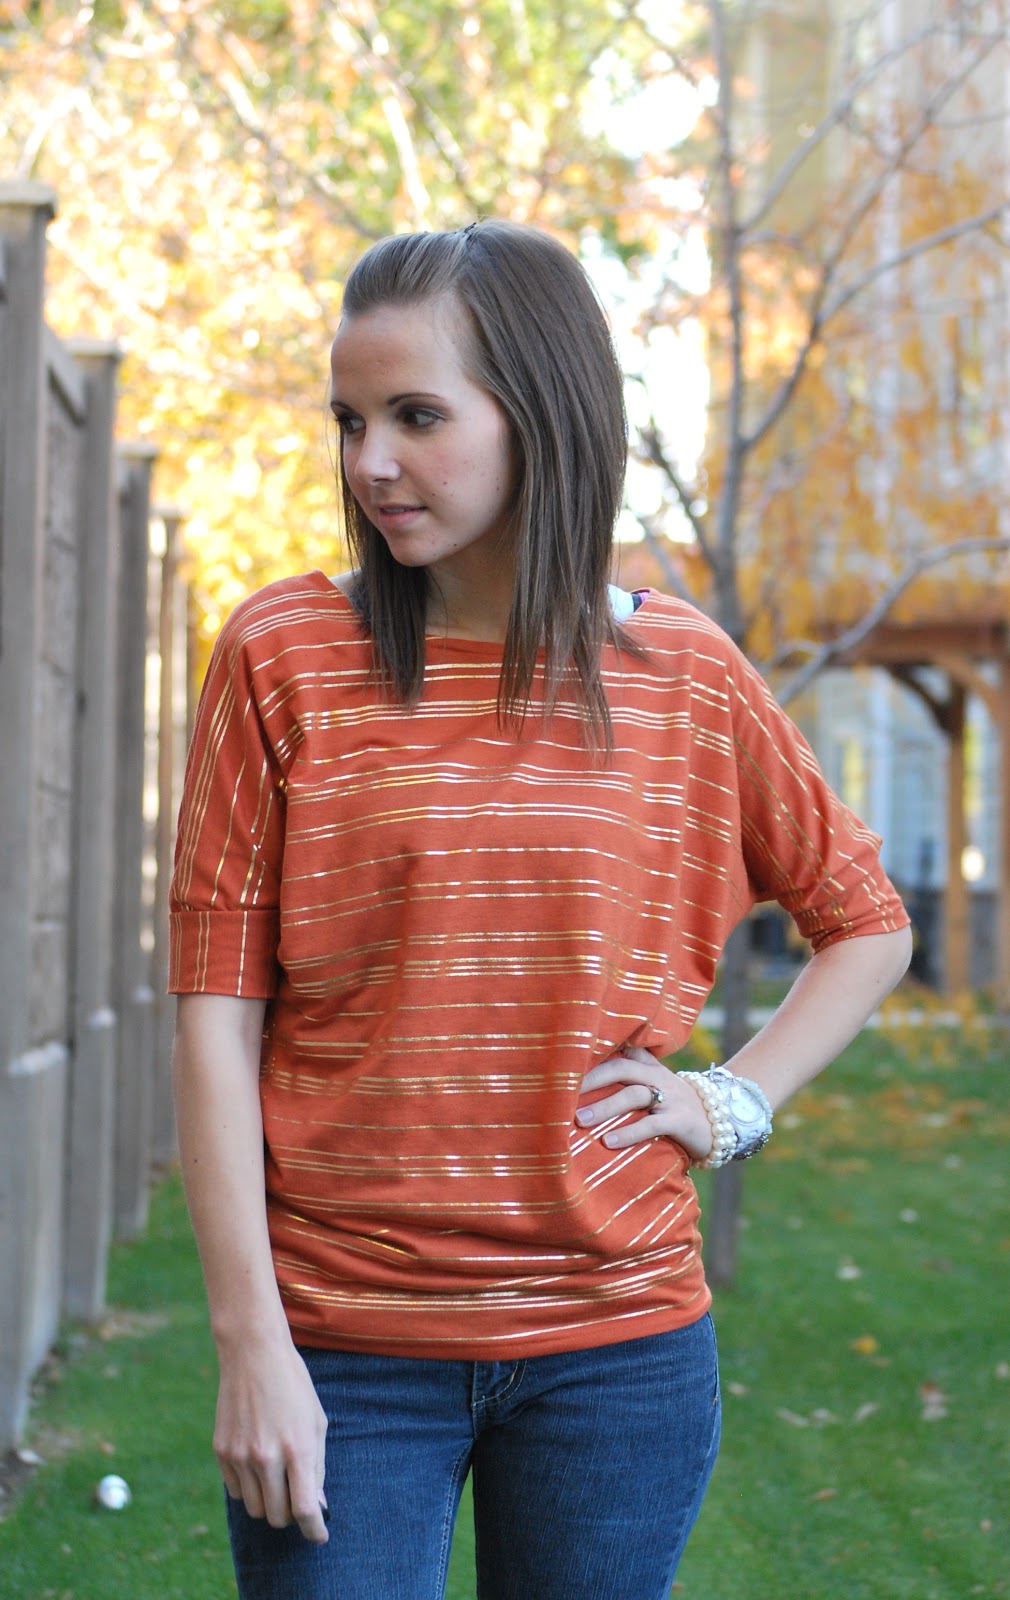
I loved how it turned out, so I made another.
- 1 1/2 yards of knit/stretchy fabric (slightly more or less depending on your size)
- thread in a coordinating color
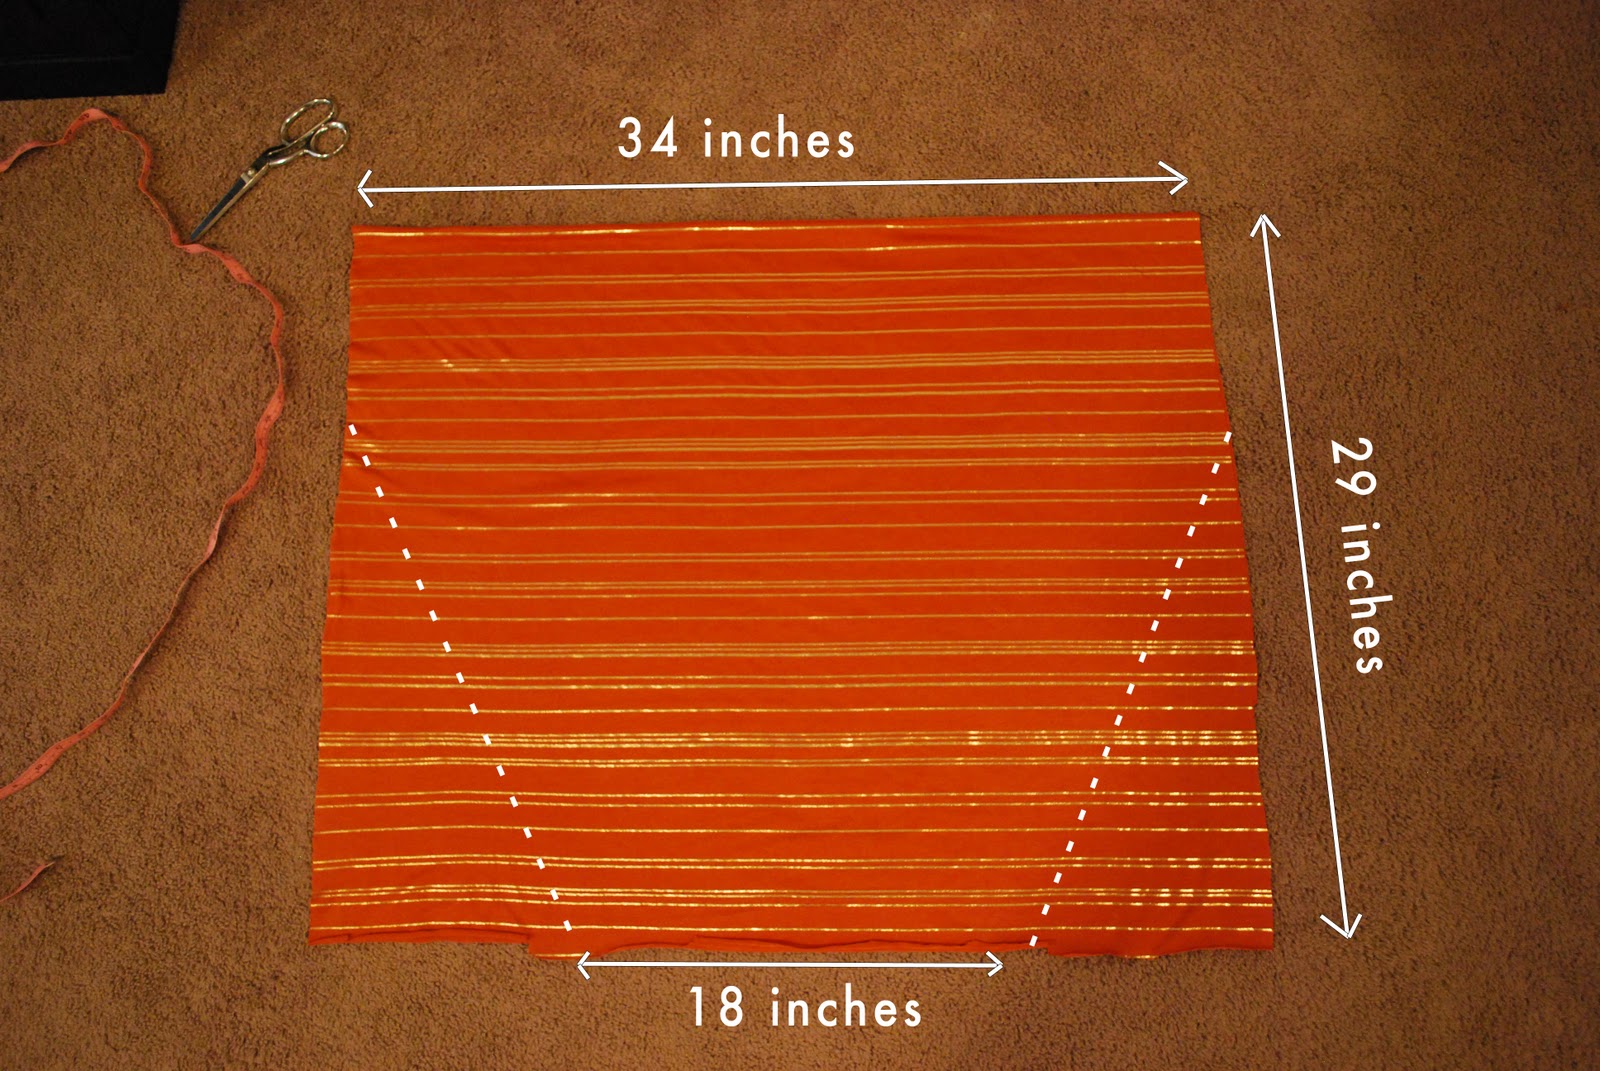
Step 1. With a measuring tape, measure the length from elbow to elbow, with the measuring tape going behind your head across your neck. Next, measure the distance around your hips and divide that number in half. Lastly, measure the length from the top of your shoulder to your waistband (wherever you want the hem of your top to hit — I made mine a little long so it would bunch at the bottom). Now add one inch to each of those measurements for your seam allowance. (My measurements were 34″ x 18″ x 29″).
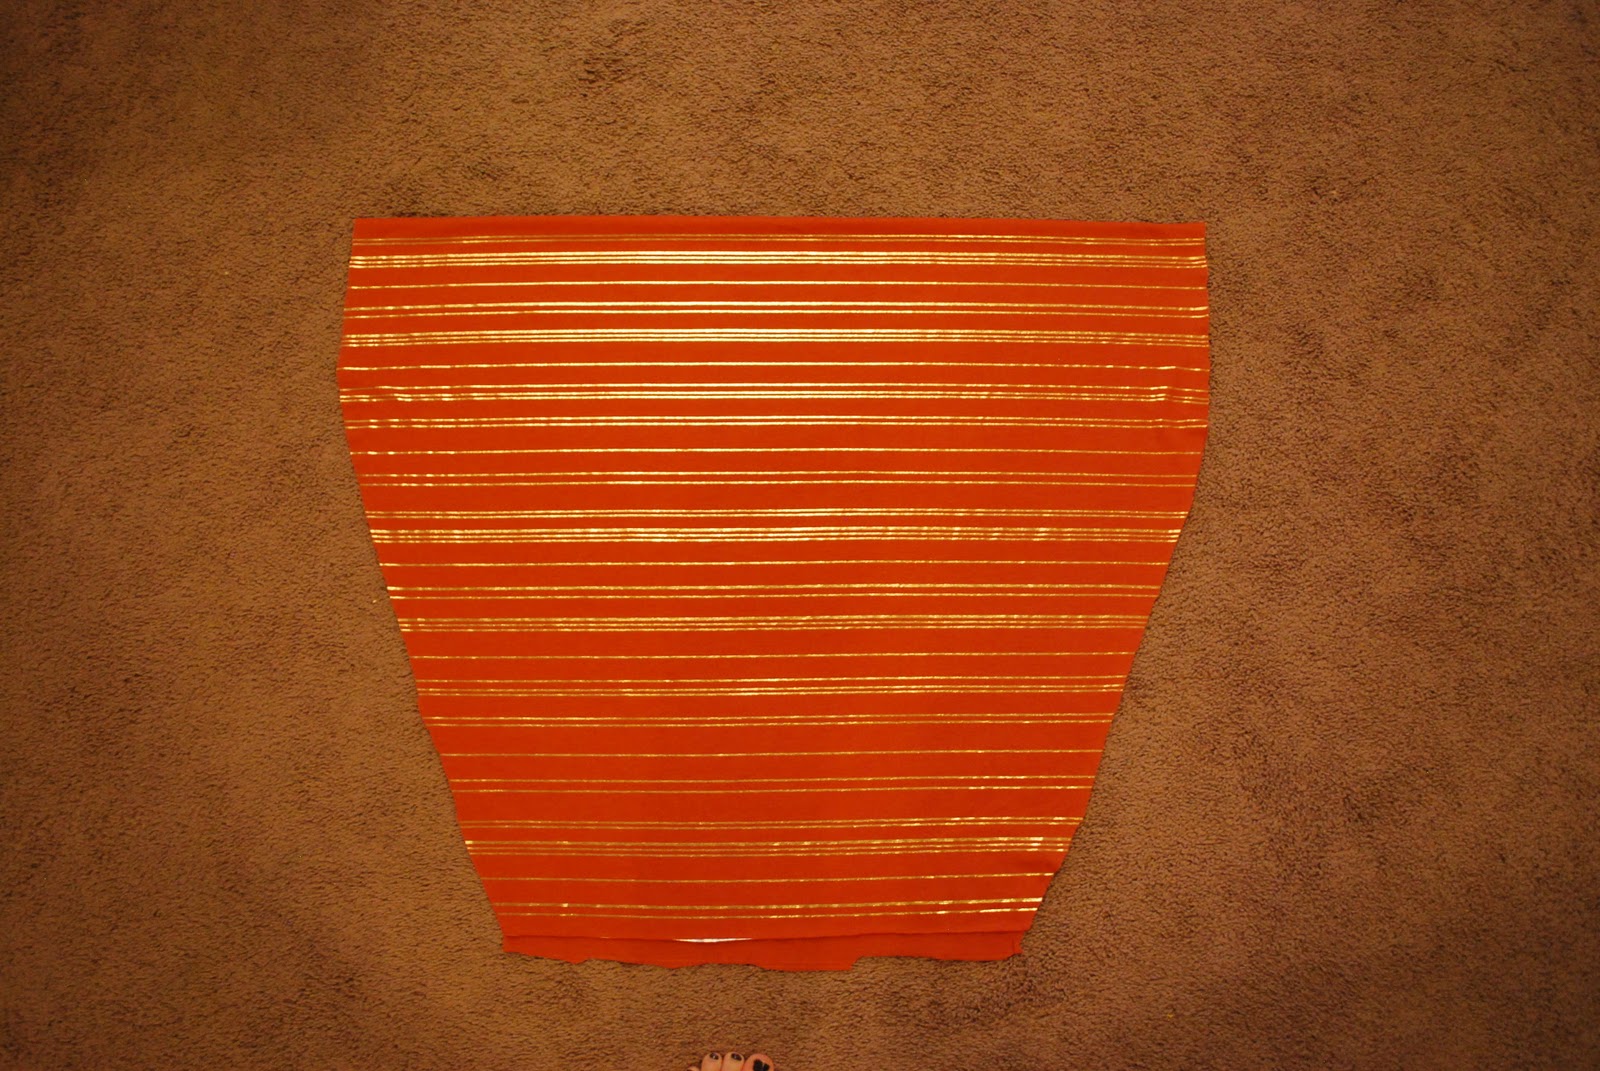
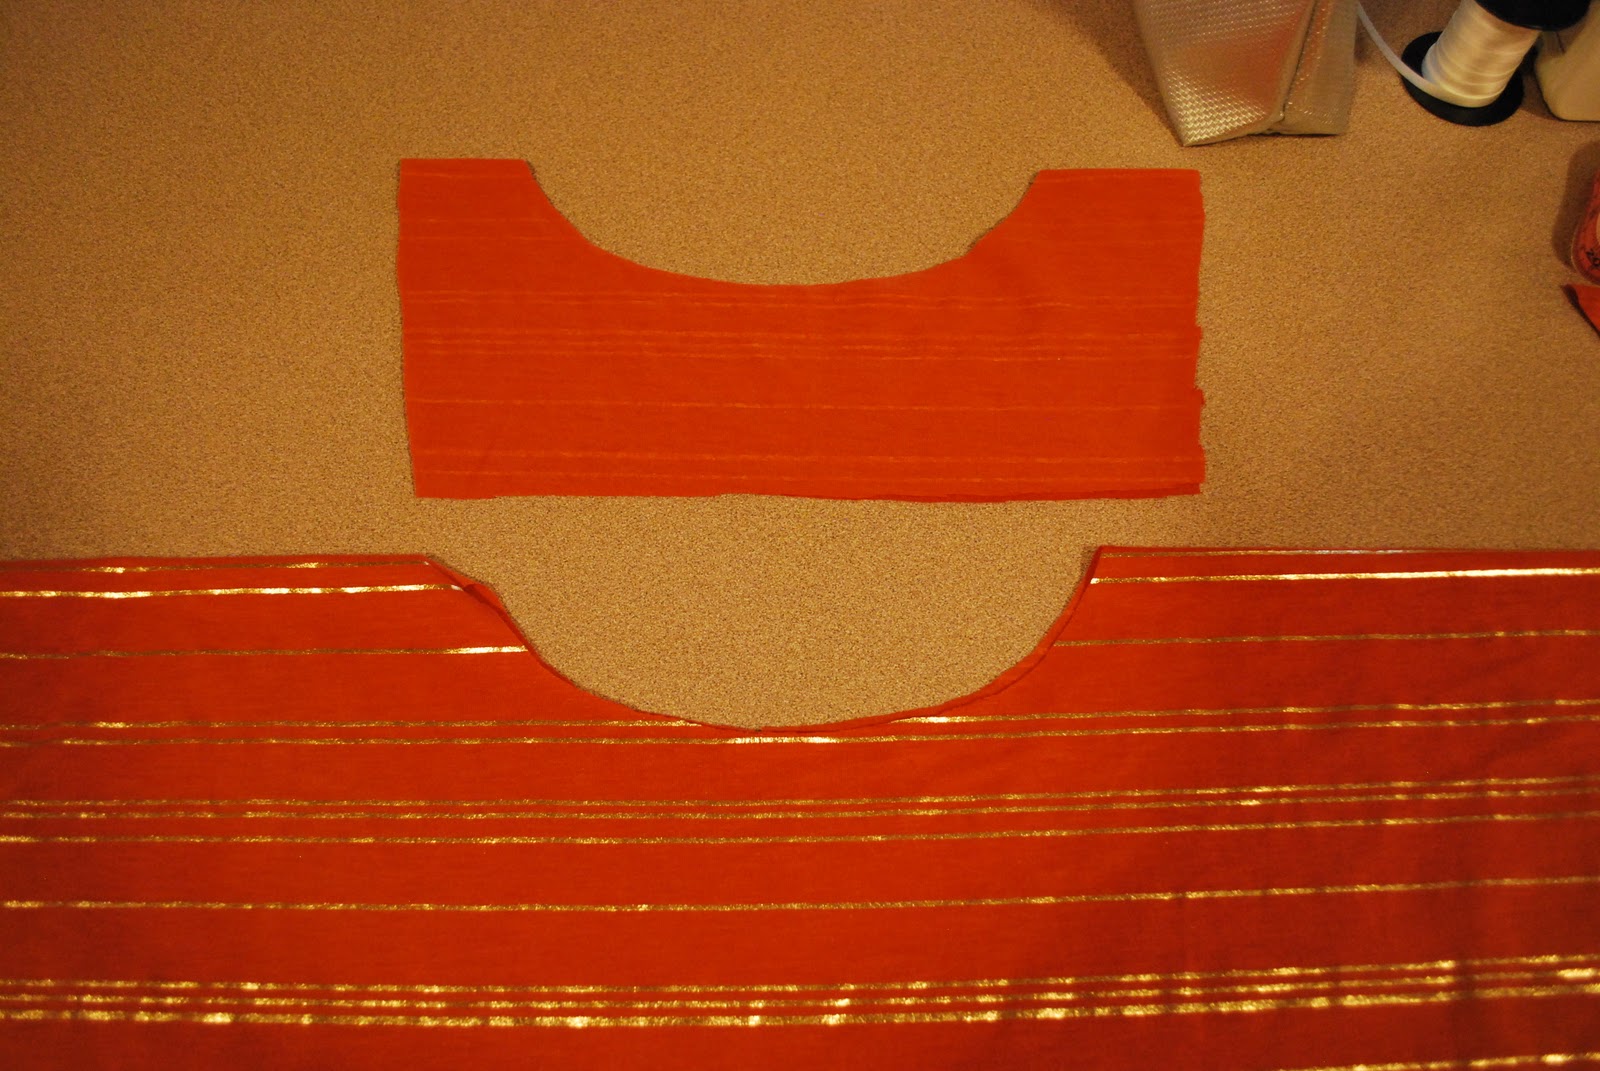
Once they’re cut, they should look like this:
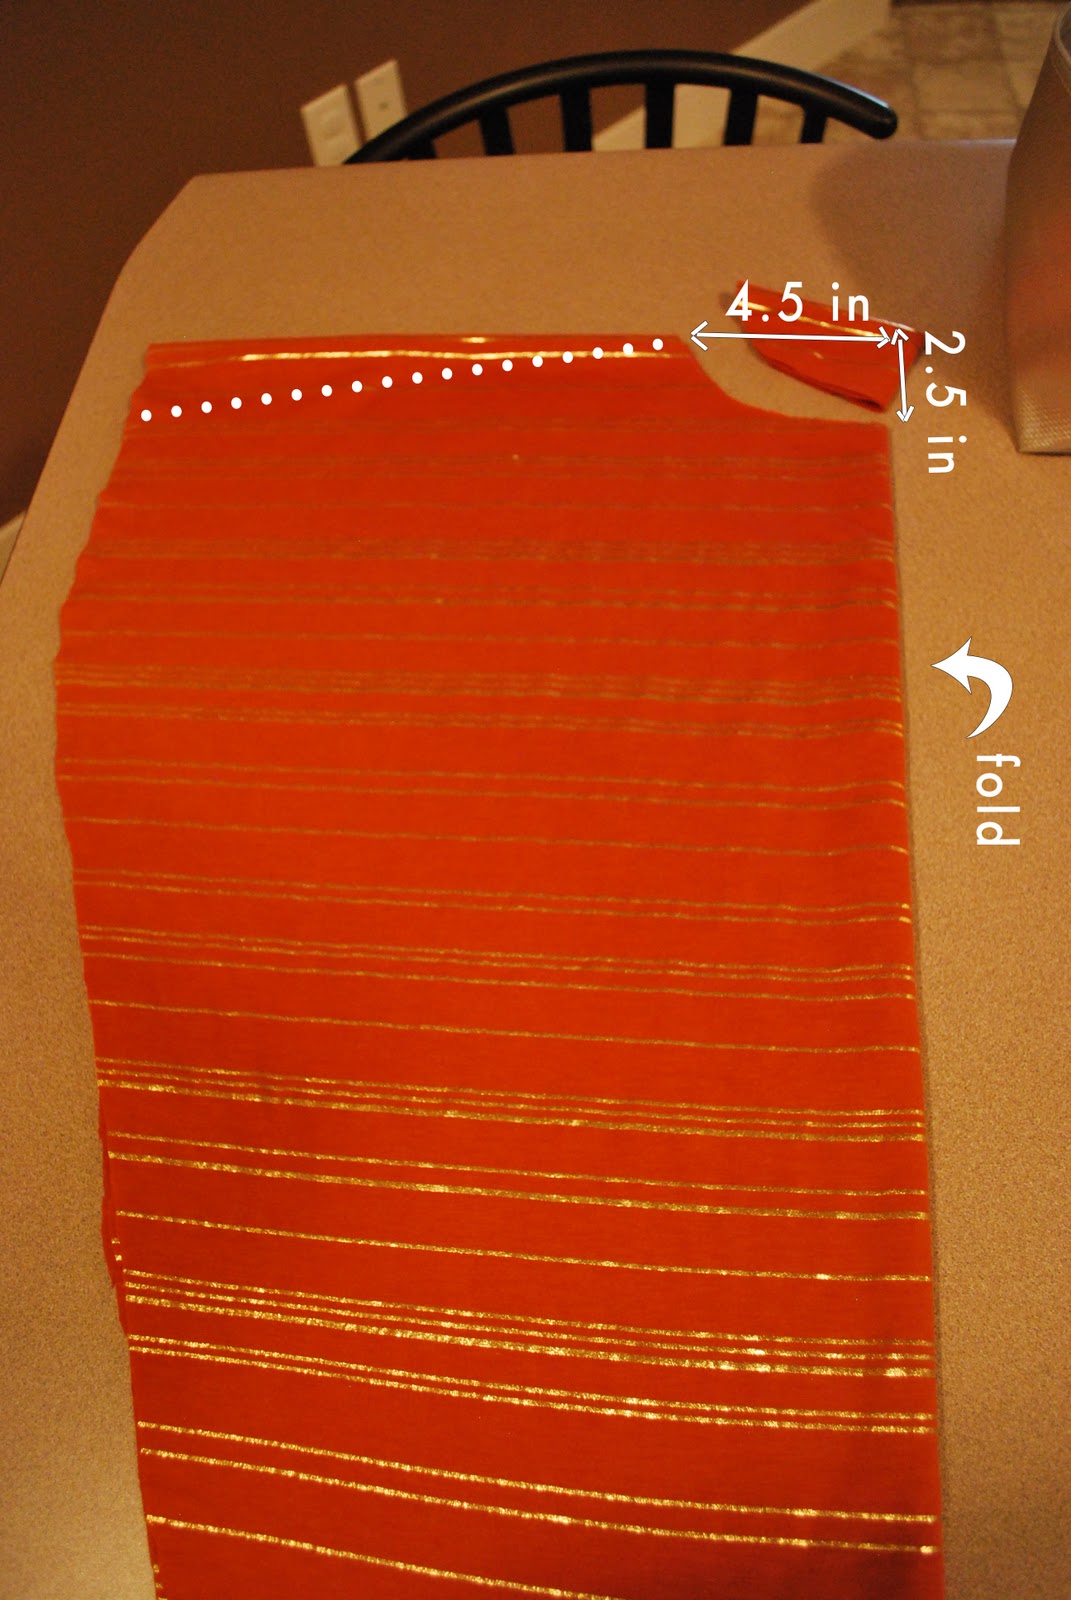
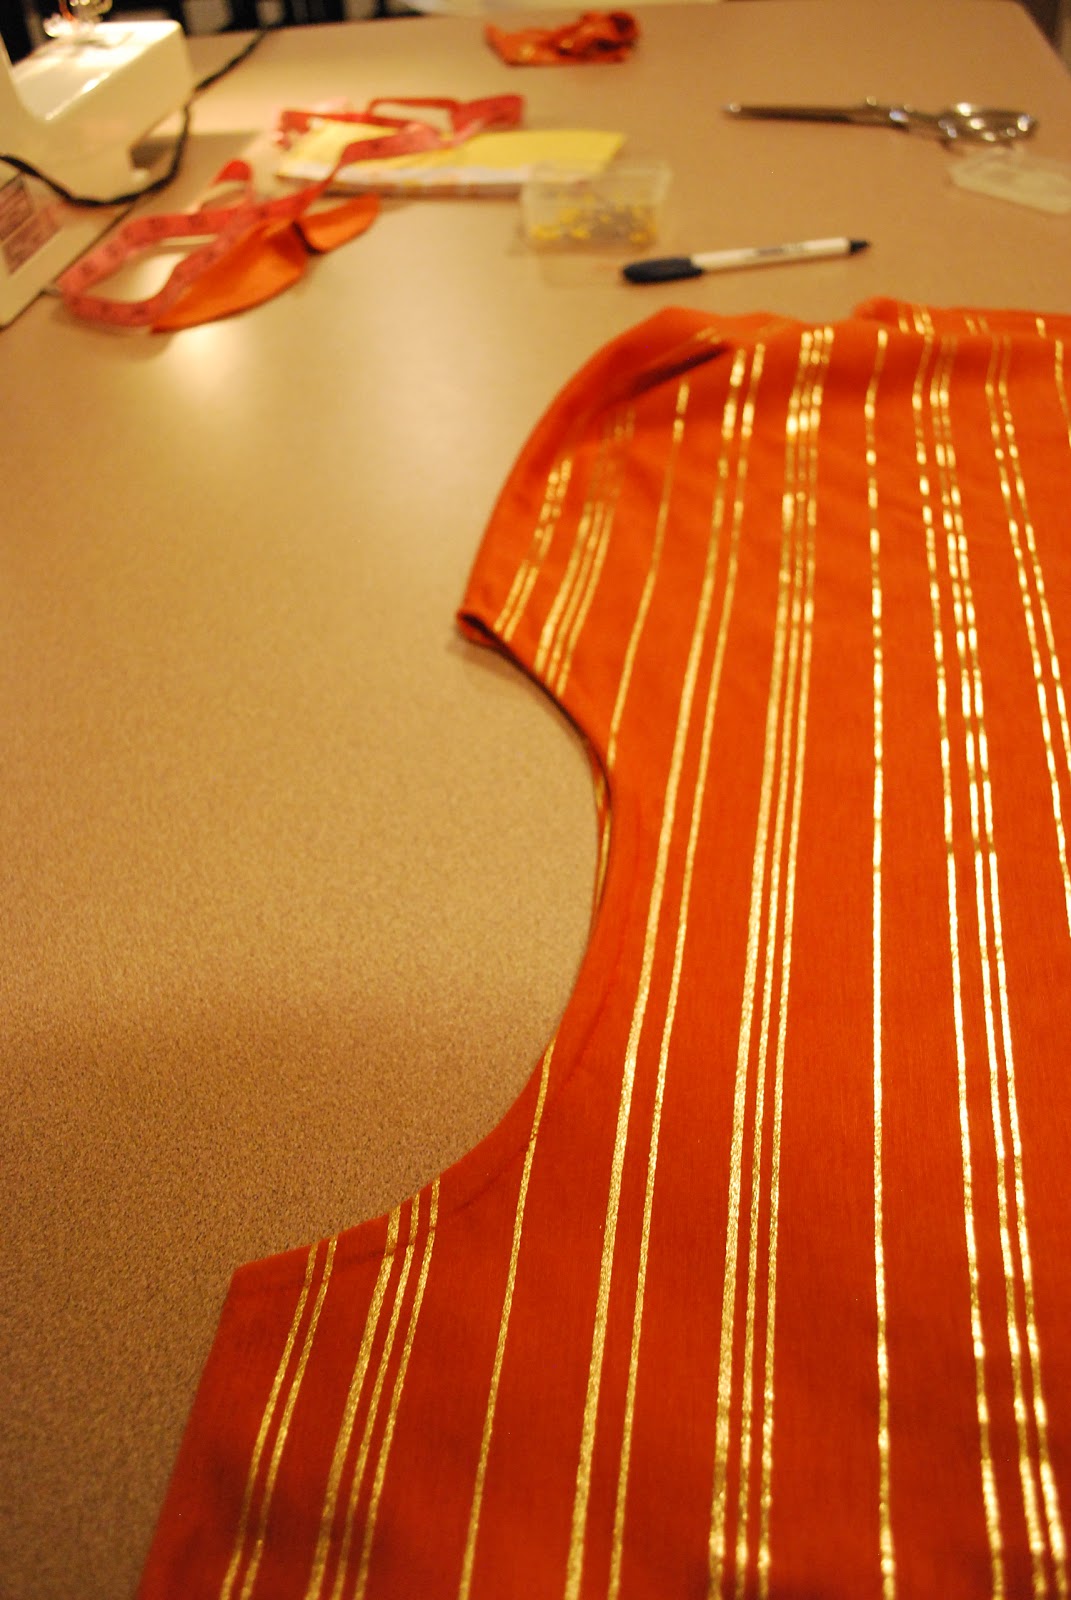
Step 3. Now it’s time to cut the neckline. Fold your fabric in half, and cut out a scoop (see photo below). I wanted a boatneck, so my cut was 4 1/2″ across and 2 1/2″ down. You can adjust to your liking. Just keep your seam allowance in mind — your neckline will be roughly 1/4″ bigger than what you cut.
Next, with right sides together, sew up your shoulder seams. (You can choose to do this straight across or at an angle (as shown below with a dotted line). I chose to do an angled seam only so there would be less fabric under my arms when the shirt was complete. It’s up to you.) Trim the extra seam allowance fabric and zigzag the raw edge.*
* I’ve heard many people say they have no desire to sew because they
don’t have a serger, and feel like their clothes will look “homemade”
without one. Yes, a serger will do wonders for your sewing and will make
all your edges look professional, but I do not own a serger (and
probably won’t for many years), and I feel like my handmade clothes can
still look professional. For all my regular seams, I do a straight
stitch, trim the extra seam allowance fabric, and then zigzag the edges.
The look is similar to a serger, and just as effective. Try it.
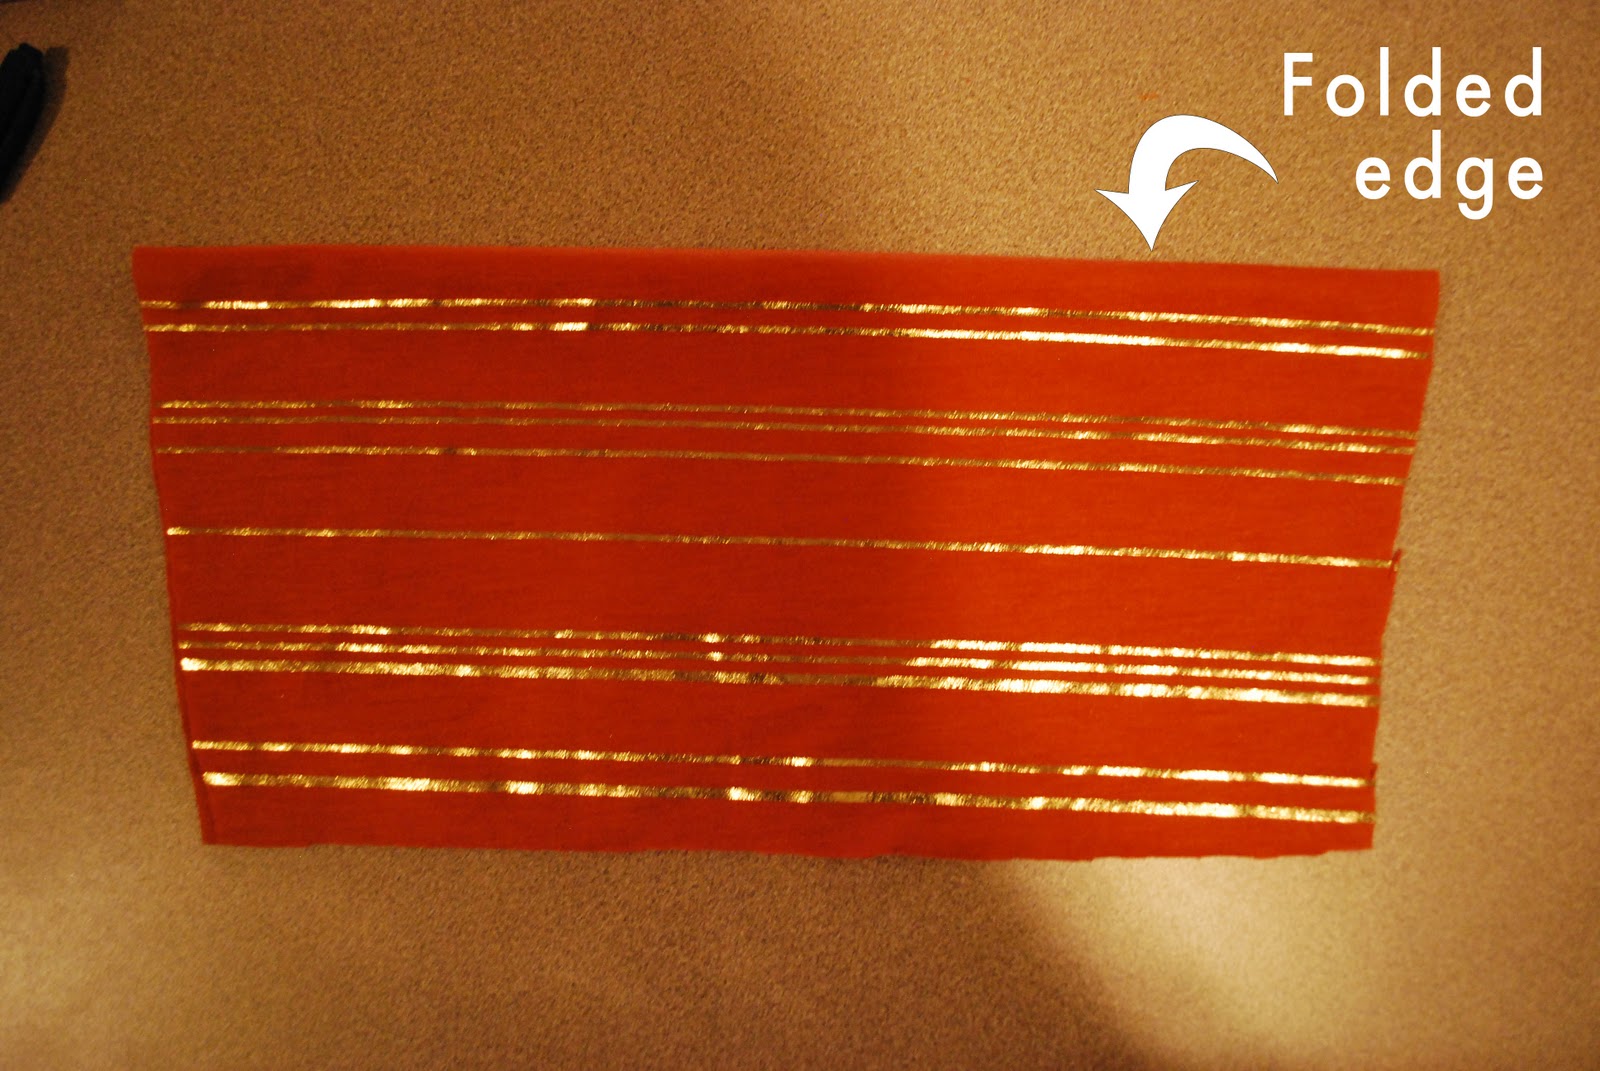
Step 4. Now it’s time to tackle the neckline. This gets a little lengthy, but is pretty straight forward. Along a folded edge, cut a rectangle that is wide enough to cover your neck hole. (Mine was roughly 11″x 4″).
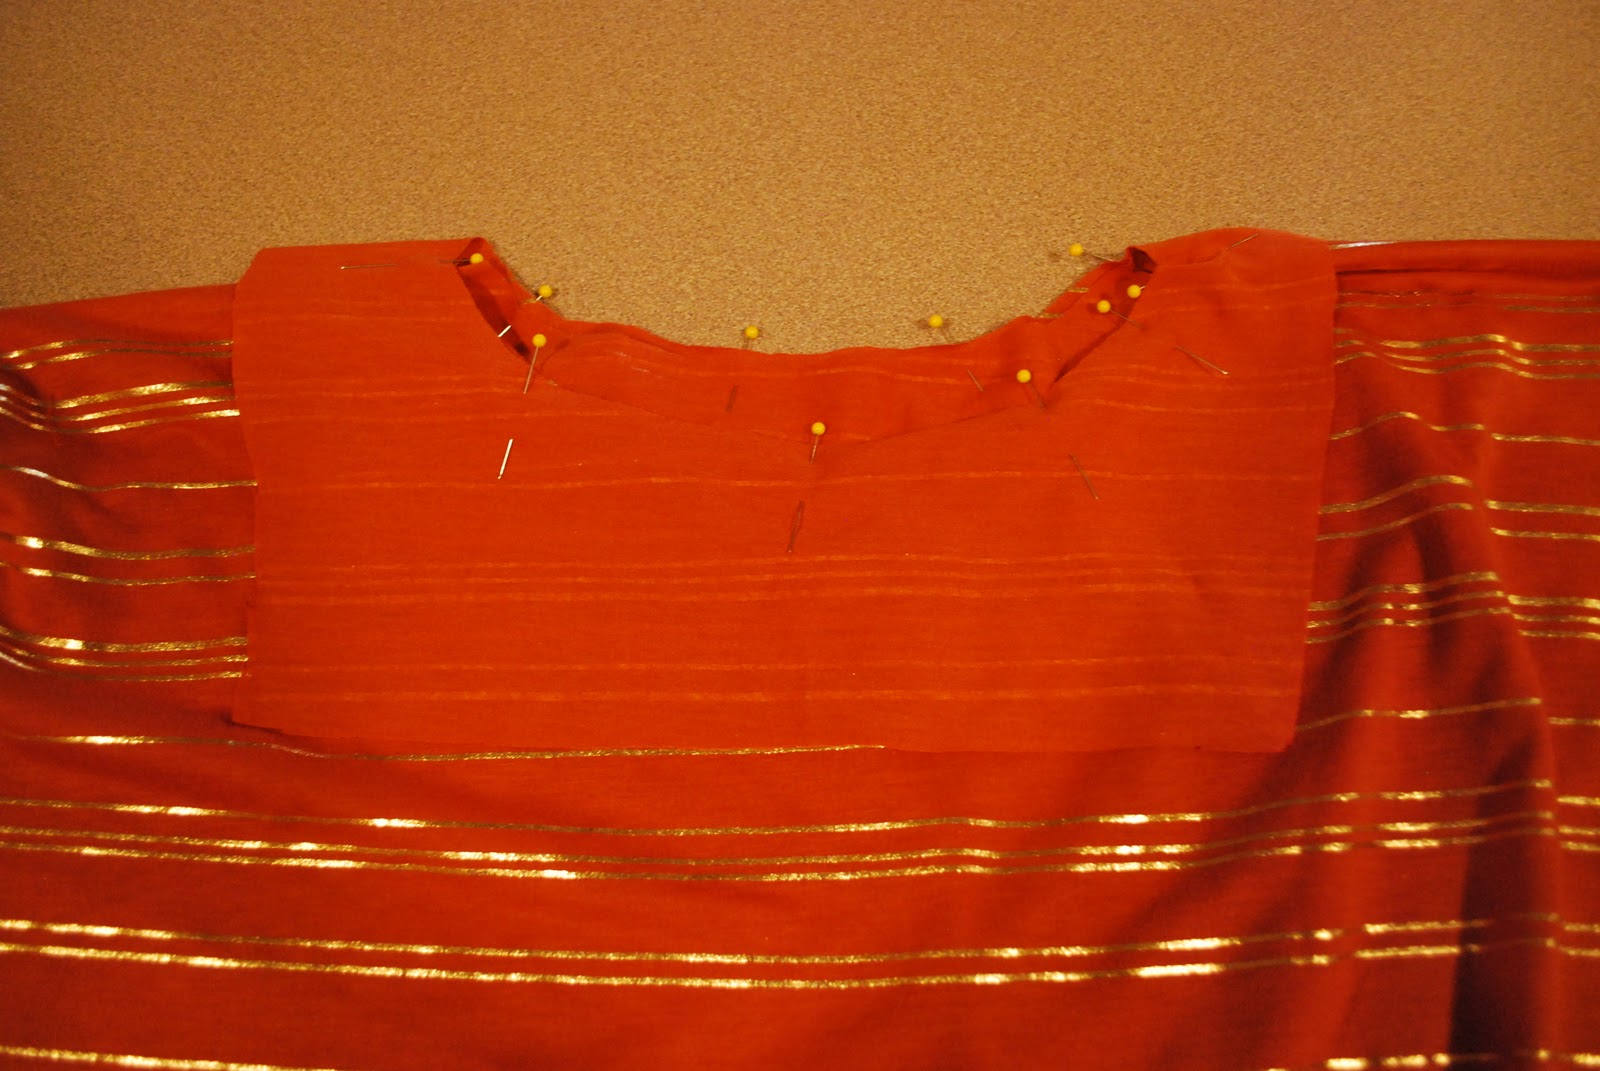
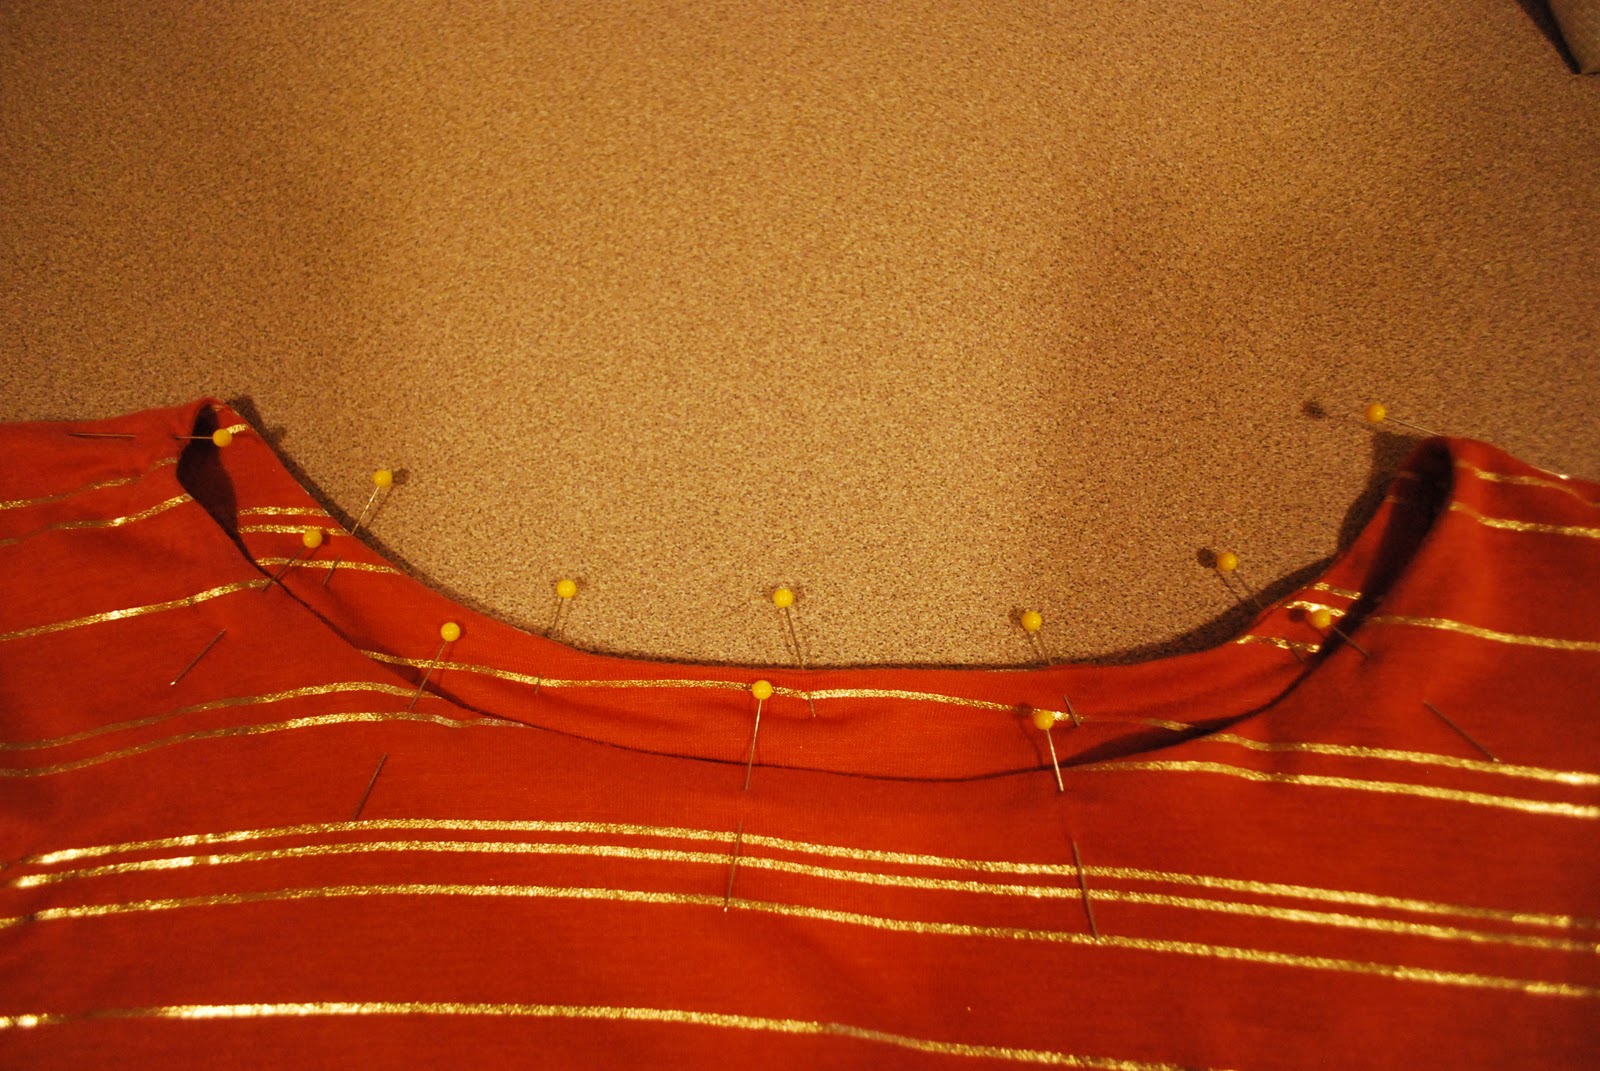
Now, with right sides together, pin the rectangle to your top, matching up the neck holes. Sew a straight seam (with a 1/4″ s.a.) around the entire hole:
Turn the shirt right side out and press. Then re-pin the neckline and do another 1/4″ straight seam around the entire neckline to hold the lining rectangle in place. Use a slightly longer stitch for this seam, as a shorter stitch will create bunching.
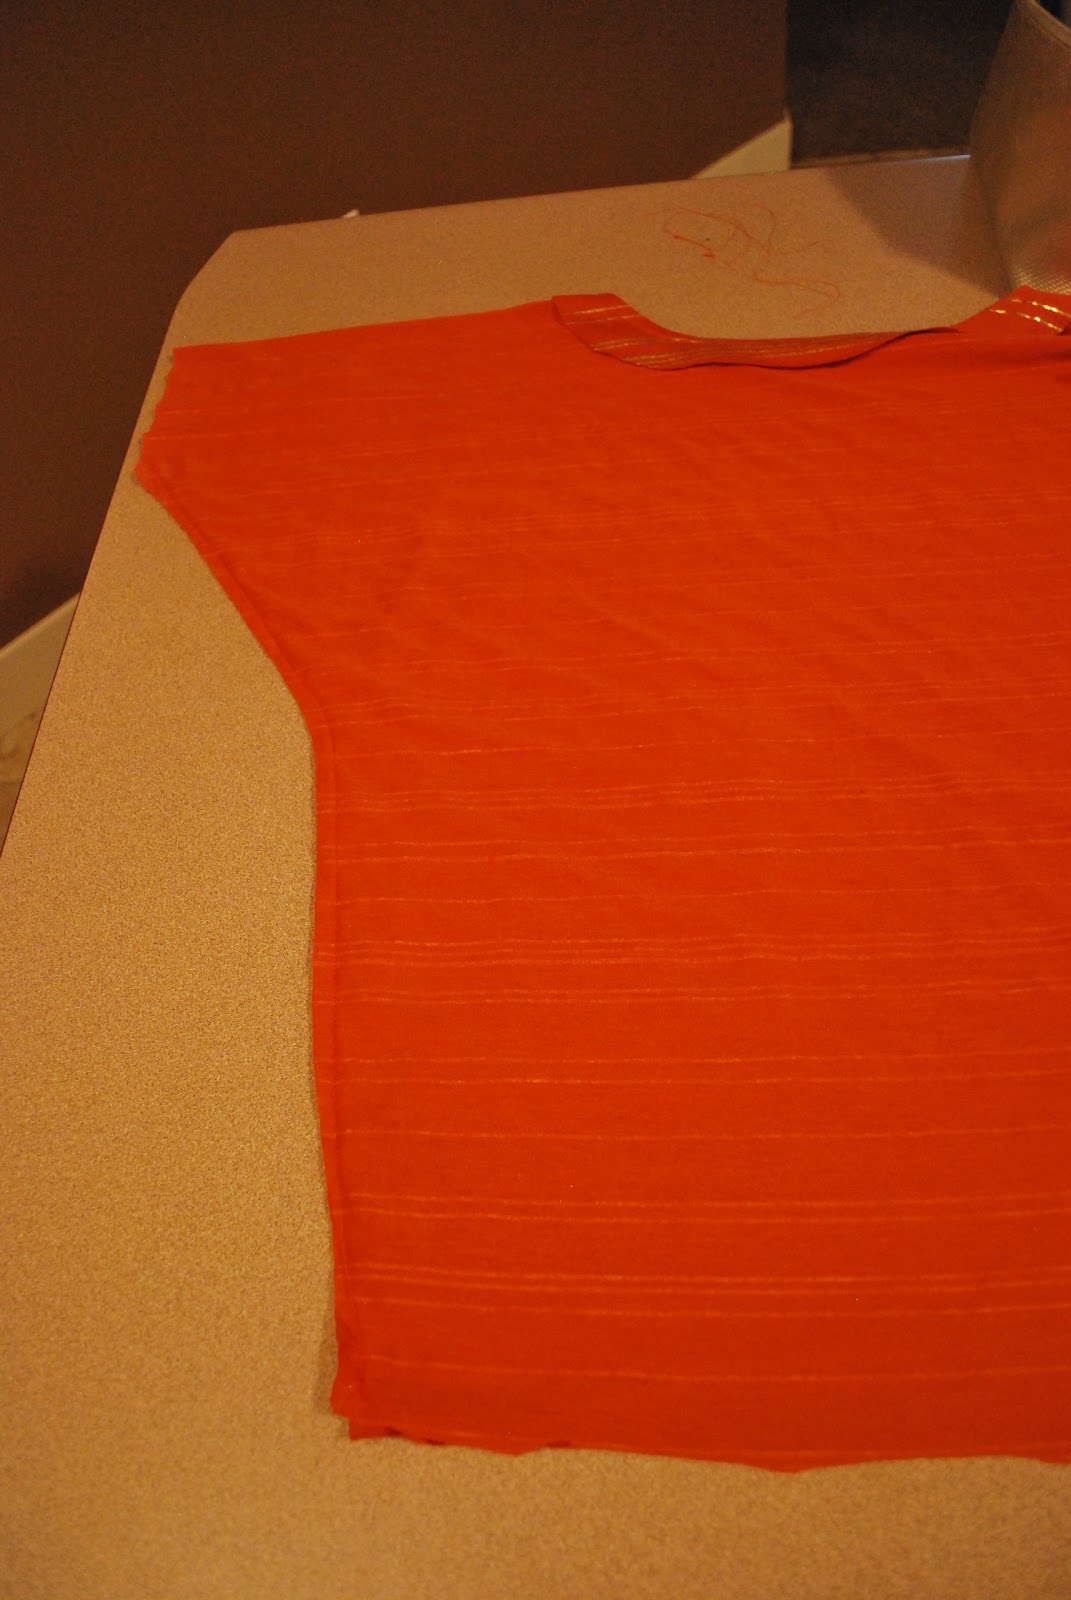
Trim the extra fabric and re-press. Now your top should look like this:
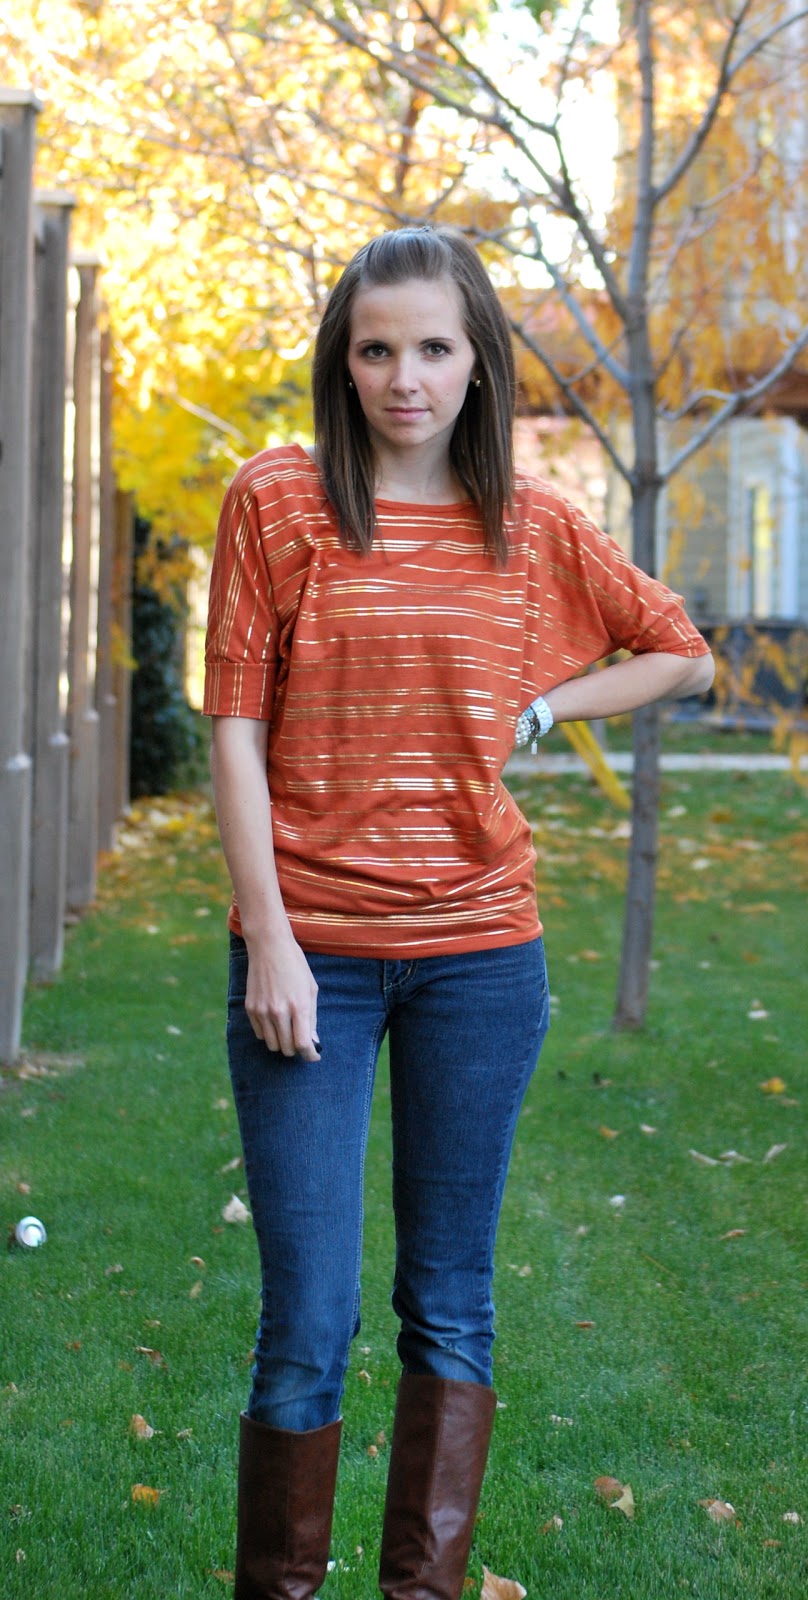
Step 5. Now it’s time for the side seams. (I ended up re-sewing these three or four times until they were exactly to my liking. This orange fabric is a fairly heavy knit, so it didn’t hang as nicely as the blue knit I used for my original dolman shirt. Depending on your fabric, you might have to do some adjusting too. Try it on after each adjustment until you’re happy with it). With right sides together, sew a straight stitch seam from the arm hole to the hemline. Or if you want it more fitted around the middle (like mine), angle your seam for the top half of your seam, then straighten out for the bottom half (as seen below).
Trim your extra seam allowance fabric and zigzag the raw edge. Turn right side out and press.
Step 6. Time for the armbands. Measure the distance around your upper arm where the armband will sit. Then decide how thick you want the armbands (mine were about 3″). Add an inch to each measurement for your seam allowance. On the fabric fold, cut two rectangles with the dimensions you just measured. Mine was 10″x4″.
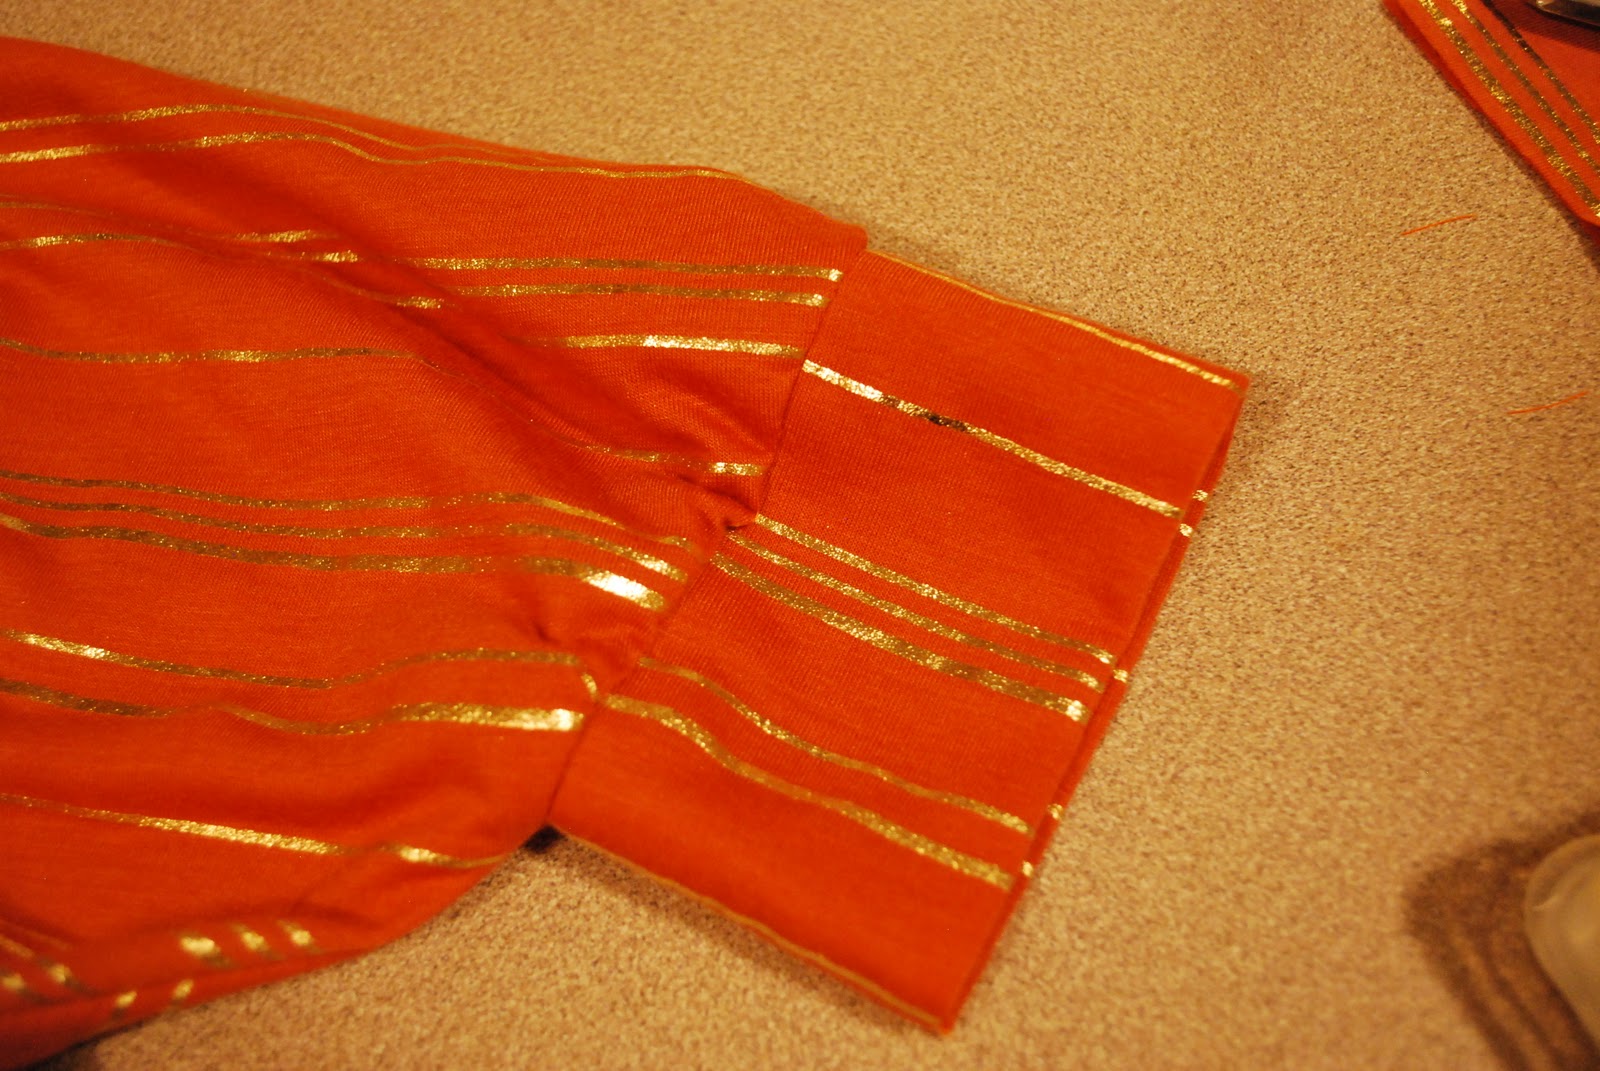
With right sides together, sew a straight seam along the short side, then trim the excess fabric and zigzag the edges. Turn right side out and press. Your band should look like this:

With right sides together, slip your armband inside of your arm hole, with all the raw edges facing out. Pin together, sew a 1/4″ straight seam, trim the edges, and zigzag. (I left my arm hole slightly (about one inch) bigger than my arm band, and sewed over a few tucks while doing this seam. This creates a little volume in the sleeve. I did not do this on the blue top — you can tell the difference in the two photos at the top of this post).

Turn your top right side out and press. It should now look like this:
Step 7. Try your top on and pin the hemline to your desired length. Hem using a slightly longer stitch than normal to avoid bunching. Press.
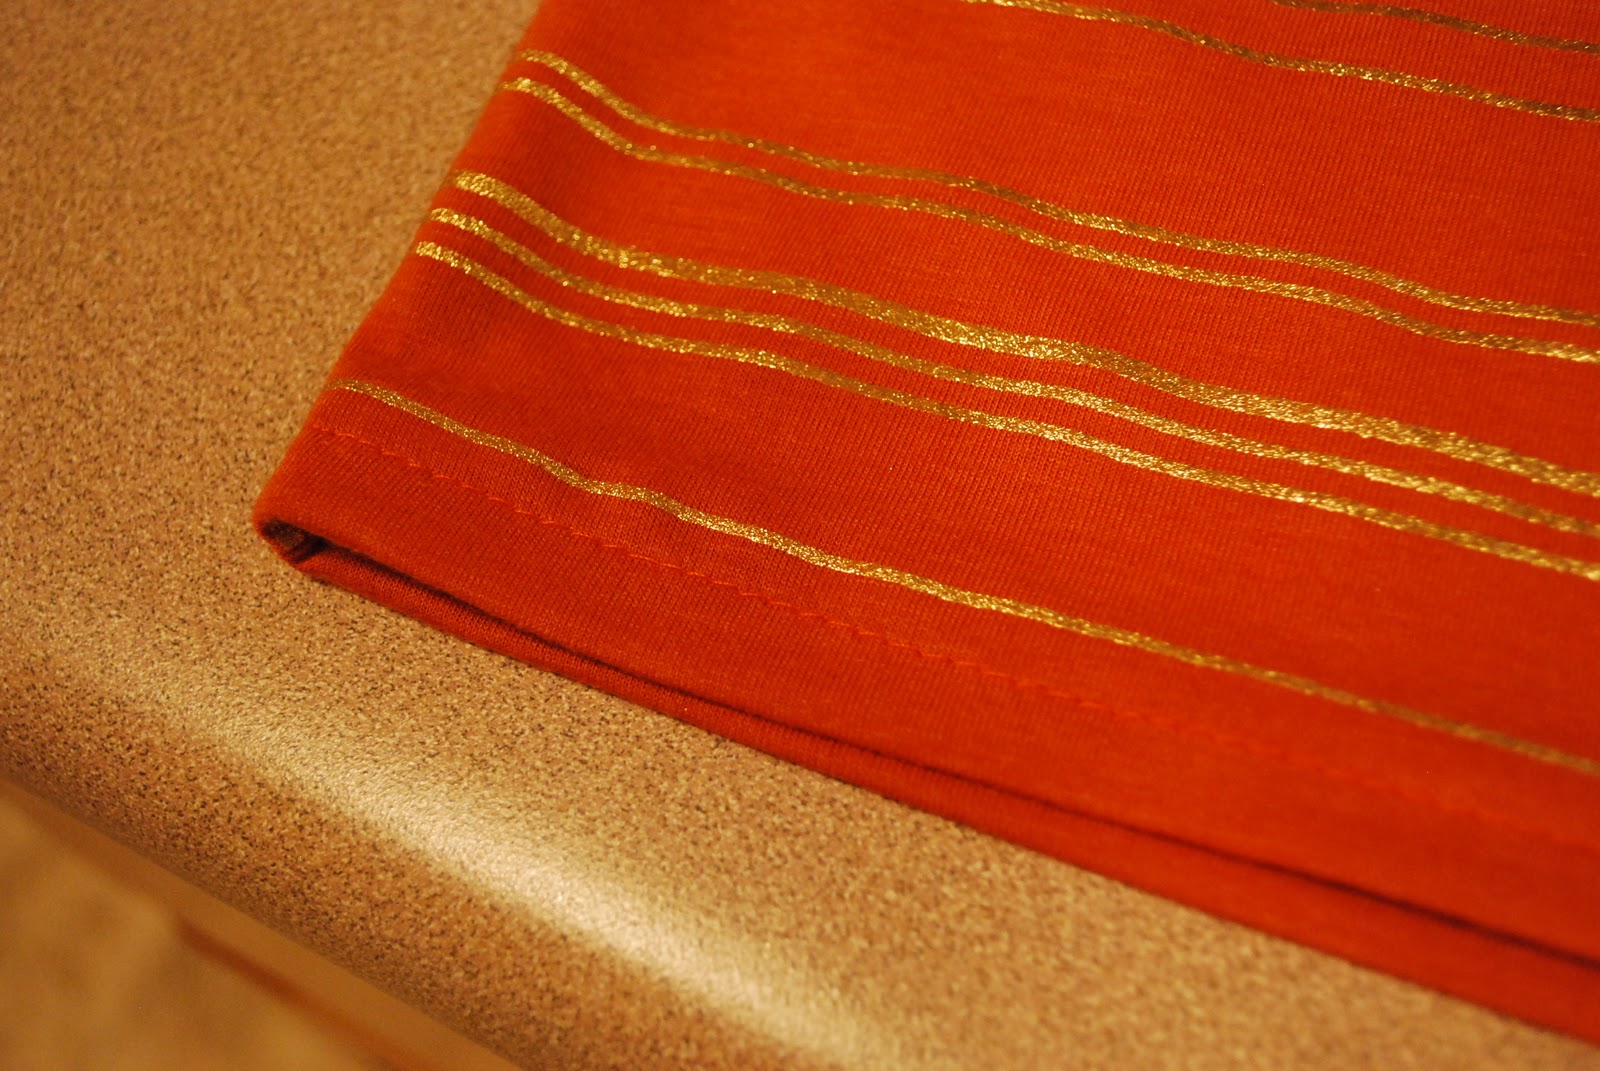
Voila! Your new favorite top!
If you have any questions regarding this tutorial, please email me. And if you make this top, email me a photo — I’d love to see! Happy sewing!


I'm so excited to make one! Thanks for the tutorial!
I can't wait! Thank you!
This is a great tutorial – I'm glad it has pictures AND detailed instructions to help novice sewers along the way. I'm excited to try it!
This is one of those times I wish I could sew! That is the most adorable top ever.
You are hot. Just thought you'd like to know. 🙂
Just found your blog and I'm loving it! This shirt style is super cute and I'm glad you included a tutorial. Have a wonderful week! XO, Katie
holy wow that's so dang cute! i wish i had the courage to sew like that 🙂
I created a grey shirt yesterday out of scrap fabric. It was more of my practice because I have a beautiful knit that will be the main shirt from this tutorial.
I have a question about the arm bands. Do I keep the non folded side unfinished and pin it into the sleeve? (I hope that makes sense 🙂 )
Wow! Once again, I'm amazed that you make these clothes. It looks store-bought. I wish I could sew 🙁
Janell
http://www.fashionableyoubyj.blogspot.com
Love your blog! I have a question about the arm bands as well. Can't figure out how to exactly attach them! Thanks so much.
Have you ever thought of selling these on Etsy.com? Could be a huge hit!
Love this! I just found 3 yards of black jersey in my fabric stash (not sure how it got lost!), but was totally thinking it would make a great top. Going to try your pattern. I'm your newest follower.
Thanks, Rachel
http://www.holy-craft.blogspot.com
I love it. Thanks for the tutorial.
Beautiful, and thanks for the great instructions. I am going to try it. 🙂
Ana
Just found your tutorial via Craft Gossip – LOVE IT! I love this style of top, and your method of finishing the neckline is fabulous. Thanks for sharing!!
Thank you so much!!!. I will try to do it!!!
I just made my first top (ever) using this tutorial! I am thrilled with the results. I followed the steps but also played with the location of the side seams. I ended up bringing them in like you did. I'm already planning my next one – thanks!
Great tutorial! You've been featured on the Quality Sewing Tutorials blog.
We hand select only the best free tutorials and patterns for the home sewist.
Grab a brag button!
Great tutorial. I can't wait to try facing the neckline the way you did! Trying to put in a neckband can be intimidating and it can put something in the "home sewn looking" category really fast! Thanks!
I just found your blog through pinterest and I'm so glad I did! This is a great tutorial – so helpful. Thank you and great job!
I LOVE this top! I've been looking for something like this in stores, but now, I can make one that fits me perfectly!
love this top! Must find fabric to make one or a few…
xoxo
Heather
http://www.HeatherlyLoves.com
thanks so much for the tutorial! i tried it out and i love my new shirt! i've posted about it if you'd like to take a look.
http://rileyriesenberg.wordpress.com/
thanks again!
Riley
I am totally loving your blog! I just got a new sewing machine and am so overwhelmed with learning how to sew!! I will definitely be following your tutorials! Thanks and sweet day!!! New follower here 🙂
I love your orange fabric, where did you find it?
I love your orange fabric, where did you find it?
TooManyHobbies:
I bought it in LA at the fabric district!
This is a really clear, helpful tutorial. I plan to make one. Thanks!!!
Bobi
http://westernwarmth.blogspot.com
Hi! I followed your tutorial but made a few tweaks in it . here's the final result. Tell me what you think!
https://twitter.com/h_arwa/status/266240619624665088/photo/1
If you cant see the link, send me your email id!
Many thanks for sharing!
Thanks for the tutorial! I am so excited to try this!
Design A Shirt with Your Logo or Slogan Online at whatflop.
design a t shirt
print on shirts
digital t shirt printing
custom tee shirts
create t shirts
We make designing and ordering a breeze, with our service team available seven days a week for consultation. They
can assist you in choosing t shirt styles, colors and sizing, then help you get the design and lettering exactly how
you imagine it.
design a t shirt
print on shirts
digital t shirt printing
custom tee shirts
create t shirts
Hi, I love how this top looks and thank you for the tutorial, but I'm having trouble understanding the first measurement you ask to take, "…measure the length from elbow to elbow, with the measuring tape going behind your head across your neck." I do hope you read this and clear it up for me– i'd love to make this!
Raise your arms so they're straight out from your sides, making your body into a T shape. Then measure from elbow to elbow, as I described in the tutorial. Does that make more sense?
thanku sooo much….realy useful….
thanku sooo much….realy useful….
Do you use a stretch stitch at all when making this? If not do you not have any issues with stitches breaking because of the nature of stretchy knit fabric?
I LOVE IT!!! Where did you get your awesome fabric? I adore the pattern! =) You look so much like Susan Saint James! She was an actor in the 70's.
I got both fabrics from the LA Fabric district!
Bout to start mine in tri-color. Wish me luck!
Thanks for this tutorial. I have been wanting to sew my own clothes but every time I try it is a disaster. Your tutorial was easy to follow and gave me many techniques to try out on my other failed projects. THANK YOU!!
I made mine in Michigan State green and white and sparkly gray for the Rose Bowl today. GO STATE!!
Great tutorial! Both your shirts look awesome.
Made one this morning!!! Thanks so much- great tutorial and I love my new shirt
I just tried this…i am NOT a precision seamstress…and this tured out AWESOME! !!! What a fantastic tutorial you have supplied us with…how amazing are you!? I LOVE my new shirt…its everything I wanted!!
Thank you Merrick, I just made a shirt and love it!!!! I’m sure there are more in my future. Now I just need to find the perfect fabric.
Thanks! cant wait to try this design, and you look gorgeous by the way 🙂
Nice tutorial! Thanks so much for posting this.
Love this pattern! It’s very simple, but it looks like a store bought top. I have also tried this pattern with non-knit fabrics, and it looks like a dressy blouse.